33
4. Define a name for the event setting.
5. Choose the “Triggered Source
” you want to respond to by clicking the radio
button of “Motion Detection”, “Camera Digital Input Ports”, “Sound”, “Video
Loss”
or “Device Digital Input Ports”. Click the “Next” button to continue.
Attention
This function is available only when the connected IP
Camera is supported.
•
For the “Motion Detection” event, you will need to configure Motion
Detection settings for the camera (Please go to the “Setup” page and click
on “Camera”, “Channel” tab to configure Motion Detection with “Motion”
button). Choose the Motion Detection window from the drop-down list and
the motion detection event as “starts”, ”stops” or ”starts-stops”.
•
For the “Camera Digital Input Ports” event, you will need to connect an
external sensor or device to the camera’s input port. Choose the input
event from the drop-down list as “active”, ”inactive” or ”change”.
•
For the “Sound” event, you will need to select the sound volume level at
which the event will be triggered.
This function is only available when the
connected IP Camera is supported.
•
For the “Device Digital Input Ports” event, you will need to connect an
external sensor or device to the NVR’s input port. Choose the input port
from the drop-down.
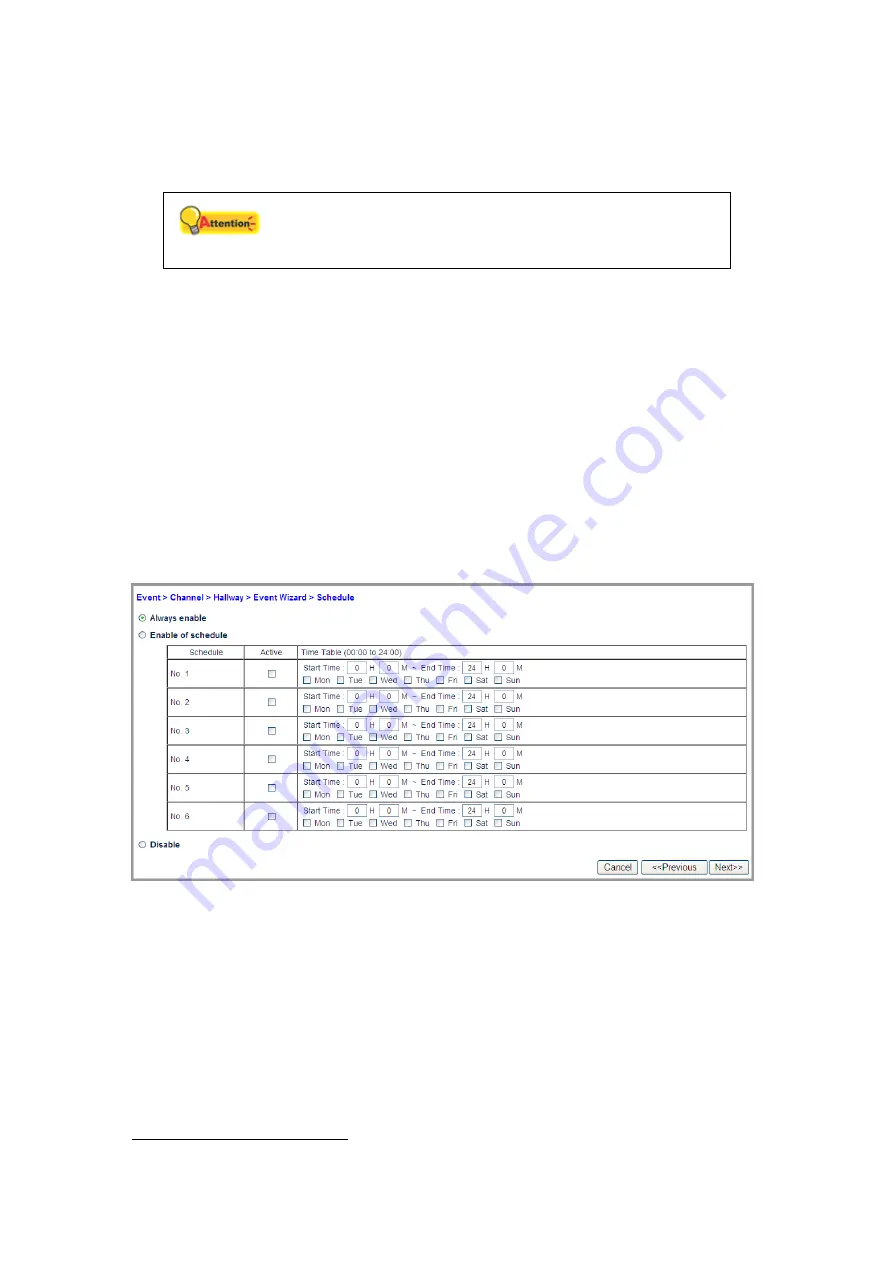
6. Select to “Always enable”, “Enable of schedule” or “Disable” the Schedule.
Click the “Next” button to continue.
Select the “Always enable” option to record video all the time.
Select the “Enable of schedule” option to record video at the scheduled
periods.
a. Set the “Start Time” and “End Time” for the NVR to record during the.
Select the day (or days) of the week to record. For example, you can
enable the recording from 6 pm to 12 pm for every day of the week.
b. Select a preset record schedule setting and check the “Active”
checkbox to activate the record schedule.
7
The XPRESS series only supports Motion Detection.


