Saving and Recalling Configurations
m70L Installation & Configuration Guide
75
Note:
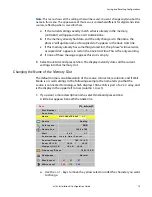
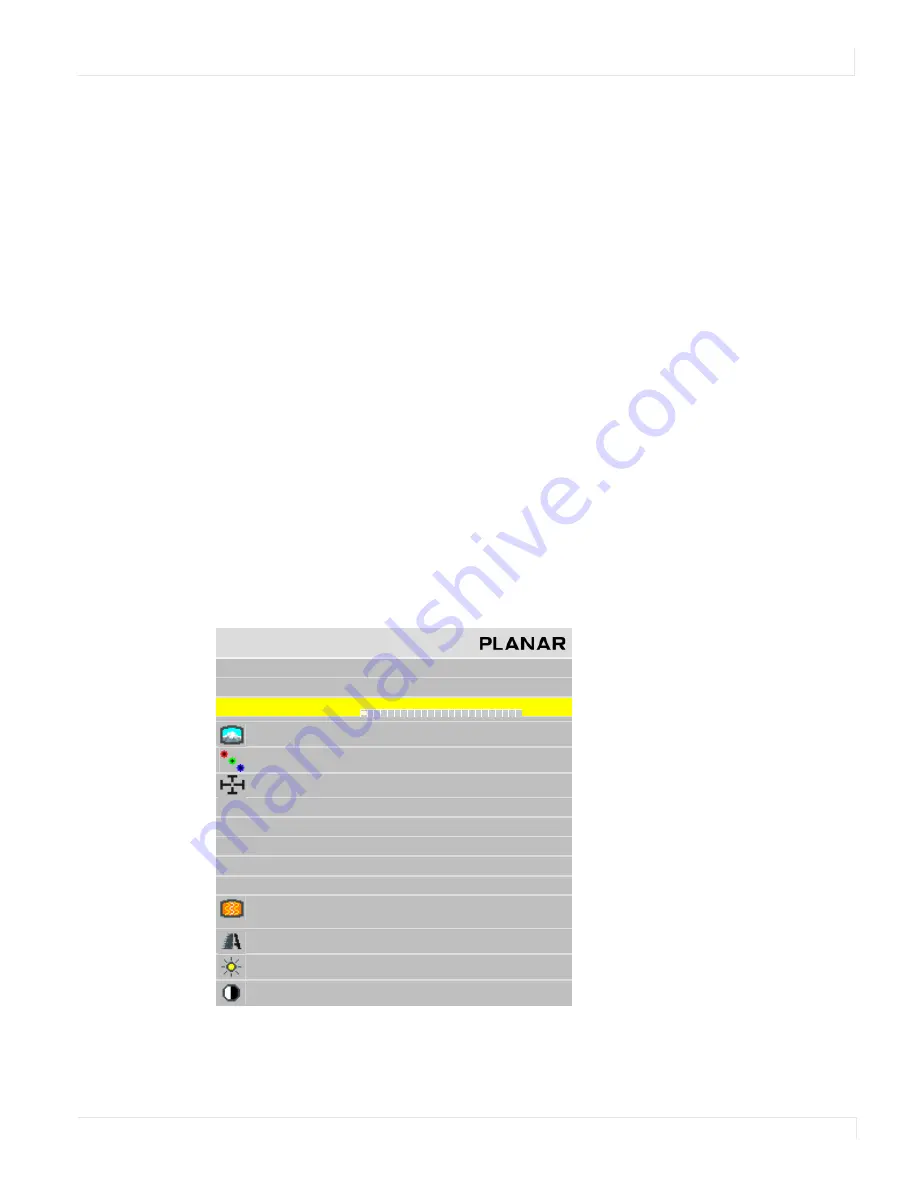
This menu shows all the settings that will be saved. You can’t change anything but the
name in this menu. The appearance of this menu is somewhat different for digital and video
sources, reflecting what is saved for them.
a
If the current settings exactly match what is already in the memory,
(
CURRENT
)
will appear in the
SLOT
NUMBER
line.
b
If the memory already had data, and the only change is to the name, the
phrase “will update name of occupied slot” appears in the
SAVE
NOW
line.
c
If this memory already has something stored in it, the phrase “will overwrite
occupied slot” appears in red on the
SAVE
NOW
line. This is the only warning.
d
If none of these messages appear, this slot is empty.
5
Select
SAVE
NOW
and press
ENTER
. The display instantly stores all the current
settings into that memory slot.
Changing the Name of the Memory Slot
The default name is an abbreviation of the source connector, resolution, and if Wall
Mode is on, wall settings. In the following example, the name tells you that the
source is connected to Analog, which displays 1366 x 768, is part of a 2 x 2 array, and
is the display in the upper left corner (column 1, row 1).
1
If you want a more descriptive name, select
NAME
and press
ENTER
.
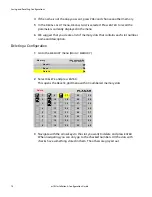
A little bar appears beneath the
NAME
line.
a
Use the + or - keys to move the yellow selector under the character you want
to change.
S a v e
S l o t N u m b e r
1
S a v e N o w
N a m e
A N 1 3 6 6 x 7 6 8 2 x 2
1 : 1
S o u r c e
A n a l o g
C o l o r s pa c e
R G B
R e s o l u t i o n
1 3 6 6 x 7 6 8
Wa l l
2 x 2
1 : 1
S c a l e / J u s t i f y
O n e t o O n e / C e n t e r
P o s t i o n / O v e r s c a n
1 6 8 , 1 9 / 0 %
Z o o m U L / L R
+ 0 , + 0
/ + 0 , + 0
Vi e w p o r t U L / L R
+ 0 , + 0 / + 0 , + 0
F r e q u e n c y / P h a s e
1 6 0 2 / 2 2 . 5 °
S h a r p n e s s
N o r m a l
B l a c k L e v e l
6 3
5 5
5 7
W h i t e L e v e l
1 6 6
1 7 0
1 6 9
Summary of Contents for m70L
Page 1: ...m70L Installation Configuration Guide ...
Page 2: ......
Page 4: ...iv m70L Installation Configuration Guide ...
Page 18: ...Before You Begin 10 m70L Installation Configuration Guide ...
Page 24: ...Installing the Video Input Module VIM 16 m70L Installation Configuration Guide ...
Page 28: ...Connecting Power 20 m70L Installation Configuration Guide ...
Page 52: ...Adjusting Sharpness 44 m70L Installation Configuration Guide ...
Page 54: ...Adjusting Position 46 m70L Installation Configuration Guide ...
Page 56: ...Viewport 48 m70L Installation Configuration Guide ...
Page 60: ...Adjusting Color Balance 52 m70L Installation Configuration Guide ...
Page 74: ...Backlight Control 66 m70L Installation Configuration Guide ...
Page 78: ...Serial Port Settings and Diagnostics 70 m70L Installation Configuration Guide ...
Page 88: ...Saving and Recalling Configurations 80 m70L Installation Configuration Guide ...
Page 100: ...92 m70L Installation Configuration Guide ...
Page 102: ...Rear View 94 m70L Installation Configuration Guide Rear View ...


