PRA-BD11
32
1
2
3
4
1
2
3
4
C
D
F
A
B
E
7. GENERAL INFORMATION
7.1 DIAGNOSIS
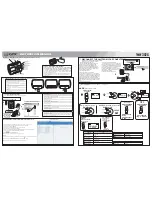
7.1.1 [PRA-BD11]: HOW TO OPERATION CHECK
1. Equipment necessary for operational checking of the main unit
• PRV-LX1
(Product -jig
1
for checking): The PRA-BD11 is to be mounted.
• PRV-LX1
(Product -jig
2
for checking): The PRA-BD12 (product -jig) is to be mounted.
• PRA-BD12
(product -jig)
• AV amplifier & Speaker
• GGV1035
(Test disc: DVDT-001)
• DKP3673
(4 pin cable (M))
• DDD1266
( FFC cable (M))
• DDD1267
( FFC cable (L))
• BNC - BNC cable: 2 cables
• TV monitor
2. About video and audio signals to be used for operational checking of the main unit
Play back the GGV1035 Test Disc with the PRV-LX1 (Product -jig
2
).
The formats of signals to be used for inspection of the main unit are as follows:
• SDI
: 270-MHz SDI signal with 525/60i embedded audio
• AES/EBU : Professional-format, 48-kHz sampling frequency AES/EBU signal
PRA-BD11
PRV-LX1
AVIB: CN5501
AVIB: CN5502
AVIB: CN3203
~
Ÿ
!
Preview composite output waveform from the PRV-LX1
(J model) when a 100% color-bar signal is input to the
SDI video input connector
Preview RCA output waveform from the PRV-LX1 (J model)
when a sine waveform signal at 1 kHz with -20 dB Fs is input
to the SDI audio input and AES/EBU input connectors
3. Inspection of the main unit
3-1. Mount the PRA-BD11 on the PRV-LX1 (Product -jig
1
) and connect it with the PRV-LX1 (Product -jig
2
) using the
4-pin PH cable: DKP3673 (
!
), 26-pin FFC cable: DDD1266 (
~
), and 30-pin FFC cable: DDD1267 (
Ÿ
).
Summary of Contents for PRA-BD11
Page 19: ...PRA BD11 19 5 6 7 8 5 6 7 8 C D F A B E A 3 4 ...
Page 21: ...PRA BD11 21 5 6 7 8 5 6 7 8 C D F A B E ...
Page 23: ...PRA BD11 23 5 6 7 8 5 6 7 8 C D F A B E B 1 2 2 2 B 2 2 B 2 2 B 2 2 B 2 2 B 2 2 B 2 2 B 2 2 B ...
Page 25: ...PRA BD11 25 5 6 7 8 5 6 7 8 C D F A B E B 2 2 1 2 B 1 2 B 1 2 B 1 2 B ...


