ZX Series USER MANUAL
30
7. Make sure your Mercury is selected.
8. Then click Setup then Paper.
9. Click Rotary Fixture, then type in the diameter value based on Fig. 6.
10. Write down the X and Y values given for paper size (these are your new height and width of your
paper size in your software).
11. After getting the proper paper sizes click OK.
12. Then click Cancel in the Print dialog box.
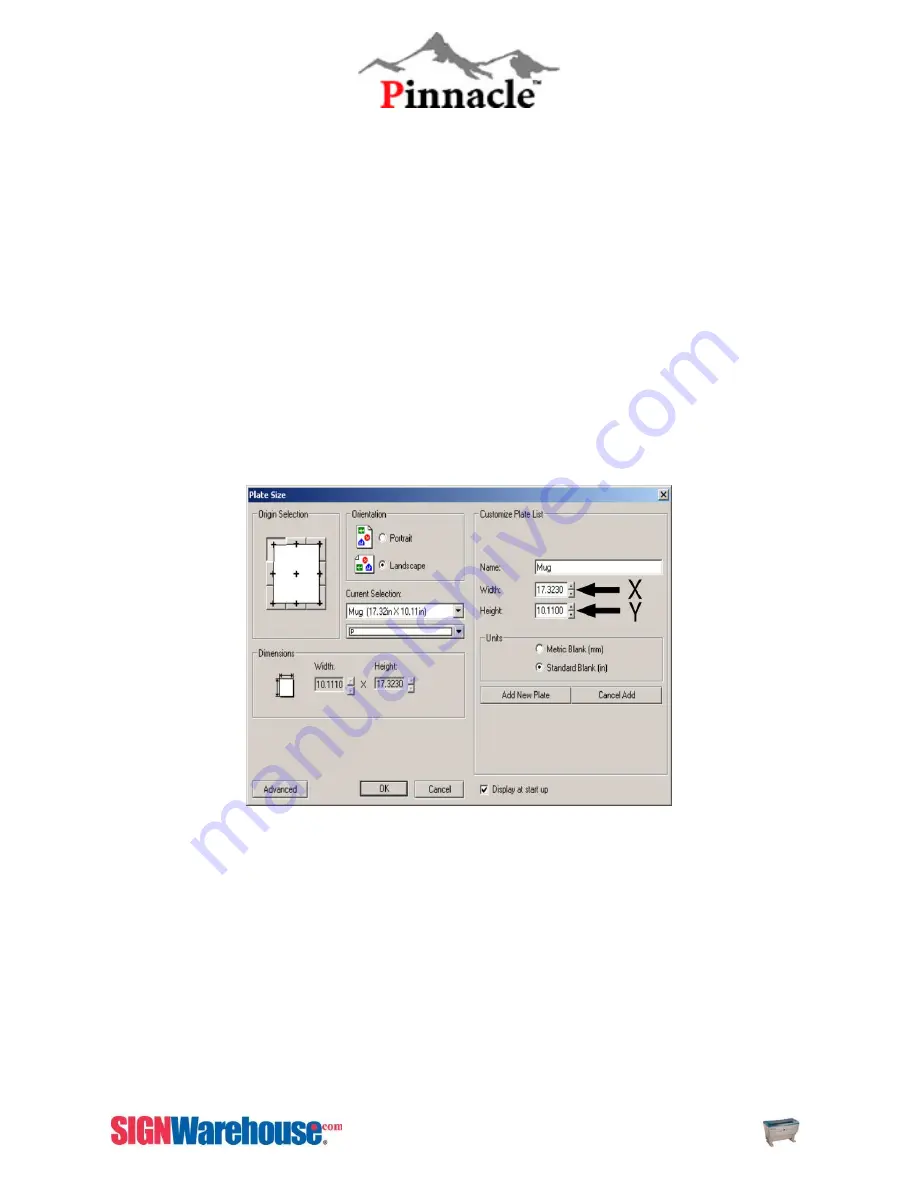
13. Next, go to Layout > Plate Size > Advanced > New.
14. In the name portion, type in the name of the product being engraved. (i.e. Mug).
15. Input the X value (17.322) in the ‘width’ box. It will always be 17.322 because that is the longest piece
of material you can have in your rotary attachment.
16. Input the Y value in the ‘height’ box. The Y measurement will constantly change because the
circumference of each object is different.
17. Click Add New plate.
18. Change your Current Selection to the new plate size you just made, then OK in the blank size dialog
box. Now your blank size should reflect the circumference of the object to be engraved.
Summary of Contents for LaserPro ZX Series
Page 1: ......
Page 22: ...ZX Series USER MANUAL 21 Fig 3 12 Red Pointer Access Red Pointer Access...
Page 32: ...ZX Series USER MANUAL 31...
Page 39: ...ZX Series USER MANUAL 38...
Page 82: ...ZX SERIES USER MANUAL 81 Firmware FPGA Back Fig 5 37 Machine Information Page 2...
Page 86: ...ZX SERIES USER MANUAL 85...


