


FL SWITCH 2000
22
PHOENIX CONTACT
107065_en_01
Step 2: “IP Assignment Tool”
The program opens and the start screen of the addressing tool appears.
The program is mostly in English for international purposes. However, the program buttons
change according to the country-specific settings.
The start screen displays the IP address of the PC. This helps when addressing the device
in the following steps.
•
Click on the “Next” button.
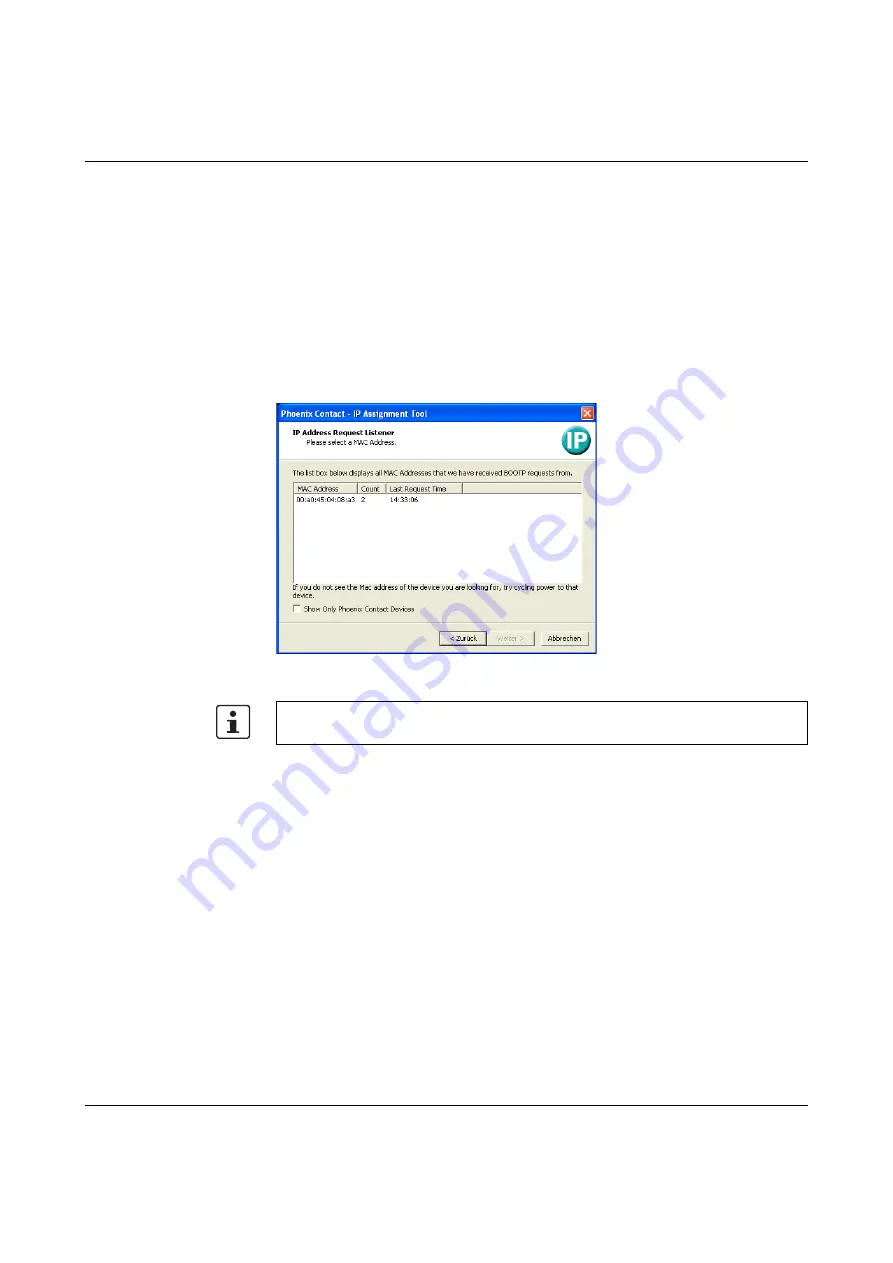
Step 3: “IP Address Request Listener”
All devices sending a BootP request are listed in the window which opens. These devices
are waiting for a new IP address.
Figure 3-4
“IP Address Request Listener” window
In this example, the switch has MAC address 00.A0.45.04.08.A3.
•
Select the device to which you want to assign an IP address.
•
Click on the “Next” button.
Step 4: “Set IP Address”
The following information is displayed in the window which opens:
–
IP address of the PC
–
MAC address of the selected device
–
IP parameters of the selected device
(IP address, subnet mask, and gateway address)
–
Any incorrect settings
The MAC address of the switch can be found on the sticker on the side.
Summary of Contents for FL SWITCH 2005
Page 1: ...User manual FL SWITCH 2000 Order No...
Page 62: ...FL SWITCH 2000 62 PHOENIX CONTACT 107065_en_01...
Page 68: ...FL SWITCH 2000 68 PHOENIX CONTACT 107065_en_01...
Page 87: ...Technical data and ordering data 107065_en_01 PHOENIX CONTACT 87 49 5281 9 462888...
Page 88: ...FL SWITCH 2000 88 PHOENIX CONTACT 107065_en_01...
Page 92: ...FL SWITCH 2000 92 PHOENIX CONTACT 107065_en_01...
Page 94: ...FL SWITCH 2000 94 PHOENIX CONTACT 107065_en_01...
Page 98: ...FL SWITCH 2000 98 PHOENIX CONTACT 107065_en_01...