


Configuration via PSI-CONF
104275_en_c00
PHOENIX CONTACT
3-9
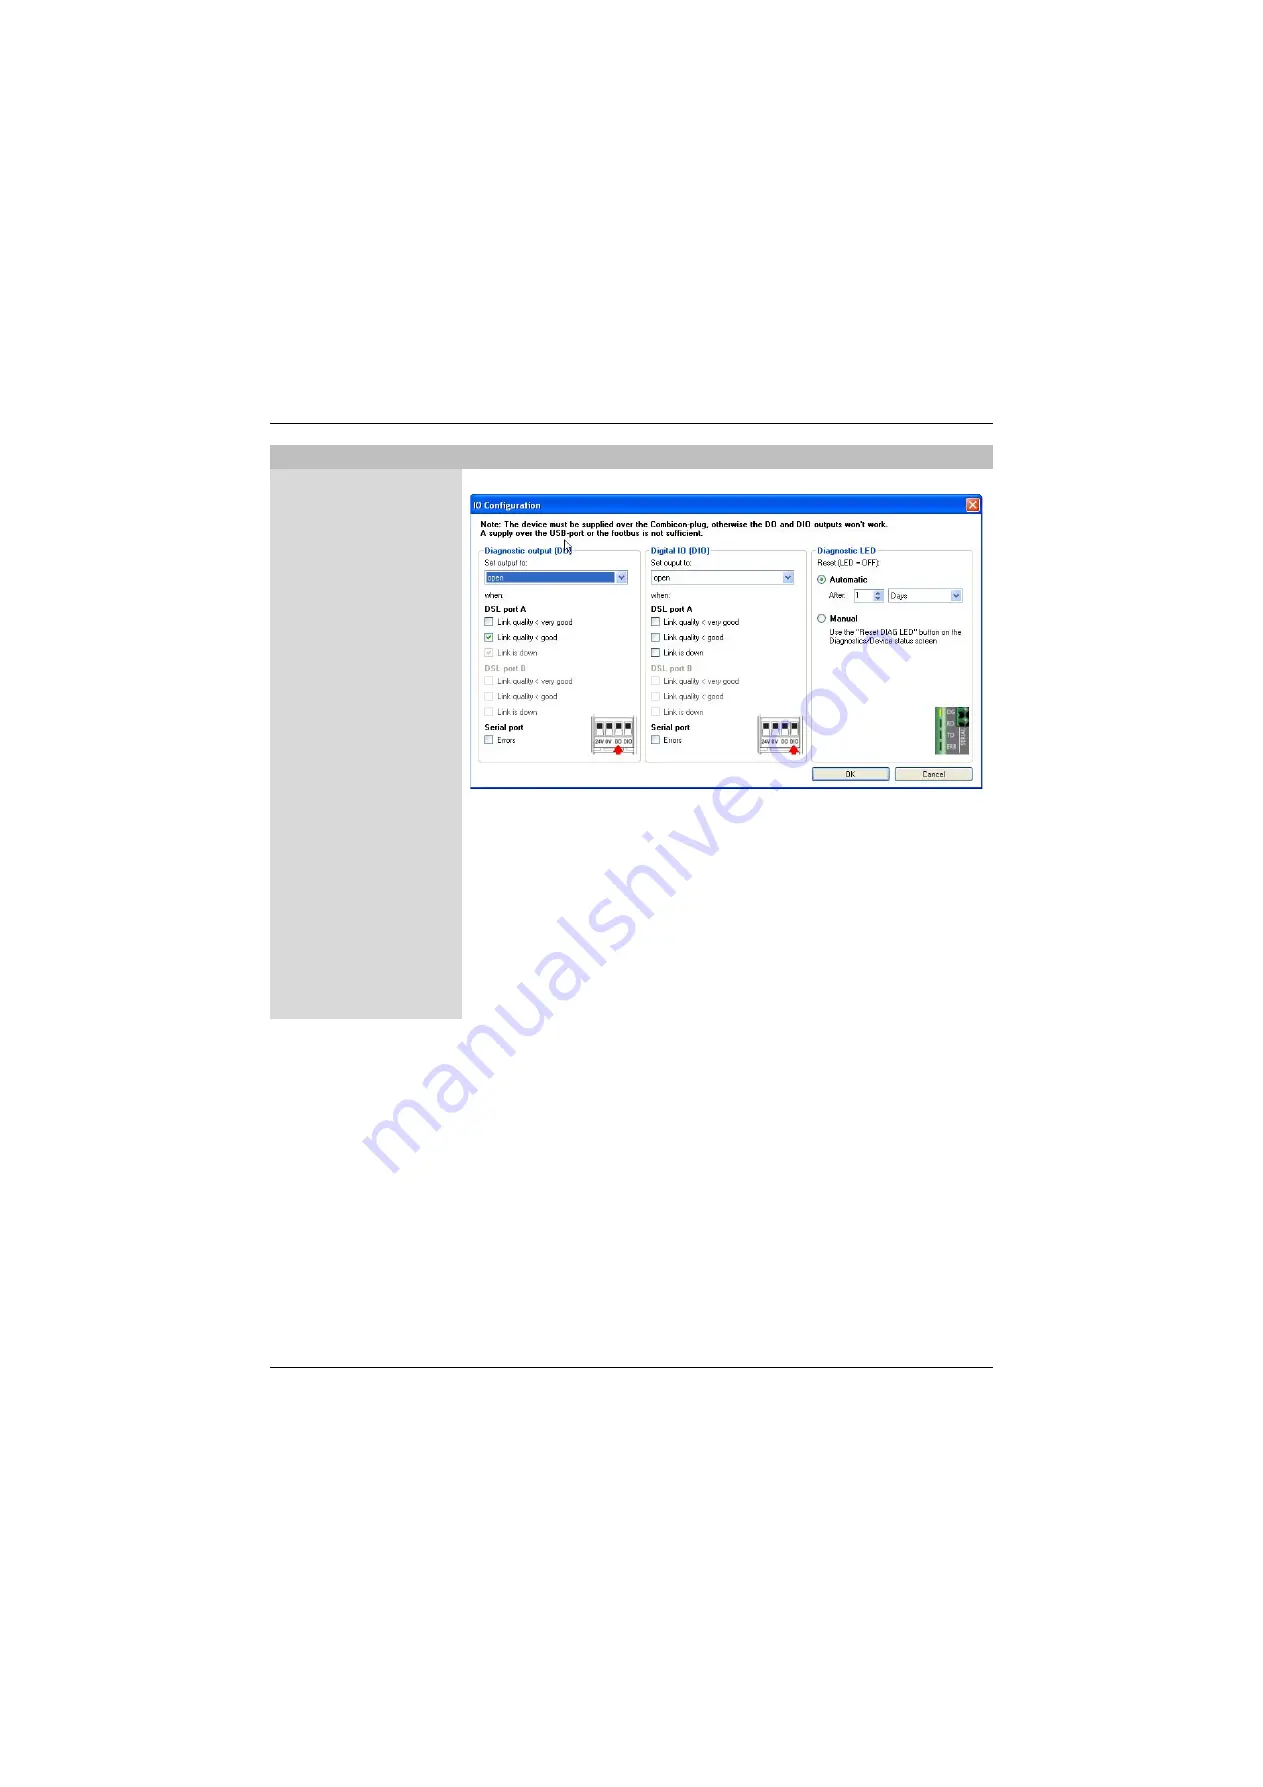
Step 5: IO configuration
Click on "Edit" to change the default settings. The following window appears.
Under certain conditions (signal quality is no longer good/very good or the DSL or serial
connection was interrupted), the DO/DIO can be set to "24 V" or "open".
The diagnostic LED lights up if a serious error is detected. In this case, we recommend
reading the diagnostic memory (see "Event log" on page 3-13).
The diagnostic LED remains lit until it is reset. You can specify a fixed time interval for
reset (e.g., after 2 minutes) or reset the LED manually. Manual reset is performed using
the "Reset DIAG LED" button in the "Diagnostics, Device Status" menu.
Confirm your changes with "OK" or discard with "Cancel". The window is closed.
You can set the configuration individually for each modem. If the configuration is the same
for each modem, click on "Accept for all".
Step 6: Summary
A summary of the settings is provided here. Click on "Print" to print out the settings.
Configuration >> Point-to-point wizard or Line structure wizard