background image

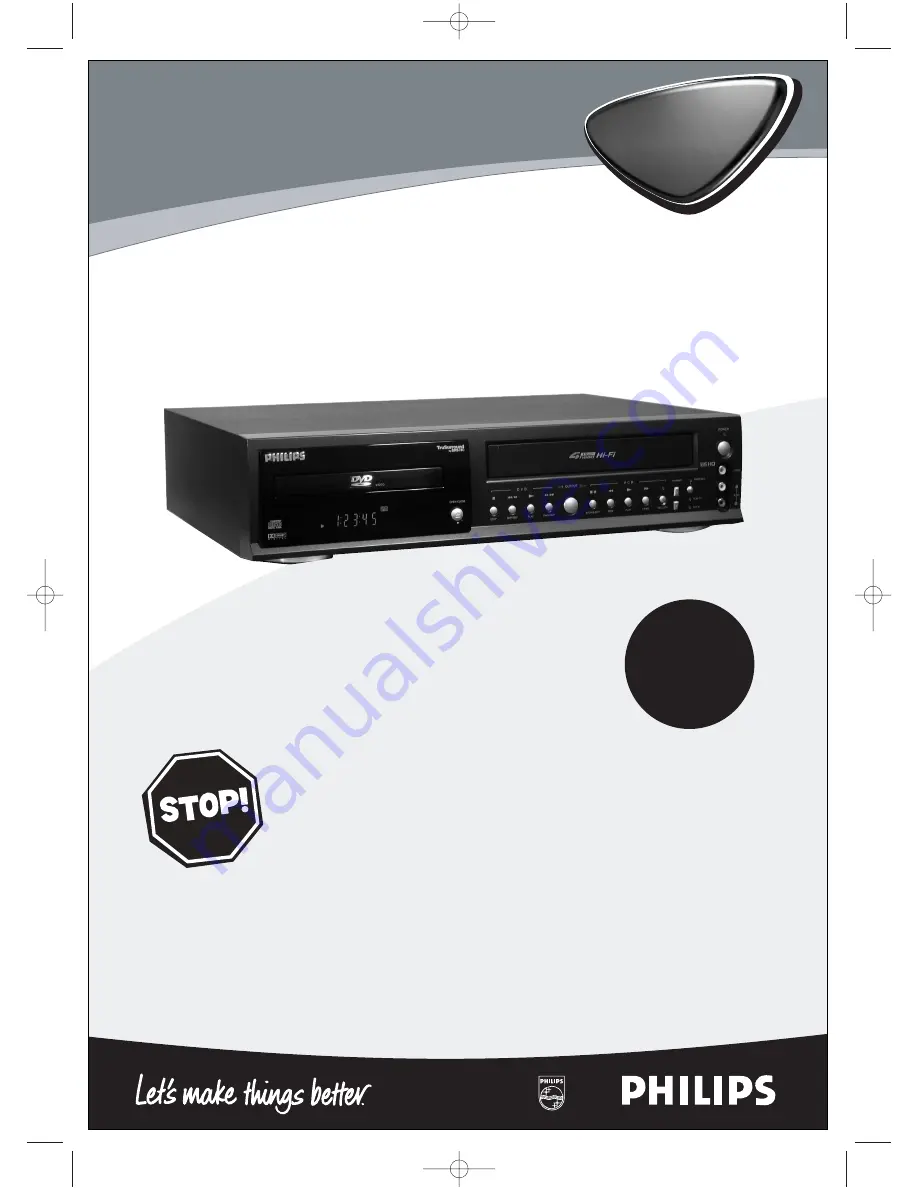
DV910VHS

Digital Video Disc Player &
Video Cassette Recorder 
Owner’s Manual

Read this manual first!

Congratulations on purchasing this Philips product.
We’ve included everything you need to get started.
If you have any problems, Philips Representatives can
help you get the most from your new product by explaining:
• Hookups,
• First Time Setup, and 
• Feature Operation.
Do not attempt to return this product to the store.

For fast help, call us first! 

1-800-531-0039

Thank you for making Philips a part of your home! 

Important!

Return your

Warranty

Registration Card

within 10 days.
See why inside.

DV910(H9100).QX33  01.8.9 10:26 AM  Page 1

Summary of Contents for DV910VHS

Page 1: ...ve any problems Philips Representatives can help you get the most from your new product by explaining Hookups FirstTime Setup and Feature Operation Do not attempt to return this product to the store For fast help call us first 1 800 531 0039 Thank you for making Philips a part of your home Important Return your Warranty Registration Card within 10 days See why inside DV910 H9100 QX33 01 8 9 10 26 ...

Page 2: ...om your PHILIPS prod uct you must return your Warranty Registration Card within 10 days So please mail it to us right now Know these safetysymbols This bolt of lightning indi cates uninsulated material within your unit may cause an electrical shock For the safety of everyone in your household please do not remove product covering The exclamation point calls attention to features for which you shou...

Page 3: ...nterference by one or more of the follow ing measures 1 Reorient or relocate the receiving antenna 2 Increase the separation between the equipment and the receiver 3 Connect the equipment into an outlet on a circuit different from that to which the receiver is connected 4 Consult the dealer or an experienced radio TV technician for help Copyright Protection Unauthorized copying broadcasting public...

Page 4: ... Tapes 41 Real Time Counter Memory 42 Time Search 43 Special Effects Playback 44 Automatic Operation Features 45 Additional VCR Features MTS System 46 47 Hi Fi Stereo Sound System 48 Blue Background 49 Disc Playback and Features Playing a Disc 50 Disc Menus 51 Pausing Playback 52 Step by Step Playback 53 Fast Forward Reverse Search 54 Slow Motion 55 Zoom Playback 56 Track Playback 57 Title Chapter...

Page 5: ...me DigitalVideo Discs when the DVD VCR is in DVD mode Indicates the feature is available on some Audio CDs when the DVD VCR is in DVD mode Disc Menus Some explanations in this manual describe the Disc menus These menus are set by the movie producers or the music industry the menus will vary among Discs All Discs do not have menus However if the Disc has a menu access the Disc menu by pressing the ...

Page 6: ...n not play Discs that are labelled for other regions Look for the symbols below on your DVDs If these region symbols do not appear on your DVD you cannot play the DVD in this DVD VCR The number inside the globe refers to a region of the world Region 1 represents the United States Canada upper regions of North America Bermuda the U S Virgin Islands and small regions near Australia A Disc encoded in...

Page 7: ...speed SLP DVD VCR maintenance Use only tapes with the mark Remove any light adhesive stick on notes from the video cas sette tape before putting the tape in the DVD VCR Removable labels can jam the DVD VCR Periodic maintenance is required to maintain your DVD VCR s excellent performance This DVD VCR has an Automatic Head Cleaner However the video heads will require replacement even tually Only an ...

Page 8: ...al connections are not possible connect the DVD VCR s red and white AUDIO OUT jacks to the Audio In jacks of your Stereo or TV This connection is for DVD andVCR features Before you begin Refer to the manuals of your TV VCR Stereo System or other devices as necessary Note the style of jacks and connectors on the other equipment Determine how to choose different Audio andVideo In channels on your ot...

Page 9: ... the same channel For example when playing a tape if the CH3 CH4 switch is set to CH3 the TV should be on channel 03 Hookups cont d 9 Antenna In Jack on back of TV example only 4 Plug in the power cords of the TV and the DVD VCR 6 You are ready to turn on the DVD VCR Please go to page 16 before turning on the DVD VCR You must complete theVCR setup before you can access the DVD Player so it is impo...

Page 10: ...channel channel 03 or 04 set the DVD VCR s CH3 CH4 switch to the same chan nel Set your Cable Box DBS to the channel you want to record When you enter the channel you want to record in a timer recording select channel 03 or 04 the Cable Box DBS output channel This is step 5 on page 37 Leave the Cable Box DBS on for a timer recording OUT IN 75 ANT CABLE DVD VCR AUDIO OUT DVD VCR OUT IN VIDEO ANT IN...

Page 11: ...tton once to put the DVD VCR in TV position 5 Select the channel you want to watch at the Cable Box DBS When you play a tape make sure the Cable Box DBS is set to the same channel as the CH3 CH4 switch on the DVD VCR Set the TV to the Cable Box DBS output channel 03 or 04 TV s ANTENNA IN Jack Cable Box DBS DVD VCR Connections 1 Connect a Cable signal to the DVD VCR s ANT IN Antenna In Jack 2 Use a...

Page 12: ...either connect the RF coaxial cable between the ANT OUT jack of the DVD VCR and theTV s Antenna In jack or connect the yellow video cable as described earlier To connect the supplied RF coaxial cable see step 3 on page nine 4 Connect the power cords of theTV and the DVD VCR to a power outlet Turn on theTV and set it to the correct Audio Video In channel If you are using the RF coaxial cable forVCR...

Page 13: ...or connect the yellow video cable To connect the supplied RF coaxial cable see step 3 on page nine To connect the supplied yellow video cable see step 3 on page 12 4 Connect the power cords of all the equipment to a power outlet Turn on the Stereo and select the Stereo s Auxiliary IN station Turn on theTV and set it to the ComponentVideo In channel If you are using the RF coaxial cable forVCR play...

Page 14: ...onnect the supplied red white audio cables To connect the supplied RF coaxial cable see step 3 on page nine To connect the red white audio cables see step 2 on page 12 3 Connect the supplied yellow video cable to the yellow DVD VCR VIDEO OUT jack on the DVD VCR and to the VIDEO IN jack on the TV To use component video cable or S Video cable instead for the DVD Player see pages 12 13 You will still...

Page 15: ...ntain materials that can be recycled and reused Specialized companies can recycle your prod uct to increase the amount that needs to be properly disposed Your product uses batteries that should not be thrown away when depleted but should be disposed of as small chemical waste Please find out about the local regulations on disposal of your old product batteries and packaging whenever you replace ex...

Page 16: ... briefly then TV programming will appear These channels will be available when you want to watchTV while in VCR mode To put the DVD VCR inVCR mode press the OUTPUT SELECT button so that the greenVCR OUTPUT light appears Then press theVCR TV button so that theVCR TV light appears Press the VCR button then use the CHANNEL and Number buttons to select aTV channel for viewing To skip this feature and ...

Page 17: ...p the channels again Before you begin place the DVD VCR inVCR mode Press the OUTPUT SELECT button so that the greenVCR OUTPUT light appears on the front of the DVD VCR Press theVCR TV button so that theVCR TV light appears on the front of the DVD VCR 2 Press the Play B button or the Stop C button to select TUNER SET UP then press the Fast Forward g button SELECT op CHOOSE B AUTO PROGRAMMING ADD DE...

Page 18: ...25 DELETED 1 DELETED 2 ADDED 3 ADDED TO END PUSH EXIT 2 Press the Play B button or the Stop C button to select TUNER SET UP then press the Fast Forward g button 3 Press the Play B button or the Stop C button to select ADD DELETE CH then press the Fast Forward g button If you have an antenna channel numbers 2 69 will appear on the ADD DELETE CH menu If you have a cable connection channels 1 125 wil...

Page 19: ...H MEMORY REVIEW then press the Fast Forward g but ton A list of memorized channels will appear on the screen If all the memorized channels don t fit on the screen press the Fast Forward g button to see the remaining channels Then press the Rewind h button to return to the first screen of channels If you do not press any buttons within 10 seconds you will either go to the next screen of channels or...

Page 20: ...ns for the month two Number buttons for the day and two Number buttons for the year For example for July 1 2001 press 07 01 01 The day of the week will appear automatically TIME 02 15 PM DATE 07 01 01 SUN TO CORRECT PUSH CLEAR TO END PUSH EXIT 6 Press the DISPLAY STATUS EXIT button Enter a 0 before a single digit number Entries that do not match the DVD VCR s clock or calendar will cause a questio...

Page 21: ...PROGRAM VCR SET UP TUNER SET UP SET CLOCK TO END PUSH EXIT Daylight SavingsTime 21 You may program the DVD VCR so the VCR clock will automati cally move forward one hour in April and turn back one hour in October Daylight Savings Time is ON when you receive your DVD VCR Turn Daylight Savings Time ON or OFF by following the steps below Before you begin Set the clock Details are on page 20 Before yo...

Page 22: ...SET UP SET CLOCK TO END PUSH EXIT SELECT op CHOOSE B REPEAT PLAY OFF ON SCREEN MODE AUDIO OUT LANGUAGE BLUE BACKGROUND ON TO END PUSH EXIT If you accidentally select Spanish and need English 1 Press theVCR button then press the MENU button 2 Press the Play B button or the Stop C button to select PREPARE EL VCR then press the Fast Forward g button 3 Press the Play B button or the Stop C button to s...

Page 23: ...ds After five seconds only the counter will remain on the screen You must press the DIS PLAY STATUS EXIT button to remove it Portions of the status display also may appear when you press other function buttons If you select STATUS ON then select COUNTER ONLY OFF Whenever you press the Stop C button or the Play B button the status display will appear for five seconds Portions of the status display ...

Page 24: ...LECT button on the remote control Power is turning on Appears after the disc tray closes if the tray is empty if there is an error reading the disc or if an unacceptable disc is installed Tray is opening or is open Tray is closing This also may appear as the Player tries to load a Disc Disc is loading Power is turning off Display Messages REPEAT Appears during Repeat Playback along with A B TITLE ...

Page 25: ...s when the DVD VCR is in standby mode or off for a timer recording or during a One Touch Recording It flashes if the TIMER SET button is pressed for a timer recording but there is no tape in the DVD VCR It flashes when all timer recordings or One Touch Recordings are finished Details are on pages 35 38 STOP SKIP REV FWD SKIP STOP EJECT REW PLAY F FWD REC OTR CST IN VCR TV VIDEO TIMER SET CHANNEL P...

Page 26: ... the nextVCR menu or to change the setting of an item in theVCR menu SKIP REV erse FWD Forward SKIP Buttons DVD Press during playback to go to previous or subsequent Tracks or Chapters Press and hold for three seconds for a forward or reverse search Details are on page 54 Remote Sensor Receives a signal from your remote control so you can work your DVD VCR from a distance REW ind Button VCR When t...

Page 27: ... the supplied audio cables here and to the Audio In jacks of a television or other audio equip ment Details are on pages 12 13 COAXIAL Jack Connect an optional coaxial digital audio cable here and to the Coaxial Digital Audio In jack of a decoder or audio receiver Details are on page 14 ANT IN Antenna In Jack Connect your antenna or cable here Details are on pages 8 14 ANT OUT Antenna Out Jack Use...

Page 28: ...erate theVCR and its features press theVCR button on the remote control before pressing otherVCR buttons Make sure the DVD VCR is inVCR mode by pressing the OUTPUT SELECT button so that the greenVCR OUTPUT light appears on the front of the DVD VCR Helpful Hints Arrow Buttons Press to select an item in the DVD Player Setup menu or in the DVD Disc menu OK Button Press to confirm a setting or select ...

Page 29: ...ress to rewind the tape at high speed During playback press to rewind the tape while the picture stays on the screen Details are on page 44 Press to return to a previous VCR menu VCR Button Press before using the remote control for VCR features SPEED Button Press to select the VCR s recording speed SP or SLP Details are on pages 38 and 86 ZOOM Button Enlarges the DVD picture during playback Detail...

Page 30: ...skip Chapters or Tracks Details are on pages 57 58 VCR mode Press to change TV channels at the DVD VCR To use the remote control to operate the DVD player and its features press the DVD button on the remote control before pressing other DVD buttons Make sure the DVD VCR is in DVD mode by pressing the OUTPUT SELECT but ton so that the red DVD OUTPUT light appears on the front of the DVD VCR To use ...

Page 31: ...ctions Also press to reset the real time counter Details are on page 42 VCR TV Button Use to selectVCR orTV position If theVCR TV light appears on the front of the DVD VCR it is inVCR position in eitherVCR or DVD mode If theVCR TV light doesn t appear on the front of the DVD VCR it is in TV position VCR Position When the greenVCR OUTPUT light appears on the front of the DVD VCR use theVCR to watch...

Page 32: ...n the back of the DVD VCR is set to Or if you connected the DVD VCR to the TV using audio and video cables select the correct audio and video in channel at the TV Details are on page 12 2 With the DVD VCR power off insert a tape in the cas sette compartment of the DVD VCR The POWER green VCR OUTPUT VCR TV and CST IN lights will appear on the front of the DVD VCR If the tape s record tab has been r...

Page 33: ...not appear press the VCR button then press the VCR TV button once If you press the REC ord OTR but ton when there is not a tape in the DVD VCR NO CASSETTE will flash on the screen If you press the REC ord OTR but ton while a tape without a record tab is in the DVD VCR the DVD VCR will eject the tape and PROTECTED CASSETTE CANNOT RECORD will flash on the screen Other recording options are on pages ...

Page 34: ...to watch at the TV 4 To return to the channel being recorded use the TV remote control to select channel 03 or 04 at the TV the channel to which the CH3 CH4 switch on the back of the DVD VCR is set Or if you connected the DVD VCR to the TV using audio and video cables select the correct audio and video in channel at the TV Details are on page 12 5 Press the VCR TV button on the DVD VCR remote con ...

Page 35: ...continue insert another tape in the DVD VCR To return toVCR mode press the TIMER SET button on the front of the DVD VCR then press the OUTPUT SELECT button so that the greenVCR OUTPUT light appears on the front of the DVD VCR 3 To stop an OTR before recording is finished press the Stop C button To cancel the OTR but continue recording press the REC ord OTR button repeatedly until REC appears in th...

Page 36: ...he front of the DVD VCR Press the VCR TV button so that the VCR TV light appears on the front of the DVD VCR Do each step within 60 seconds of the previous step 1 Press the VCR button then press the MENU button SELECT op CHOOSE B PROGRAM VCR SET UP TUNER SET UP SET CLOCK TO END PUSH EXIT 2 Press the Play B button or the Stop C button to select PROGRAM then press the Fast Forward g button SELECT op...

Page 37: ...le Users enter channel numbers as a two digit number for the quickest results For example to select channel 6 press 0 6 If you only press the Number 6 button channel 6 will be selected after a brief delay There also may be a brief delay when you select channels 10 11 and 12 If you want to select channels 100 and above enter channel numbers as a three digit number For example to select channel 117 ...

Page 38: ...ording will take place several hours or days from now you may use the DVD VCR until time for the recording Press the TIMER SET button a few minutes before the recording starts If you forget to press the TIMER SET button PLEASE PUSH TIMER SET FORTIMER RECORDING flashes on your TV screen two minutes before a timer recording starts Press the CLEAR button to remove the message Then press the TIMER SET...

Page 39: ...nd in VCR position press the VCR TV button so that the VCR TV light appears on the front of the DVD VCR press the VCR button then press the MENU button Checking or Cancelling Timer Recordings Before you begin place the DVD VCR inVCR mode Press the OUTPUT SELECT button so that the greenVCR OUT PUT light appears on the front of the DVD VCR 2 Press the Play B button or the Stop C button to select PRO...

Page 40: ... on the front of the DVD VCR 1 Audio cables from DVD VCR AUDIO OUT Jacks of DVD VCR 1 to AUDIO IN Jacks of DVD VCR 2 2 Video cable from DVD VCR VIDEO OUT Jack of DVD VCR 1 toVIDEO IN Jack of DVD VCR 2 3 RF coaxial cable from the ANT OUT Antenna Out jack of DVD VCR 2 to the TV s ANTENNA IN Jack If you use the AUDIO andVIDEO IN Jacks on the back of DVD VCR 2 press Number buttons 0 0 1 at step 5 AV R...

Page 41: ... g button so that ON appears beside REPEAT PLAY 5 Press the DISPLAY STATUS EXIT button Now when a tape has finished playing the DVD VCR will rewind it and start playback again To cancel Repeat Play follow steps 1 3 above At step 4 press the Fast Forward g button so that OFF appears beside REPEAT PLAY Press the DISPLAY STATUS EXIT button The real time counter memory does not function during Repeat ...

Page 42: ...ero at a tape location you want to refer to later Before you begin place the DVD VCR inVCR mode Press the OUTPUT SELECT button so that the greenVCR OUT PUT light appears on the front of the DVD VCR 1 Press the VCR button then play fast forward or rewind a tape to the location that you would like to refer to later Press the Stop C button to stop the tape 2 Press the DISPLAY STATUS EXIT button to se...

Page 43: ... the Number buttons to enter the desired length of time you want to skip forward or back ward For example for 1 hour 25 minutes press Number buttons 1 2 5 Or for five minutes press Number buttons 0 0 5 3 Within 10 seconds press the Fast Forward g button or the Rewind h button The DVD VCR will skip over the spec ified length of time then begin playback If you want to search for more than 59 minutes...

Page 44: ... now search in super high speed Repeatedly pressing the Fast Forward g or Rewind h button will switch between regular and high speed searching 2 To return to normal playback press the Play B button Viewing a Still Picture 1 During tape playback press the Pause k button A still pic ture will appear on the screen 2 To release the still picture and return to playback press the Play B button or press ...

Page 45: ...ejected with the DVD VCR power on or off but the DVD VCR must be plugged in If a timer recording is set and theTIMER SET light is on or flashing the tape cannot be ejected To eject the tape you must first press the TIMER SET button to cancel the timer recording then press the STOP EJECT button to remove the tape To reset the timer record ing insert a tape then press the TIMER SET button AutomaticT...

Page 46: ...en a program broadcast in stereo is available STEREO appears here When a program broadcast in second audio is available 2ND AUD appears here When a program is available both in stereo and second audio both STEREO and 2ND AUD appear here Even though a program is available in stereo or second audio you still must program the DVD VCR to receive or record the program Follow the directions on page 47 N...

Page 47: ...ton ON will appear to the right of your selection 4 Press the DISPLAY STATUS EXIT button 5 To record select the channel to be recorded using the CHANNEL o pbuttons then go to step 6 6 Press the REC ord OTR button to start recording SELECT op CHOOSE B AUTO PROGRAMMING ADD DELETE CH CH MEMORY REVIEW TV STEREO ON 2ND AUDIO TO END PUSH EXIT SELECT op CHOOSE B AUTO PROGRAMMING ADD DELETE CH CH MEMORY R...

Page 48: ...tton or the Stop C button to select HIFI ON will appear to the right of HIFI on the screen 5 Press the DISPLAY STATUS EXIT button SELECT op HIFI ON MONO TO END PUSH EXIT SELECT op CHOOSE B REPEAT PLAY OFF ON SCREEN MODE AUDIO OUT LANGUAGE BLUE BACKGROUND ON TO END PUSH EXIT Normally HIFI should be selected from the AUDIO OUT menu for playback with Hi Fi sound But you can change the selection to MO...

Page 49: ...he sound will be muted Or if you want to receive the weak signal set BLUE BACK GROUND to OFF When you select a channel that is receiving a weak signal you will see and hear the static in the TV program ming The channel number will not appear on the screen when you select a weak channel To set BLUE BACKGROUND to ON or OFF follow these steps Before you begin place the DVD VCR inVCR mode Press the OU...

Page 50: ...t channel Details are on pages 8 14 3 Press the OPEN CLOSE button on the front of the DVD VCR to open the Disc tray 1 Press the POWER button to turn on the DVD VCR P ON will appear briefly on the display panel 4 Place a Disc into the tray Make sure the Disc is sitting proper ly in the correct recess Some DVDs are recorded on both sides Make sure the side you want to play is facing up Or if the DVD...

Page 51: ...e then press the OK button Playback will begin at the Title you selected Menus may vary among Discs Refer to the information accompa nying the Disc for details Not all DVDs haveTitle menus Some DVDs may refer to Chapters as scenes Some DVDs may refer to theTitle Menu as the scene index Helpful Hints Disc Menus 51 1 Press the DVD button then press the MENU button The DVD s main menu will appear 2 P...

Page 52: ...on press 2 Press the Play B button to resume playback Resuming playback 1 Press the DVD button then press the Stop C button dur ing disc playback In a few seconds the following Resume mes sage will appear on the TV screen DVD AUDIO CD Pausing Playback 2 1 2 Pause k Play B Press PLAY to play from here To play beginning press STOP first and then PLAY Play B 1 To cancel resume playback and start play...

Page 53: ...ay B will appear briefly on the screen On Screen Info must be On Details are on pages 74 75 2 Press the Pause k button repeatedly to see the picture advance one frame or step at a time The sound will remain muted Pause k will appear briefly on the screen each time you press the Pause k button On Screen Info must be On Details are on pages 74 75 DVD 3 1 2 1 During DVD playback press the DVD button ...

Page 54: ...ackward at 16 times the normal playback speed hX16 or gX16 Pressing the Fast Forward g or Rewind h button repeat edly will not affect the speed of the search Sound will be inter mittent during searching on an Audio CD Use the Fast Forward g button for a forward search Press the Rewind h button for a reverse search Before you begin place the DVD VCR in DVD mode Press the OUTPUT SELECT button so tha...

Page 55: ...an not play the DVD in reverse slow motion Helpful Hints DVD Slow Motion 55 3 2 1 Press the DVD button then press the Pause k button during playback 2 Press the Fast Forward g button Slow motion playback will begin Press the Fast Forward g button repeatedly during slow motion playback to vary the speed of slow motion playback You may play the DVD at 1 16 1 8 or 1 2 the normal playback speed 1 D Pr...

Page 56: ...ack The enlarged pic ture will continue to play 2 Press the Arrow buttons o p s B to move the zoomed image left right up and down 3 To return the picture to its normal size press the ZOOM button again Zoom On 56 Zoom Playback Zoom Off POWER MARKER TIMER SET VCR TV MEMORY SPEED REC OTR OUTPUT SELECT 3 4 5 6 7 8 9 ZOOM TIME SEARCH SLOW STATUS EXIT SEARCH MODE DISPLAY 0 10 2 1 VCR DVD E B OK D H L K ...

Page 57: ...umber 2 button then press the Number 6 button If you enter a Track number that is not available on the Disc playback will not begin or the current Track will continue to play An X will appear in the top right corner of theTV screen B Using the SEARCH MODE Button to Select aTrack Press the DVD button then press the SEARCH MODE but ton once so that theTrack Search display appears Within 30 seconds p...

Page 58: ... or go to a previous chapter Helpful Hints Search Title 1 4 Chapter 17 Search Title 4 4 Chapter 17 Search Title 4 4 Chapter 12 17 2 To select the Title press the Arrow o o button to select the Title space then press the Number buttons to enter the Title number The bar will move to Chapter automatically 3 To select the Chapter press the Number buttons to enter the Chapter number The DVD VCR will be...

Page 59: ...t playback to begin Within a few seconds playback will start at the specified time Example 1 hour 23 minutes and 30 seconds 1 2 3 3 0 Make sure the time you enter is within the total time of the Title or Track If it is not X will appear on the screen Playback will continue at its current point If you make a mistake press the CLEAR button Then enter the correct information POWER MARKER TIMER SET VC...

Page 60: ...n the front of the DVD VCR 1 During disc playback press the DVD button then press the REPEAT button repeatedly until the repeat mode you want appears in the top left corner of the TV screen 1 Repeat Title Repeat Chapter Repeat Off Repeat All Repeat Track Repeat Off Press the REPEAT button to select Repeat All The entire Audio CD plays over and over REPEAT will appear on the DVD VCR Display Press t...

Page 61: ...lace the DVD VCR in DVD mode Press the OUTPUT SELECT button so that the red DVD OUT PUT light appears on the front of the DVD VCR 1 Press the DVD button 2 Press the Play B button to play the Disc to the point at which you want repeated playback to begin 3 Press the A B REPEAT button to set the starting point A Repeat A will appear on the DVD VCR s display panel and on theTV screen briefly 3 5 2 4 ...

Page 62: ...xam ple for Track three press the Number 3 button For Tracks 10 and above press the 10 button then the Number button for the first digit then the Number button for the second digit For example to play Track 26 press the 10 button then press the Number 2 button then press the Number 6 button 3 Repeat step 2 until you have selected all the Tracks you wish to play in the Program Make sure the Track n...

Page 63: ... recorded 1 2 3 To set up Random Playback follow these steps Before you begin place the DVD VCR in DVD mode Press the OUTPUT SELECT button so that the red DVD OUT PUT light appears on the front of the DVD VCR 1 While playback is stopped press the DVD button then press the MODE button twice so that the RANDOM screen appears 2 While the RANDOM screen appears press the Play B button The Tracks will p...

Page 64: ...uring playback You can change the language only if multiple languages are available on the DVD Press the OUTPUT SELECT button so that the red DVD OUT PUT light appears on the front of the DVD VCR 1 Press the DVD button then press the AUDIO button dur ing playback so the audio display appears in the top left corner of the TV screen Press the AUDIO button repeatedly until you select your desired lan...

Page 65: ...able lan guages appears at the right of the subtitle display In this example eight languages are available 8 DVD 2 1 With some DVDs you may select a subtitle language only in the Disc menu If the desired language does not appear after pressing the SUBTITLE button several times the Disc does not have subtitles in that language The subtitles may be delayed for a few seconds Opening the disc tray or ...

Page 66: ...r of the TV screen 2 Within five seconds press the ANGLE button repeatedly to select a different angle The number of available angles appears at the right of the Angle display In this example eight angles are available 8 DVD 2 1 Angle 1 8 Angle 2 8 Angle 8 8 Angle 1 default of eight available angles Press the ANGLE button repeatedly to select another angle Press the ANGLE button again If the Disc ...

Page 67: ...tings before you allow children access to the DVD VCR Follow the steps below to change your Parental Controls password Before you begin place the DVD VCR in DVD mode Press the OUTPUT SELECT button so that the red DVD OUTPUT light appears on the front of the DVD VCR 1 While playback is stopped press the DVD button then press the SETUP button The setup screen will appear 2 Press the Arrow o op p but...

Page 68: ...screen will appear 3 Press the Number buttons to enter your 4 digit password 2 4 5 3 4 Press the Arrow o op p buttons to select Parental Level Then press the OK button 5 Press the Arrow op buttons to select the level you desire then press the OK button For example if you want to play Discs rated PG13 you must select Level 4 or higher The level you select will appear on the screen beside Parental L...

Page 69: ...ter 18 30 Title 1 5 Time 1 56 38 Audio 1 English 4 3 2 3 Current type of disc Playback status Repeat status Current Title number Current Chapter number Elapsed playing time of current Title Remaining playing time of current Title Bit Rate display Current Chapter Total Chapters in currentTitle Current Title TotalTitles on current Disc Total playing time of current Title Current settings of Audio Su...

Page 70: ... Press the Arrow op buttons to select Marker 1 Marker 2 Marker 3 Marker 4 or Marker 5 then press the OK button Then press the RETURN button to return to the Display Screen Marker details are on page 71 Time Display Press the OK button repeatedly to choose All orTrack This determines whether the times shown in the left box of the Display Screen are for the current Track Track or the entire Disc All...

Page 71: ...e the DVD VCR in DVD mode Press the OUTPUT SELECT button so that the red DVD OUTPUT light appears on the front of the DVD VCR 1 During playback press the DVD button then press the MARKER button The Display Screen will appear Details are on pages 69 70 The Markers will appear at the bottom of the screen 2 Press the Arrow op buttons to select Marker 1 Marker 2 Marker 3 Marker 4 or Marker 5 Make sure...

Page 72: ... button 3 Press the Arrow o op p buttons to select an item Digital Audio Out Dynamic Range Down Mix Mode or Down Sampling 2 3 Choose the appropriate Audio Settings for your equipment These settings only affect the playback of the DVD Player of the DVD VCR Before you begin place the DVD VCR in DVD mode Press the OUTPUT SELECT button so that the red DVD OUTPUT light appears on the front of the DVD V...

Page 73: ...igital Audio Out Dolby Digital Off DTS On MPEG Off Select Set ENTER Cancel Exit SETUP Select Set OK Cancel Exit SETUP Language Display Audio Parental Audio Controls Digital Audio Out Dynamic Range On Down Mix Mode Dolby Surround Down Sampling 48kHz Digital Audio Out Dolby Digital Off DTS On MPEG Off Select Set ENTER Cancel Exit SETUP Select Set OK Cancel Exit SETUP Language Display Audio Parental ...

Page 74: ...hese steps Before you begin place the DVD VCR in DVD mode Press the OUTPUT SELECT button so that the red DVD OUTPUT light appears on the front of the DVD VCR 1 When playback is stopped press the DVD button then press the SETUP button The setup screen will appear 1 Language Display Audio Parental Select Set OK Cancel Exit SETUP Language Display Audio Parental Select Set OK Cancel Exit SETUP Display...

Page 75: ...een Info On Panel Display Bright Angle Icon On Select Set ENTER Cancel Exit SETUP Select Set OK Cancel Exit SETUP Language Display Audio Parental Display Controls Panel Display Bright Angle Icon On Background Color Blue Auto Power Off On Select Set ENTER Cancel Exit SETUP Select Set OK Cancel Exit SETUP 4 If you selected On Screen Info Angle Icon Background Color or Auto Power Off press the OK but...

Page 76: ... English Audio Original English French Spanish Select Set ENTER Cancel Exit SETUP Select Set OK Cancel Exit SETUP Audio Language Display Audio Parental Language Controls Audio English Subtitle English Disc Menu English Player Menu English Subtitle Off English French Spanish Select Set ENTER Cancel Exit SETUP Select Set OK Cancel Exit SETUP Subtitles are not shown Subtitles are in English Subtitles...

Page 77: ...r to the list on page 78 You can only select other languages if the language is available on the Disc 5 Press the SETUP button to clear the screen Language Display Audio Parental Language Controls Audio English Subtitle English Disc Menu English Player Menu English Audio Irish Portuguese Dutch Other _ Select Set ENTER Cancel Exit SETUP Select Set OK Cancel Exit SETUP 4 5 If the automatic settings ...

Page 78: ...i 6460 Korean 5761 Kurdish 5767 L N Laothian 5861 Latin 5847 Latvian 5868 Lettish 5868 Lingala 5860 Lithuanian 5866 Macedonian 5957 Malagasy 5953 Malay 5965 Malayalam 5958 Maltese 5966 Maori 5955 Marathi 5964 Moldavian 5961 Mongolian 5960 Nauru 6047 Nepali 6051 Norwegian 6061 O R Occitan 6149 Oriya 6164 Oromo Afan 6159 Panjabi 6247 Pashto 6265 Persian 5247 Polish 6258 Portugese 6266 Pushto 6265 Qu...

Page 79: ... laser Specifications Video Heads Four heads Hi Fi Antenna VHF UHF 75 ohm external antenna terminal VHF Output Signal Channel 03 or 04 switchable 75 ohms unbalanced Tuner Broadcast Channels VHF 2 13 UHF 14 69 Cable TV Channels 1 125 Product Type Digital Video Disc Player Video Cassette Recorder Playable Discs DVD Video Audio CD Color System NTSC Frequency Response DVD linear sound 20 Hz to 22 kHz ...

Page 80: ... then try the other VCR feature buttons Press the OUTPUT SELECT button so that the green VCR OUTPUT light appears on the front of the DVD VCR This means the DVD VCR is in VCR mode Make sure the VCR TV light appears on the front of the DVD VCR If it does not press the VCR TV but ton once There is no picture in DVD mode Make sure the video cable is connected correctly You may connect either the yell...

Page 81: ...n the desired language Not all DVDs contain audio or sub titles in multiple languages See if other languages are available Details are on pages 64 65 An X appears in the top right corner of the TV screen prohibiting an operation The DVD VCR prohibits the current operation or it is not available on the Disc Details are on page five The DVD VCR switches itself from DVD mode to VCR mode after 35 minu...

Page 82: ...em timer recordings are programmed differently Details are on page 10 Finish programming a timer recording at least five minutes before the recording is set to begin 12 p m is noon 12 a m is midnight There is no picture or the picture is noisy or contains streaks during video cassette tape play back Put the DVD VCR in VCR mode Press the OUTPUT SELECT button so that the green VCR OUTPUT light appea...

Page 83: ...tracking This is normal When connecting the DVD VCR to a stereo TV you will only get stereo sound if you use audio cables to connect the DVD VCR AUDIO OUT jacks on the DVD VCR to the AUDIO IN jacks on your TV and if the TV is in Line Auxiliary Input mode See your TV owner s manual for details When you connect the DVD VCR AUDIO OUT jacks on the DVD VCR to the AUDIO IN jacks on your TV the stereo li...

Page 84: ...s where Philips Consumer Electronics does not distribute the product the local Philips service organization will attempt to exchange the product although there may be a delay if the appropriate product is not readily available MAKE SURE YOU KEEP Please keep your sales receipt or other document showing proof of date of purchase Attach it to the owner s manual and keep both nearby Also keep the orig...

Page 85: ...e original sales receipt and the proper payment amount into an envelope DO NOT SEND CASH Do not staple or clip these items together Label the envelope Return Documents Enclosed Place this envelope in the box with the product 5 Seal the box with packing tape and return the product via United Parcel Service UPS insured and freight prepaid to Philips Recovery Center Rojas 6 12420 Mercantile Avenue El...

Page 86: ...the DVD VCR select 001 AV REAR If you accidentally enter Line Input mode press the CHANNEL o p buttons or use the Number buttons to select another chan nel OPTICAL DIGITAL AUDIO OUT Jack Converts electrical signals into optical signals before sending the audio to the audio receiver Optical audio is not prone to external electrical influences and has less noise which reduces adverse effects on exte...

Page 87: ...trols 67 68 password 67 pause button 31 44 52 53 play button 26 31 32 50 playing discs 50 playing tapes 32 power button 26 28 cord 27 light 24 25 program audio cd 62 random playback 63 real time counter 42 rear panel 27 rec ord otr button 26 30 33 35 light 25 recording basic 33 one channel watching another 11 34 prevention 7 timer 36 39 remote control buttons 28 31 sensor 26 using 15 28 30 repeat ...

Page 88: ...1 Two AA Batteries 4835 138 17012 This owner s manual is made of recyclable materials Remember to recycle Audio and Video Cables 4835 321 17148 RF Coaxial Cable 75 ohm 4835 323 27011 OPTIONAL ACCESSORIES The following additional items are not provided with your DVD VCR but they are designed for use with your new DVD VCR To order these optional accessories contact us at Philips Parts Accessories Ma...

Reviews: