Installation and Configuration Guide
Setting up Omega PS200 Hardware
11
Setting up Omega PS200 Hardware
This section provides you with the step-by-step procedures in setting up the PS200 including instructions
on connecting the various PS200 components.
Attaching the desk stand to the PS200 Touchscreen
A desk stand is supplied with the PS200. This desk stand attaches to the back of the Touchscreen and
can be fastened to a desk, a bench or to the MFP. For more information on the mounting options for
the Touchscreen, see “Mounting the Touchscreen” section.
Before attaching the desk stand to the PS200, ensure that you have all the necessary components. The
desk stand includes:
2 pcs plastic stand (pedestal and base)
4 pcs mounting 1 spare
1 thumb head screw
2 pcs plastic wire ties
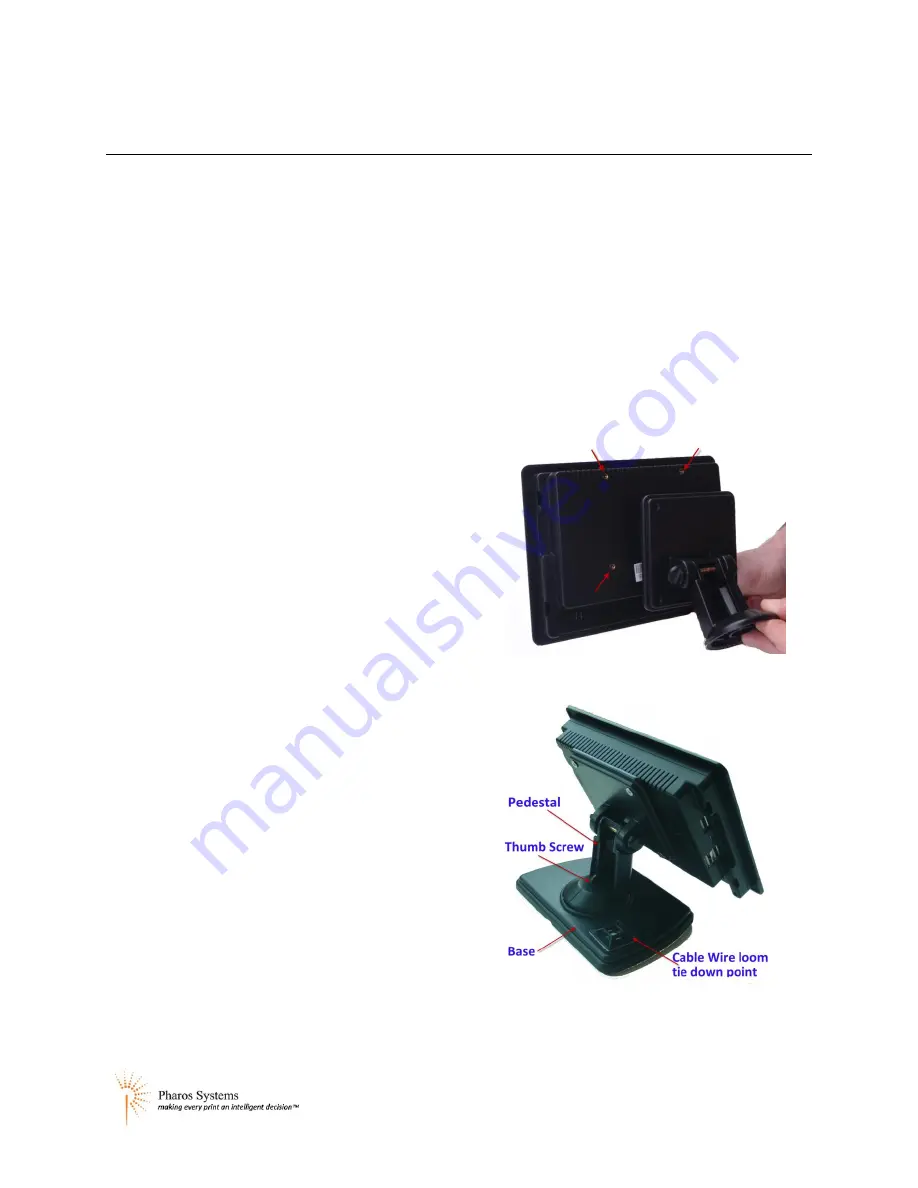
To attach the desk stand to the PS200:
1.
Locate the four threaded holes at the back of
the PS200 Touchscreen,
2.
Align the threaded holes of the PS200
Touchscreen with the holes of the pedestal
3.
Secure the pedestal to the PS200 Touchscreen
using the supplied mounting screws.
4.
Attach the pedestal to the base using the thumb
screw provided.
Note: Make sure you position the cable wire tie
down point at the left rear of the base (see
illustration)
Rotate the thumb screw until the pedestal is in
place


