


72 . RamanFlex 400 Series Getting Started Guide
6.
Check that the Power LED on the front panel is On.
The Laser LED and the Active LED should be off. If the Power LED is not on, please turn
the instrument off at the PSU and check all of the connections, any power socket
switches and then switch the PSU on again.
7.
Start the Spectrum software.
On the Windows start menu select Programs/PerkinElmer Applications/Spectrum.
When you start the software the instrument will prepare for use by turning on the laser
and cooling the detector to its operating temperature (usually −50 °C).
SOP-2: Turning the Instrument Off
NOTE: We recommend that you always leave the RamanFlex 400 switched on, but switch
the PC off overnight if required.
1.
Shut down Spectrum software by selecting Exit from the File
menu to return to the
Windows operating environment.
2.
Switch off the spectrometer by pressing the power switch on the PSU to OFF:
- ON
Ο
- OFF
SOP-3: Setting-Up and Saving Experimental
Parameters
This SOP is designed to act as a quick guide to help you start collecting data. The exact
setup for optimized spectral collection is sample dependent, and we recommend that you
modify these settings to suit your needs.
1.
Ensure that the RamanFlex 400 is switched on by following SOP-1.
2.
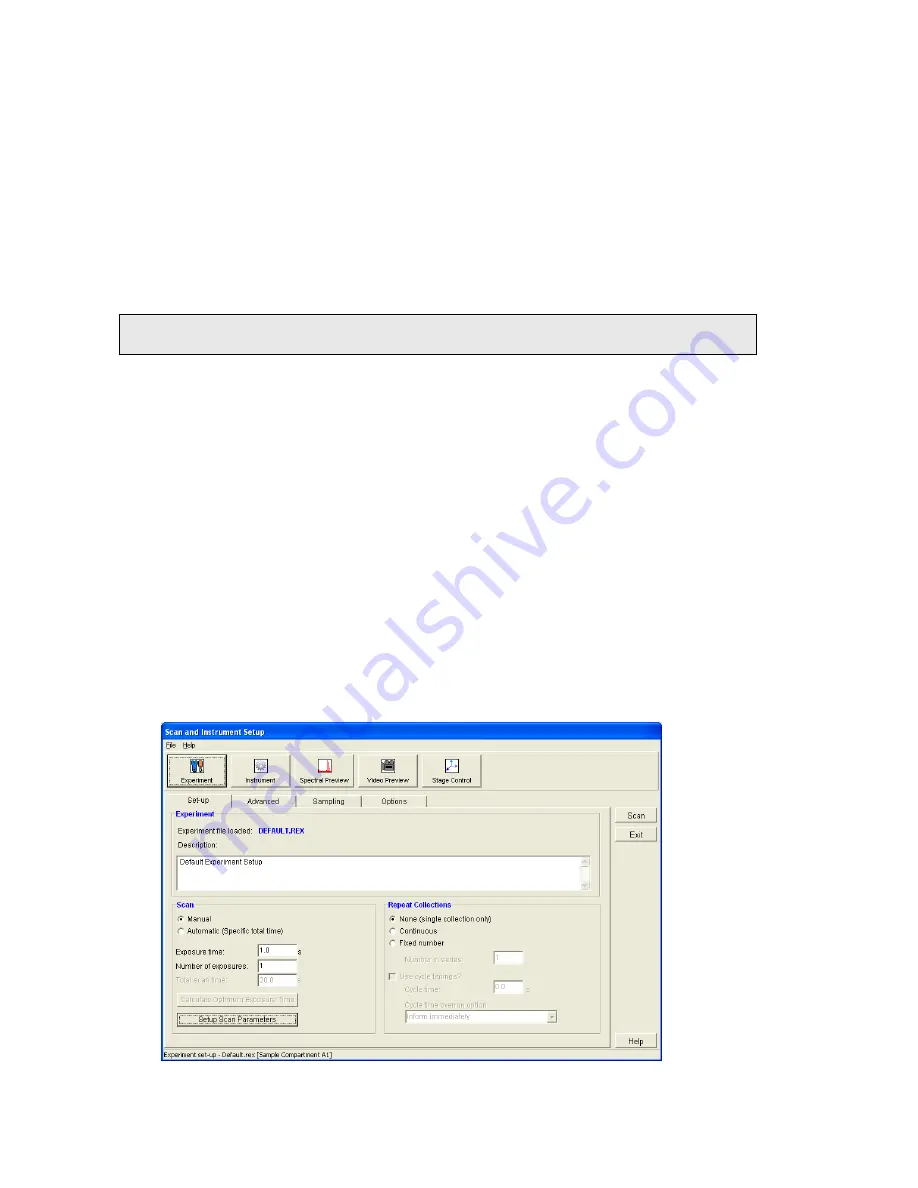
Start the Spectrum software and then select Instrument from the Setup menu.
The Scan and Instrument Setup dialog is displayed.
The Scan and Instrument Setup dialog has a number of pages that enable you to setup
and save the experimental parameters, choose the beam path and align the samples.
Summary of Contents for RamanFlex 400
Page 1: ...RamanFlex 400 Series Getting Started Guide MOLECULAR SPECTROSCOPY ...
Page 5: ...Introduction ...
Page 10: ...10 RamanFlex 400 Series Getting Started Guide ...
Page 11: ...Safety Practices ...
Page 27: ...Raman History Theory and Instrumentation ...
Page 34: ...34 RamanFlex 400 Series Getting Started Guide ...
Page 35: ...Preparing your Facility ...
Page 40: ...40 RamanFlex 400 Series Getting Started Guide ...
Page 41: ...Installing your RamanFlex 400 ...
Page 61: ...Introduction to the RamanFlex 400 ...
Page 68: ...68 RamanFlex 400 Series Getting Started Guide ...
Page 69: ...Using the RamanFlex 400 ...


