40
2
Qu
ick Star
t
Quick Start
Taking Still Pictures
The standard procedure for taking still pictures is described below. The
flash fires automatically depending on the light conditions.
1
Press the power switch.
The camera turns on and is ready to take
still pictures. In this manual, this is called
Still Picture Capture mode.
2
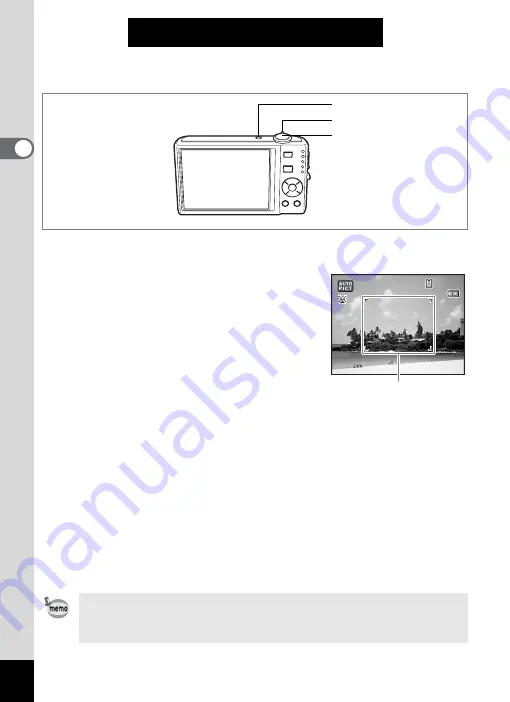
Confirm the subject and shooting
information on the display.
The focus frame in the middle of the display
indicates the zone of automatic focusing.
You can change the captured area by turning the Zoom/
w
/
x
lever to
the left or right.
x
: enlarges the subject
w
: widens the area that is captured by the camera
3
Press the shutter release button halfway.
The focus frame on the display turns green if the subject is in focus.
4
Press the shutter release button fully.
The picture is taken.
The image appears on the display for one second (Instant Review) and
is saved to the SD Memory Card or built-in memory. (p.41)
Press the Green button to switch to the
9
(Green) mode and let the
camera set all the shooting functions automatically. Selecting the
9
mode is the easiest way to ensure that pictures come out well. (p.63)
Shutter release button
Zoom/
w
/
x
lever
Power switch
1 4 : 2 5
1 4 : 2 5
1 4 : 2 5
3 8
3 8
3 8
0 3 / 0 3 / 2 0 0 8
0 3 / 0 3 / 2 0 0 8
0 3 / 0 3 / 2 0 0 8
Focus frame
Summary of Contents for 17191 - Optio V20 Digital Camera
Page 73: ...71 4 Taking Pictures 7 Press the shutter release button fully The picture is taken ...
Page 205: ...Memo ...
Page 209: ...207 9 Appendix Z Zoom lever 44 46 Zoom xw 78 ...
Page 210: ...Memo ...
Page 211: ...Memo ...


