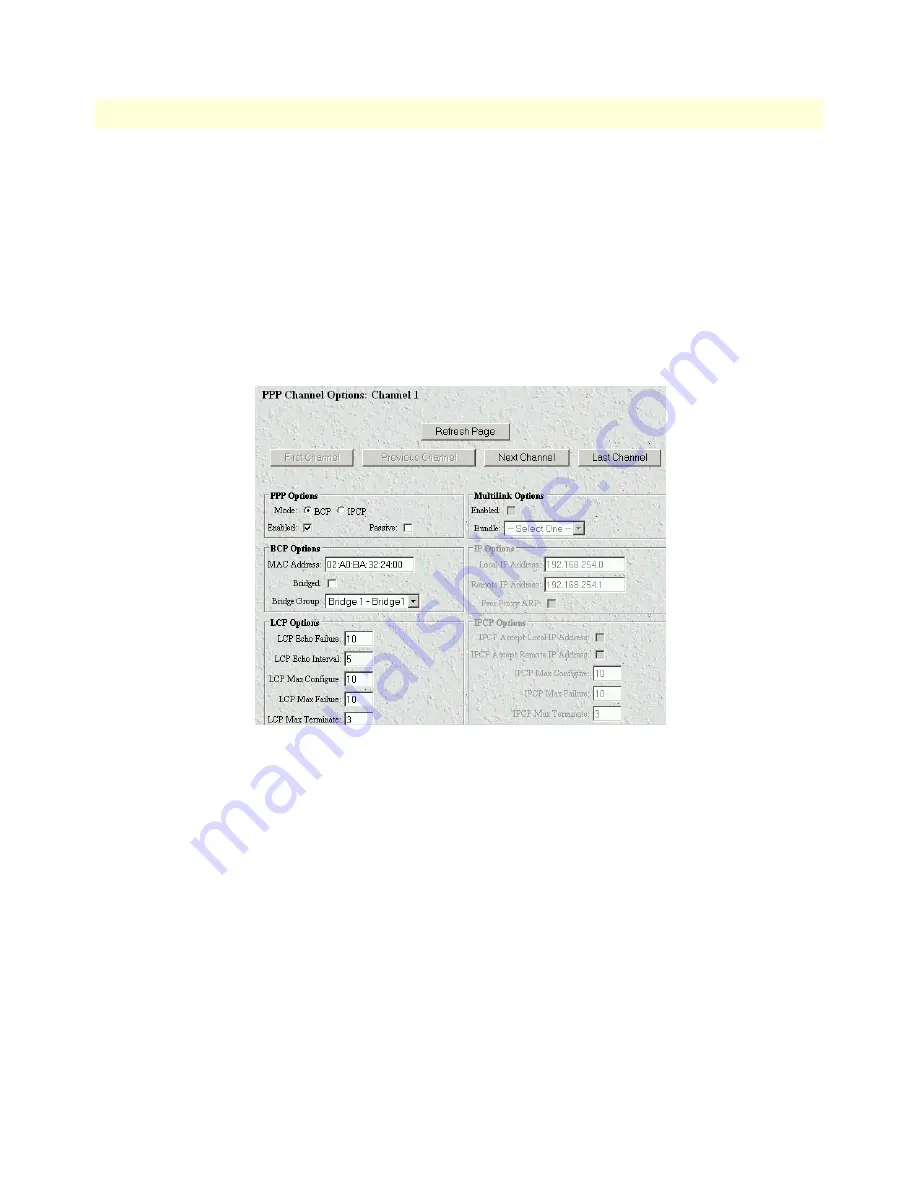
PPP channel configuration
29
Models 3224 G.SHDSL IpDSLAM & 6081RC NAS Applications Guide
3 • Bridged data application
– The
First Port
button displays the configuration for the first port in the
H.110 Channel Configuration
page listing of channels (see
figure 24
).
– The
Previous Port
button displays the configuration for the port previous to the one currently displayed
– The
Next Port
button displays the configuration for the port following the one currently displayed
– The
Last Port
button displays the configuration for the last port in the
H.110 Channel Configuration
page listing of channels (see
figure 24
)
– The
Reset
button cancels changes made to a port configuration.
– The
Submit
button saves changes made to a port configuration.
Figure 25. PPP Options page
3. Under the heading
PPP Options
, select one of the following network-control protocols (NCP) from the
Mode menu:
–
BCP
(bridge control protocol)
–
IPCP
(Internet protocol control protocol)
Note
Since this section is about configuring for bridged PPP, you would
select the BCP option.
4. Click on the
Enable
button below the
Mode
menu to enable the NCP.
5. Click on the Passive checkbox if you want the particular PPP channel to wait for the remote PPP device
linked to this channel to initiate PPP channel negotiation. If box is unchecked, this PPP channel will ini-
tiate negotiation to establish a PPP session with remote device. Normally this box should be checked.
6. Under
BCP Options
, select the bridge group that the PPP channel will be attached to (for this example
select Bridge 1) and check the
Bridged
box located just above the drop-down menu.


