119
English
Copying the USB memory data to the
display
1
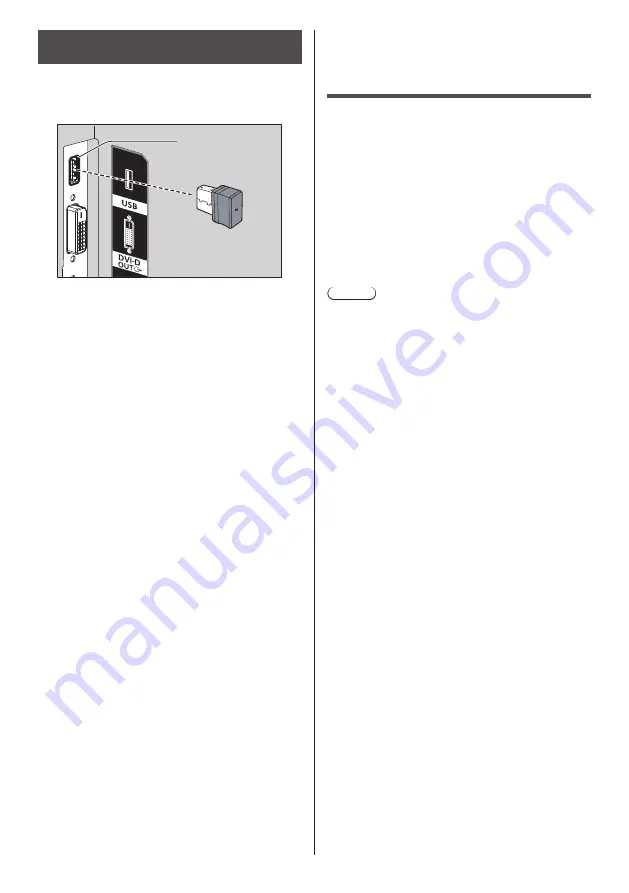
Insert the USB memory device to
the USB terminal at the side of the
display.
USB memory
USB terminal
2
The [LAN setup] screen is displayed
after data copy has finished.
3
Remove the USB memory device from
the USB terminal.
Rewriting the
Internal LightID
Using the USB memory device, the LightID written in the
LightID-distribution file can be updated as the Internal
LightID of the display.
■
Supported device
●
Commercially available USB memory devices are
supported. (Those with security functions are not
supported. Operation is not guaranteed.)
●
USB memory devices other than those formatted in
FAT16 or FAT32 cannot be used.
●
Up to 32 GB of USB memory in size are supported.
●
Only single partition configuration is supported.
Note
●
Only one Internal LightID can be written.
●
Save only the LightID-distribution file in the USB
memory device. If multiple files have been saved, the
Internal LightID may not be updated.
●
If multiple LightIDs have been written in the LightID-
distribution file, the first LightID in the file is written as
the Internal LightID.
The first written LightID can be confirmed on the Web
menu from which the LightID was obtained, or on the
“Multi Monitoring & Control Software” (see page 85).
●
If multiple LightIDs have been written in the LightID-
distribution file, using the “Multi Monitoring & Control
Software” (see page 85) can select the desired ID
and update it.
●
To restore the Internal LightID to the default state, see
“Shipping condition” (see page 125).
●
How to obtain the LightID-distribution file
(see page 56)
●
If the file name contains characters other than one-
byte alphabetic character, this function may not work
properly.
If it does not work, change the file name to that in the
form of [
****
.bin] (
****
: one-byte alphanumeric).
●
The password input screen disappears if no operation
is performed for the period set for [Menu display
duration]. (see page 67)
If the menu disappears, perform the operation again
from step 2.


