Editing: Creating Playlists
107
Ed
it
in
g
1
Select an event.
Select the event where audio channels should be
switched. Multiple events can be selected.
2
Set the channel.
Press the MENU button, choose [SETTING] – [AUDIO CH]
from the menu and set the channels to be input to each
channel.
Example: Select as shown below to switch CH1 and CH2
locations.
[AUDIO CH]- [CH1]=CH2
[CH2]=CH1
[CH3]=CH3
[CH4]=CH4
◆
NOTE:
• Press the MENU button, choose [SETTING] – [AUDIO CH] –
[RESET] to reset all audio channels to their defaults.
3
Switch channels.
Press the MENU button and choose [OPERATION] – [EDIT
AUDIO CH] from the menu to reflect operation made in
step 2 above to the event.
◆
NOTE:
• The switching status is also indicated on the timeline.
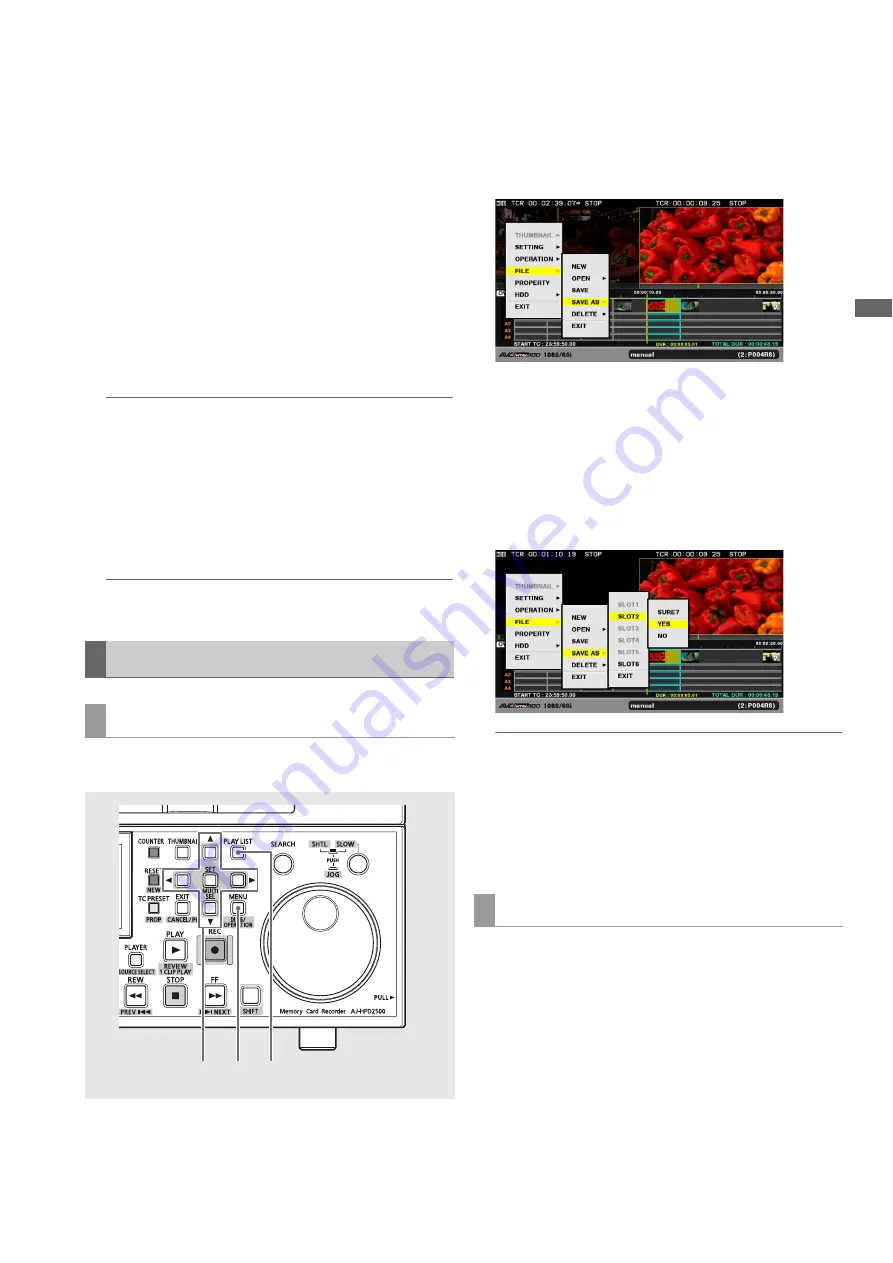
Use the steps below to save a playlist stored in the playlist
area of memory of the unit to a P2 card.
1
Press the PLAY LIST button to open the playlist
screen.
2
Press the MENU button.
3
Use the cursor buttons to choose [FILE] – [SAVE AS]
and press the SET button.
4
Use the cursor buttons to select the number of the P2
card slot that will store the file and press the SET
button.
5
Select [YES] in the confirmation dialog and press the
SET button.
◆
NOTE:
• The file name is automatically generated and cannot be
changed. Changing the file name on a PC will make it
impossible to load.
• Playlists created on other devices should be opened as read-
only files and saved out before use. Read-only files cannot be
edited.
• Playlist files are created in the EDITLIST folder on a P2 card.
A loaded playlist file that is being edited or a playlist file that
has been saved by choosing [FILE] – [SAVE AS] can
subsequently be saved using the following procedure. Use
[SAVE AS] for the first save operation.
Saving a Playlist to a P2 Card
Saving out a playlist
2
1
3,4,5
Saving playlist files


