background image

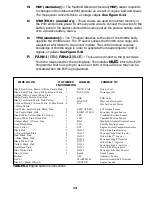
M.   MAP (mandatory) – The Manifold Absolute Pressure (MAP) sensor responds 

to changes in the intake manifold pressure as a result of engine load and speed. 

The map sensor converts this to a voltage output. See Figure 6.13 

N.  

STARTER B+ (mandatory) - These circuits are used to maintain memory in 

the PCM and provide power to all heavy amp circuits. Connect these wires to the 

battery post on the starter solenoid (the same post as the positive battery cable) 

or to a positive battery source. 

O.  

TPS (mandatory) – The TP sensor attaches to the side of the throttle body 

opposite the throttle lever. The TP sensor senses the throttle valve angle and 

relays that information to the control module. The control module requires 

knowledge of throttle angle in order to generate the required injector control 

signals, or pulses. See Figure 6.18 


P.     FAN#1 (GRN) FAN#2 (BLUE) – 

These wires connect to the ground wire 

                             From the relays used for the cooling fans. The installer 

MUST

                             Programmer that he is going to use one or both of these wires so they can be 

 inform the ECM 

                             activated when the ECM is programmed. 


WIRE COLOR                                 # OF WIRES        LABELED               CONNECT TO: 

                                                      IN CONNECTOR 


TABLE 6.2 Engine Section Connections 


14 

Black, Red, Green, Brown, Lt.Blue, Purple, Pink 
Black, Red/ White, Green/ White, Brown/ White, 
Lt.Blue/ White, Purple/ White, Pink 
White, Purple, Brown, Gray, Red 
Black, Tan, Black/ White, Pink, Yellow 
Lt.Green/ Black, Lt.Green/ White, Lt.Blue/ Black, 
Lt. Blue/ White 
Tan/ White, Purple/ White, Black, Pink 
Tan, Purple, Black, Pink 
Black/ White, Yellow/ Black, Lt.Green 
Brown/ White, Pink/ Black, Red 
Orange/ Black, Lt.Green, Gray 
Gray, Black, Blue 
Gray, Yellow 
Black, Pink 
Lt.Green/ Black, Pink 
Pink/ Black, Pink 
Lt.Blue/ Black, Pink 
Black/ White, Pink 
Yellow/ Black, Pink 
Red/ Black, Pink      
Blue/ White, Pink 
Blue, Lt. Blue 
Brown 
Red (2) 
Black (3), Black/ White (3) 


2


DRVR. COIL 
PASS COIL 
 
EGR 
MAF-IAT 
IAC 
 
LEFT O2 SEN 
RIGHT O2 SEN 
CKP 
CMP 
MAP 
TPS 
ECT 
INJ #1 
INJ #2 
INJ #3 
INJ #4 
INJ #5 
INJ #6 
INJ #7 
INJ #8 
Knock 
ALT 
STARTER B+ 
GROUND 

Drivers Coil 
Passenger Coil 
 
EGR Valve 
Mass Air Flow Sensor 
Idle Air Control Motor 
 
Left Oxygen Sensor 
Passenger Oxygen Sensor 
Crankshaft Position Sensor 
Camshaft Position Sensor 
Manifold Absolute Pressure Sensor 
Throttle Position Sensor 
Engine Coolant Temperature Sensor 
Driver Side Front Injector 
Passenger Side Front Injector 
Driver Side 2

nd

 Injector 

Passenger Side 2

nd

 Injector 

Driver Side 3

rd

 Injector 

Passenger Side 3

rd

 Injector 

Driver Side Rear Injector 
Passenger Side Rear Injector 
Knock Sensor 
Alternator Exciter 
Starter Solenoid Batt Terminal 
Engine Ground 

Summary of Contents for 60217

Page 1: ...VORTEC FUEL INJECTION 4 8L 5 3L 6 0L WIRE HARNESS INSTALLATION INSTRUCTIONS Manual P N 90530 Third Edition July 2014 Copyright November 2004 PAINLESS PERFORMANCE PRODUCTS 2501 Ludelle Street Fort Wor...

Page 2: ...ke Switch Connection 7 Figure 6 3 Brake Switch Relay 8 Figure 6 4 Air Pump Relay 8 Figure 6 5 Canister Purge Solenoid 8 Figure 6 6 Canister Vent Solenoid 9 Figure 6 7 Air Pump Connections 9 Figure 6 8...

Page 3: ...f you wish to operate the fans automatically painless kit 30106 is available This kit will turn the fans on at 205 degrees and off at 195 This kit is also available in a weatherproof version part 3012...

Page 4: ...SENSOR WIRING OR YOU WILL DAMAGE THE COMPUTER Tech II or equivalent scanner for presetting and diagnostic purposes Electric drill 1 5 8 Hole saw for the rubber grommet in the firewall 4 0 PRE INSTALLA...

Page 5: ...G NOTE The 99 02 4 8L 5 3L 6 0L Vortec engines had four oxygen sensors from the factory but we have provisions for only two one on the driver side and one on the passenger side of the engine We remove...

Page 6: ...the computer NEVER FORCE ANY CONNECTOR USE EXTREME CARE The fuel pump you are using to make sure none of the pins in the computer are or become bent MUST maintain a constant pressure of 55 62 P S I po...

Page 7: ...is seated 5 2 4 Route the dash group over to the driver s side of the car 5 2 5 Route the fuse block and relays to the place they will be mounted 5 3 HARNESS ATTACHMENT Note Harness routing and shapi...

Page 8: ...nnection DO NOT OVER CRIMP 5 4 5 Crimp the terminal onto the wire 5 4 6 Connecting the wires and connectors throughout the harness is a simple process Make sure that each wire is properly routed and t...

Page 9: ...mp solenoid relay Battery voltage to the AIR pump is controlled by the AIR pump solenoid relay A vacuum operated shut off valve prevents air flow during OFF periods When the PCM provides a ground circ...

Page 10: ...light is mounted in allowing access to the front of the connector allowing you to see the light while driving See Figure 6 1 See table 4 1 for the recommended brake switch If you are using the recomm...

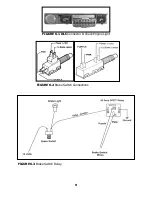
Page 11: ...FIGURE 6 1 DLC Connector Check Engine Light FIGURE 6 2 Brake Switch Connections FIGURE 6 3 Brake Switch Relay 9...

Page 12: ...Pump Air Pump Gray Green White Black Orange 4 Fuel Relay Fuel Pump Relay Green White VSS Output Speedometer White Tach Tachometer Pink Purple Brake Switch Brake Switch Pink Fuse Block Ignition Igniti...

Page 13: ...is used to excite turn on the voltage regulator When using the stock alternator equipped on the 4 8 5 3 or 6 0L Vortec engines this wire will connect to the L terminal in the voltage regulator plug Y...

Page 14: ...ions are secure H IAC mandatory The purpose of the Idle Air Control Motor IAC is to control engine idle speed The IAC valve mounted in the throttle body controls the amount of bypass air See Figure 6...

Page 15: ...14 Black Red Green Brown Lt Blue Purple Pink Black Red White Green White Brown White Lt Blue White Purple White Pink White Purple Brown Gray Red Black Tan Black White Pink Yellow Lt Green Black Lt Gre...

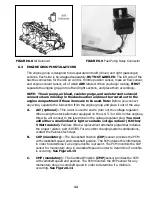
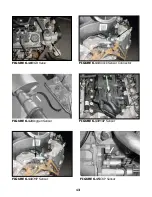
Page 16: ...FIGURE 6 10 EGR Valve FIGURE 6 11 Knock Sensor Connector FIGURE 6 12 Oxygen Sensor FIGURE 6 13 MAP Sensor FIGURE 6 14 CMP Sensor FIGURE 6 15 CKP Sensor 13...

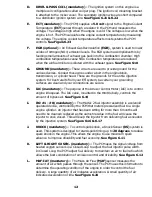
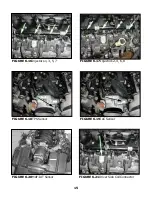
Page 17: ...FIGURE 6 16 Injectors 1 3 5 7 FIGURE 6 17 Injectors 2 4 6 8 FIGURE 6 18 TPS Sensor FIGURE 6 19 IAC Sensor FIGURE 6 20 MAF IAT Sensor FIGURE 6 21 Driver Side Coil Connector 15...

Page 18: ...n Connect this wire to a circuit from the ignition switch start position This wire should only have power in the start position C FUEL PUMP mandatory This circuit provides power to the electric fuel p...

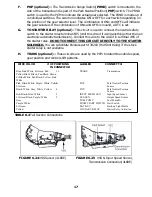
Page 19: ...UIT DIRECTLY TO THE STARTER SOLENOID You can substitute Painless part 30202 Hot Shot Relay if the stock starter relay is not available H TRANS optional These circuits are used by the PCM to determine...

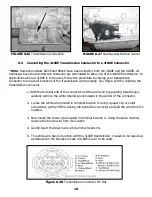
Page 20: ...ission connector 1 With the terminal end of the connector and the arrow on top pointing towards you carefully remove the white retaining lock located in the center of the connector 2 Locate the white...

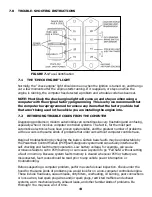
Page 21: ...e greatest number of problems with new cars is the same kinds of problems that older cars without computer controls have Begin all troubleshooting by checking the basics Certain basic faults may be un...

Page 22: ...nded and will not turn off the check engine light Once a DTC has been identified contact the Painless tech dept or a GM Service Manual for a procedure to identify why a particular code is being set Do...

Page 23: ...urate instructions possible and are always concerned about corrections or improvements that can be made If you have found any errors or omissions or if you simply have comments or suggestions concerni...

Page 24: ...original purchaser to be free from defects in material and workmanship under normal use Painless Performance will repair or replace defective products without charge during the first 12 months from t...

Reviews: