


3-26
Sun Blade X6275 Server Module Service Manual • September 2013
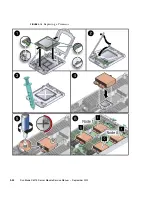
FIGURE 3-13
SP and Screws
4. Lift the service processor straight up to remove it.
5. Lower the new service processor onto the motherboard.
Lower the service processor straight onto the connector. Do not force it.
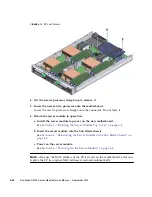
6. Return the server module to operation.
a. Install the server module top cover on the new motherboard.
See
Section 4.1, “Installing the Server Module Top Cover” on page 4-2
.
b. Insert the server module into the Sun Blade chassis.
See
Section 4.2, “Reinstalling the Server Module in the Sun Blade Chassis” on
page 4-3
.
c. Power on the server module.
See
Section 4.3, “Powering On the Server Module” on page 4-4
.
Note –
Because the MAC address of the SP is stored on the motherboard, after you
replace the SP, its original MAC address is restored automatically.
Summary of Contents for Sun Blade X6275
Page 1: ...Sun Blade X6275 Server Module Service Manual Part No Part No 820 6849 16 September 2013 Rev A ...
Page 26: ...1 16 Sun Blade X6275 Server Module Service Manual September 2013 ...
Page 47: ...Chapter 3 Servicing Server Module Components 3 7 FIGURE 3 3 DIMM Numbering and Position ...
Page 61: ...Chapter 3 Servicing Server Module Components 3 21 FIGURE 3 11 Removing a Processor ...
Page 80: ...3 40 Sun Blade X6275 Server Module Service Manual September 2013 ...
Page 86: ...4 6 Sun Blade X6275 Server Module Service Manual September 2013 ...
Page 112: ...A 26 Sun Blade X6275 Server Module Service Manual September 2013 ...
Page 116: ...Index 4 Sun Blade X6275 Server Module Service Manual September 2013 ...


