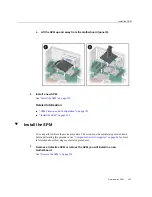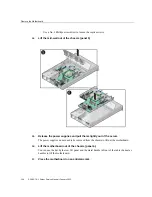
Install the SPM
2.
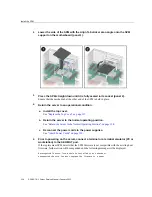
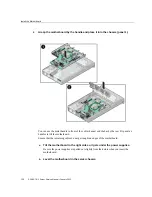
Lower the side of the SPM with the Align Tab sticker at an angle onto the SPM
support on the motherboard (panel 1).
3.
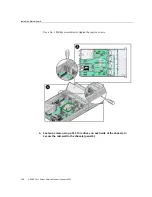
Press the SPM straight down until it is fully seated in its socket (panel 2).
Ensure that the notched tab at the other end of the SPM is held in place.
4.
Return the server to an operational condition.
a.
Install the top cover.
See
“Replace the Top Cover” on page 157
.
b.
Return the server to the normal operating position.
See
“Return the Server to the Normal Operating Position” on page 158
.
c.
Reconnect the power cords to the power supplies.
See
“Attach Power Cords” on page 159
.
5.
Prior to powering on the server, connect a terminal or a terminal emulator (PC or
workstation) to the SER MGT port.
If the replacement SPM detects that the SPM firmware is not compatible with the existing host
firmware, further action will be suspended and the following message will be displayed:
Unrecognized Chassis: This module is installed in an unknown or
unsupported chassis. You must upgrade the firmware to a newer
124
SPARC T8-1 Server Service Manual • January 2022
Summary of Contents for SPARC T8-1
Page 1: ...SPARC T8 1 Server Service Manual Part No E80510 04 January 2022 ...
Page 2: ......
Page 10: ...10 SPARC T8 1 Server Service Manual January 2022 ...
Page 20: ...20 SPARC T8 1 Server Service Manual January 2022 ...
Page 58: ...58 SPARC T8 1 Server Service Manual January 2022 ...
Page 106: ...106 SPARC T8 1 Server Service Manual January 2022 ...
Page 112: ...112 SPARC T8 1 Server Service Manual January 2022 ...
Page 128: ...128 SPARC T8 1 Server Service Manual January 2022 ...
Page 146: ...146 SPARC T8 1 Server Service Manual January 2022 ...
Page 152: ...152 SPARC T8 1 Server Service Manual January 2022 ...

