background image

 Workstation 5A Setup Guide - Fourth Edition

2-23

Workstation 5A BIOS

Chipset

Chipset 

This tab displays the workstation processor temperature and contains the 
system power fail recovery selection.

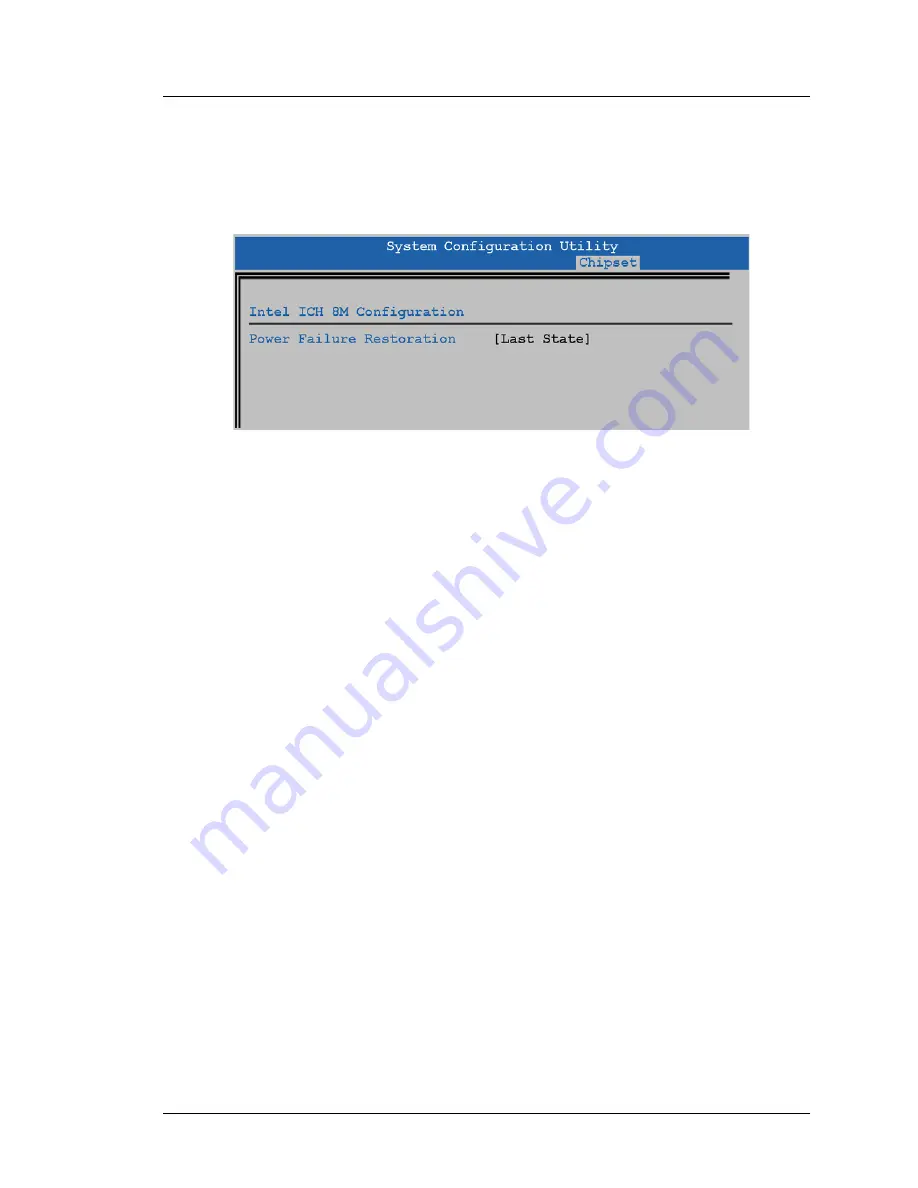
Figure 2-18: BIOS Power Failure Restoration

Intel Pineview Information (Q1000g or Q1010m)

The read-only field displays the Pineview temperature as reported by an on-die 
thermal diode. This field has been removed in Q2010g or later. 

Intel ICH8M Configuration (All BIOS Versions)

The ‘Power Failure Restoration’ field defines how the workstation recovers 
from a power failure.

The default selection of [Last State] causes the workstation to return to the 
previous power state before AC power failed. For example, if the WS5A is 

ON 

and AC power fails, it will automatically restart when AC power is 

restored.

Conversely, if the workstation was 

NOPOWER

 when AC power failed, it 

remains 

NOPOWER

 when AC power returns.

If enabled, the [Power Off] selection requires the user to press the power 
button to restart the unit after an AC power failure.

If enabled, the [Power On] selection causes the unit to automatically 
power-on when the AC power cable is connected to the unit or when AC 
power is restored after an AC power failure.

Summary of Contents for MICROS Workstation 5A

Page 1: ...Oracle MICROS Workstation 5A Setup Guide Release 1 0 F22801 01 January 2020...

Page 2: ...icable to the programs No other rights are granted to the U S Government This software or hardware is developed for general use in a variety of information management applications It is not developed...

Page 3: ...erial Trademarks MICROS is a registered trademark of MICROS Systems Inc Intel Intel Atom Intel SpeedStep and the Intel logo are registered trademarks Intel Corporation in the U S and other countries M...

Page 4: ...1 4 Compact Flash CF Riser Card 1 4 DMA Direct Memory Access CF Cards 1 4 Recovery Button 1 4 Workstation 5A Options 1 5 Hard Disk 1 5 Mini PCI Options 1 6 WiFi 1 6 Powered USB 1 7 Finger Print Reade...

Page 5: ...ary BIOS Q1010m 2 4 System Summary BIOS Q2010g 2 4 System Summary BIOS Q2011d 2 5 BIOS Q2010g features 2 5 BIOS Q2011d features 2 5 BIOS Versions Q2010g Q2011d known issues 2 5 Tips for Using the Syst...

Page 6: ...s 2 20 Personality Module All BIOS Versions 2 20 WINCE Image Update All BIOS Versions 2 21 USB Port1 USB Port4 and USB Port6 All BIOS Versions 2 21 WINCE Factory Restore All BIOS Versions 2 21 USB WIN...

Page 7: ...thernet 3 18 HD Audio 3 19 GPIO 3 19 LPC 3 19 SMBus 3 19 LCD Touchscreen Assembly Resistive Touchscreen 3 21 CCFL Backlight Inverter Board 3 22 LCD Touchscreen Assembly Optional Capacitive Touchscreen...

Page 8: ...5 4 5 Rear Display 4 5 VGA 4 5 ANT 4 5 5V 12V 24V Select USB6 4 6 VGA 4 6 OPT 4 6 COM1 4 6 COM2 4 6 USB1 USB4 4 6 10 100 1000 Ethernet 4 6 CF Express Card 4 7 DMA Enabled CF Card 4 7 CF Card Cover Slo...

Page 9: ...reen 4 26 BIOS Q1000g Password not Required 4 26 BIOS Q1010m Login and Password Required 4 27 BIOS Q2010g and Q2011d Password Required 4 27 POSReady Recovery CF Recovery Button at Splash Screen 4 28 B...

Page 10: ...ble Stand w Prot g Customer Display A 6 Workstation 5A on Adjustable Stand and Prot g on 6 Pole A 7 LCD Pole Display A 8 Prot g Customer Display on 6 Pole A 9 Cash Drawers A 10 Appendix B Connector an...

Page 11: ...x Table of Contents...

Page 12: ...ace if you have questions about the organization conventions or contents of this manual In this section Why Read This Manual viii How This Manual Is Organized ix Notation Conventions x NOTE For inform...

Page 13: ...Edition Preface Why Read This Manual Why Read This Manual Purpose This guide is intended for those who will be setting up installing and operating the MICROS Workstation 5A hardware It is not specifi...

Page 14: ...en Workstation 5 and Workstation 5A are noted where possible Chapter 4 presents the operational aspects of the unit This ranges from a discussion of each IO Panel connector to using the power button a...

Page 15: ...ING This symbol indicates that specific handling instructions or procedures are required to prevent damage to the hardware or loss of data SHOCK HAZARD This symbol calls attention to a potential hazar...

Page 16: ...age architecture and power management support Complete specifications are provided at the end of this chapter In addition the differences and similarities of the Workstation 5 and Workstation 5A featu...

Page 17: ...the system board chassis and power supply are new The WS5A System Board is based on the Intel Atom N450 a mobile platform that improves both processor and graphics performance while at the same time m...

Page 18: ...the unit starts up and performs the Power On Self Test POST After the operating system starts and loads the API the Operator LED turns solid White Operator Power Button The power button is recessed an...

Page 19: ...nstalled in the these workstations it may fail POST and not start On the other hand if a CF Card without DMA support is installed in the Workstation 5A the unit will likely function but the performanc...

Page 20: ...Mini PCI connector Abocom Mini PCI Wireless Card The Abocom WiFi card used on the original Workstation 5 can also be used the Workstation 5A The kit has been modified by adding a new adhesive backed a...

Page 21: ...rt 6 from system board header J14 to the IO Panel connector shown on the left of the illustration Separate dongles one for each voltage attach to the IO Panel connector and terminate in the appropriat...

Page 22: ...ter System Board Intelligent MICROS peripherals such as the Prot g Customer Display System are equipped with a custom interface cable that attaches directly to the USB6 IO Panel connector bypassing th...

Page 23: ...low profile WS5A into an adjustable display design The stand has a weighted base for stable operation generous cable area printer power supply compartment and locking hinges to allow the workstation t...

Page 24: ...and base plate and the compartment for housing an optional Printer Power Supply AC power is connected to a receptacle in the throat of the stand using a low profile angled connector An internal Y cabl...

Page 25: ...n controller board The LCD Customer Display is capable of emulating the 2x20 VFD Customer Display Part numbers and pricing can be found in the Workstation 5A PMA Integrated LCD Customer Display Figure...

Page 26: ...the workstation A 2x20 VFD Pole Display is also available Figure 1 8 Pole Mount LCD Customer Display Adjustable Stand Pole Display This version of the LCD Customer Display is mounted to the Adjustabl...

Page 27: ...display featuring an ARM Processor LCD Controller Flash Memory RAM and MicroSD Card Facing the customer is a 7 800x400 wide format TFT LCD 4 wire resistive touchscreen stereo speakers and room for exp...

Page 28: ...ase is pre boot operating environment that runs Portable Execution Firmware Applications The Firmbase environment runs inside the protective envelope of the System Management Mode SMM The ability to e...

Page 29: ...t Application Loader for WIN32 CAL 32 an intelligent agent designed to remotely manage software installed on the workstation Utilities Utilities included with the Workstation 5A platform include the C...

Page 30: ...ot partition and DOC partitions respectively See Chapter 3 for a more detailed explanation After the files have been restored the Wipe CF Utility is used to format the CF Card and restart the workstat...

Page 31: ...soft off state where the power supply remains active but delivering minimal power to several key circuits in order to detect a power button press or Wake On Lan event It is not safe to disassemble the...

Page 32: ...han 1 seconds ON NOPOWER Operator The operator presses the power button for more than 4 seconds ON NOPOWER Server Application A server application sends a Wake On LAN command ON ON Operator The operat...

Page 33: ...rm features and century roll over includes 242 bytes of battery backed CMOS RAM Memory 2 SO DIMM Sockets Max 2 GB DDR2 667 Mag Stripe Reader 3 Track ABA compatible operates in MAGTEK and Special modes...

Page 34: ...Workstation 5A Setup Guide Fourth Edition 1 19 What is the WS5A General Specifications Case Material PC ABS Plastic Physical Dimensions See Appendix A Specification Parameters...

Page 35: ...provals Approvals The WS5A meets the following safety and environmental certifications Directive Specification Year Safety EN 60950 1 2006 A11 2006 IEC 60950 1 2005 2005 EMC EN 55022 2006 A1 2007 EN 5...

Page 36: ...n 5A System Configuration Utility highlights user settings and discusses BIOS Updates and the Windows CE Factory Restore Feature In this chapter The BIOS System Configuration Utility 2 2 Main 2 7 Boot...

Page 37: ...ng the BIOS System Configuration Utility 1 Connect a USB Keyboard to one of the USB ports located on the IO panel 2 Power up or restart the workstation 3 When the BIOS Splash screen shown below appear...

Page 38: ...Summary screen displaying the MICROS BIOS Version and build date as shown in the following pages System Summary BIOS Q1000g The BIOS Version Q1000g System Summary screen is shown below Figure 2 2 BIO...

Page 39: ...System Summary BIOS Q2010g The BIOS Version Q2010g System Summary screen in shown below Figure 2 4 BIOS Q2010g System Configuration Utility Main Screen System Summary BIOS Q2011d The BIOS Version Q201...

Page 40: ...WIN32 Factory Default Settings and Reload SATA WIN32 Factory Default Settings Adds new fields to the ODM Tab WINCE Factory Restore USB WIN32 Factory Restore SATA WIN32 Factory Restore and Enable Passw...

Page 41: ...vigate to the menus containing specific configuration fields and change those fields as required For example the ODM tab contains all Workstation 5A related configuration fields To navigate use the he...

Page 42: ...ation of computations performed on a PC processor For each physical core the operating system addresses two virtual or logical processors and shares the workload between them when possible This allows...

Page 43: ...al SATA disk drive Figure 2 6 BIOS System Configuration Utility Exit Tab Save Restore and Exit Setup From the Exit tab you can choose the boot configuration or save minor changes Save Settings and Res...

Page 44: ...e Boot Device Prioritization fields to boot from a USB Hard Drive containing Windows Embedded CE 6 0 R3 Press Enter and Y to proceed Reload USB WIN32 Factory Default Settings Q2010g Q2011d This select...

Page 45: ...S This section contains the device boot order for the supported operating systems The BBS is populated based on the Factory Default settings selected from the Exit tab Each default is listed below Not...

Page 46: ...WIN32 OS such as POSReady 2009 from the optional SATA Solid State Drive 0 SATA drive 0 INTEL SSDSA2M040G2GC SATA Drive Brand Model 1 IDE 0 Pri Master CF Card Optional not installed 2 PXE Boot 3 None...

Page 47: ...he POST screen can be used to configure many aspects of the BIOS Power On Self Test including how the system memory is tested during start up Normally memory testing is held to a minimum in order to d...

Page 48: ...dows 98 and Windows NT It also allows the IRQ and DMA Direct Memory Access resources to be individually reserved for Plug and Play The Advanced Configuration and Power Interface ACPI replaces PnP in r...

Page 49: ...ity SIO Tab The table below describes the WS5A COM Port assignments and identifies the IO Panel Connector The resources apply to all System Board Revisions and BIOS Versions PORT I O Addr IRQ SIO Port...

Page 50: ...e Fourth Edition 2 15 Workstation 5A BIOS Features Features The BIOS Features tab enables or disables features such as ACPI APM PnP MP quick boot options and Intel VT Figure 2 11 BIOS System Configura...

Page 51: ...se Technology component of the BIOS The menu consists of several parts with the most basic user oriented options located at the top and the more technical parameters located in the lower sections Figu...

Page 52: ...ion Utility Misc Tab Cache Control We recommend that you do not change this setting Keyboard Control Several keyboard configuration settings can be found in this section Keyboard Numlock LED Enables t...

Page 53: ...eo tab allows some video configuration of the workstation including selecting the default boot display device Figure 2 14 BIOS System Configuration Utility Video Tab Display Device Configuration The D...

Page 54: ...ernal USB port control Cash Drawer voltage selection and recovery options The ODM Tab for BIOS Version Q1000g is shown in Figure 2 15 below Figure 2 15 BIOS ODM Menu Version Q1000g and Q1010m BIOS Ver...

Page 55: ...Settings and Restart Selecting Alternate removes power from the USB Hard Drive header J8 to allow the workstation to boot from a USB Thumb Drive connected to the IO panel for purposes of performing a...

Page 56: ...WINCE Factory Restore in situations when a USB keyboard is attached To start WINCE Factory Restore set this field to Enabled then return to the Exit Menu and select Save Settings and Restart Chapter...

Page 57: ...to Disabled Save Settings and Restart MICROS recommends the password requirement remain enabled to prevent accidental or malicious use of WINCE Factory Restore or the CF Recovery Card Compact Flash Q...

Page 58: ...eld defines how the workstation recovers from a power failure The default selection of Last State causes the workstation to return to the previous power state before AC power failed For example if the...

Page 59: ...on 5A Setup Guide Fourth Edition Workstation 5A BIOS AdvancedCPU AdvancedCPU This read only screen displays the CPU Model Stepping and Microcode Version Figure 2 19 BIOS System Configuration Utility A...

Page 60: ...e performs a file size check then generates a checksum against the binary file The generated checksum is compared to the value stored in the QCHKSUM LOG file If the checksum match the BIOS update proc...

Page 61: ...e to update the BIOS on WIN32 configurations of the Workstation 5A The QUNTICO LOG and QCHKSUM LOG files used by the Platform Update Utility are not required If a BIOS upgrade is required it is posted...

Page 62: ...le called NK BIN Partition 2 is also hidden and contains the factory restore files This includes a duplicate set of platform files configuration files and folders utilities and the NK BIN file Partiti...

Page 63: ...2 28 Workstation 5A Setup Guide Fourth Edition Workstation 5A BIOS Win CE Factory Restore...

Page 64: ...e workstation provides a description of the system board and peripheral boards shows how to install available options In this chapter Disassembling the Workstation 5A 3 2 System Board Components 3 7 S...

Page 65: ...ot to rest the unit in the casing o The cover is held in place by a pair of captive screws assessable from the underside of the unit as shown in Figure 3 1 3 Loosen the captive screws as shown in the...

Page 66: ...op of Figure 3 2 5 Lift up the front of the LCD Touchscreen assembly and place it to the right of the base If you encounter resistance check for a cable snagged under the Mini PCI connector Figure 3 2...

Page 67: ...hts and is shown on the left side of the Figure below The optional capacitive touchscreen interface connectors are shown on the left Figure 3 3 WS5A LCD Touchscreen Connectors w CCFL Backlights o The...

Page 68: ...rd powers the LED Backlights through connector J31 On the majority of WS5A system boards configured to drive the CCFL inverter the DC to DC converter components and connector J31 are not installed o T...

Page 69: ...rkstation 5A uses the same plastic base mag card reader assembly and speakers as the original Workstation 5 However the chassis Intel Atom based System Boards SO DIMMs DMA Enabled CF Riser Card power...

Page 70: ...cludes Revisions C D and F System Boards The Revision E System Board did not enter production Revision F System Boards will appear in mid 2012 WS5A System Board Primary Components Revisions C D and F...

Page 71: ...tem Board Components WS5A System Board Connectors Revisions C and D Please note that J14 is reserved for the IO Panel Powered USB Connection and is not intended for options such as the finger print re...

Page 72: ...Board Components WS5A System Board Jumpers and Switches Revisions C D and F The Figure below applies to all System Board Revisions See the page 3 12 for details and a procedure for using the CMOS clea...

Page 73: ...WS5A System Board Connectors Revision F The Figure below displays System Board Revision F Connectors Figure 3 9 WS5A System Board Revision F Connectors J1 the backlight connector now supports either C...

Page 74: ...o the pins 1 2 3 Connect a USB Keyboard and AC power cable to the workstation 4 If the workstation does not start when the AC power cable is connected press and release the power button When the Blue...

Page 75: ...Diagrams System Block Diagrams Workstation 5A Block Diagram CCFL Backlights Resistive Touchscreen Figure 3 10 shows a block diagram of the Workstation 5A with CCFL backlights and resistive touchscreen...

Page 76: ...ram LED Backlights Resistive Touchscreen A small number of WS5As shipped with LED backlights and resistive touchscreen as shown in the diagram below This configuration uses a System Board DC to DC con...

Page 77: ...and LVDS video Intel Atom N450 General Features Single Core Speed 1 6GHz 32kB instruction cache and 24 kB write back data cache 512K L2 Cache Hyper Threading Technology 2 threads Micro FCBGA8 package...

Page 78: ...Graphics Processing Unit GPU The GPU is composed of engines planes pipes and ports The GPUs 3D 2D engines are fed with data through the integrated memory controller The outputs of the engines are surf...

Page 79: ...y software to operate normally Features Supports two lanes in each direction 100MHz reference clock 2 5Gb s point to point DMI Interface to the ICH8M Raw bit rate on the data pins of 2 5Gb s resulting...

Page 80: ...0 Ports The ICH8M contains two Enhanced Host Controller Interface EHCI host controllers supporting up to ten USB 2 0 high speed ports The ICH8M contains port routing logic that determines whether a US...

Page 81: ...et IDE The ICH8M contains a single IDE channel supporting up to two ATAPI compatible devices The IDE interface supports PIO IDE transfers up to 16 MB sec and Ultra ATA transfers up to 100MB sec with f...

Page 82: ...o four external PCI Bus masters One PCI interface is used to support the Mini PCI connector CN12 The Mini PCI connector supports a WiFi card and modem Ethernet The ICH8M integrates a Gigabit Ethernet...

Page 83: ...12V or 24V cash drawer voltages LPC The ICH8M implements an LPC interface based on the Low Pin Count Interface Specification Revision 1 1 Several devices are connected to the LPC Bus CPLD U75 Super IO...

Page 84: ...reen assembly carries over from the original Workstation 5 It is composed of a 15 resistive touch surface bracket 15 AUO LCD with CCFL Backlights LCD Plate and Backlight Inverter Board Figure 3 13 The...

Page 85: ...del The jumper settings are routed through the interface cable to GPIO ports on the system board At start up the WS5A WINCE API reads the GPIO to determine the type of panel installed Once the API det...

Page 86: ...m Board Description LCD Touchscreen Assembly Optional Capacitive Touchscreen The Capacitive Touchscreen option adds the Capacitive Interface Board and Interface Cable as shown in the Figure below Figu...

Page 87: ...tation 5A internal components and options Magnetic Card Reader The Workstation 5A uses the same Magnetic Card Reader Assembly as the original Workstation 5 The reader head is mounted to a plastic chan...

Page 88: ...d 2 Refer to Figure 3 17 below Use a pair of needle nose pliers to pinch the stand off and remove the device Figure 3 17 Removing the USB Hard Drive Installation 1 Figure 3 18 below points out the loc...

Page 89: ...pproved for use in the WS5A Figure 3 19 Approved SO DIMMs for the WS5A Note The Windows Embedded CE 6 0 R3 image is limited to 512MB of main memory If more than 512MB is installed it is not used SO DI...

Page 90: ...t and insert the device into the socket at a 30 angle When fully inserted in the socket press down to lock the retention clips into place To remove an SO DIMM release the retention clips on each end o...

Page 91: ...U intervention Figure 3 22 DMA Enabled CF Riser Card Approved DMA Enabled CF Cards Approved DMA Enabled CF Cards are shown in the Table below Figure 3 23 Approved CF Cards Size MICROS P N Description...

Page 92: ...d used on the original Workstation 5 can also be used the Workstation 5A The kit has been modified by adding a new adhesive backed antenna Refer to MD0013 005C for installation instructions SparkLAN M...

Page 93: ...e and produces an error message 2 Enter the System Configuration Utility as described in Chapter 3 and select the Boot Tab 3 In the Boot Device Prioritization BBS list scroll to the first entry USB Ha...

Page 94: ...ete assembly ready to install 1 Remove the AC power cable from the unit 2 Place a towel or soft cloth on your work surface to protect the touchscreen glass then place the workstation face down on this...

Page 95: ...D Customer Display to the USB6 connector could damage the Customer Display and or USB6 port Figure 3 26 Installing the Integrated Customer Display 6 Return the unit to the normal operating position co...

Page 96: ...ng hardware 1 Use the base as a template to locate the mounting holes in the counter surface 2 After mounting the pole and base to the counter surface route the extension cable through the pole and co...

Page 97: ...Door Reinstall the door and make sure it is closed 3 Orient the Prot g with the speakers facing towards the bottom of the workstation then insert the bracket in the IO door cut out Slide the Prot g an...

Page 98: ...e pole as a template attach to the counter surface Appendix A provides details of the hole dimensions 2 Route the Prot g Display Cable through the pole and through the stand if used to the IO Panel o...

Page 99: ...ps in Figure 3 30 to attach the pole to the bracket run the interface cable and attach the LCD to the pole 4 Rotate the LCD to the desired position and use a 1 5mm hex wrench to tighten the set screw...

Page 100: ...top cover place it directly behind the base Run the interface cable on either side left side is preferred of the chassis but make sure it stays below the chassis lip Connect the cable to USB Option H...

Page 101: ...nnect the LED backlights and resistive touchscreen Revision D Figure 3 33 Installing LCD Touchscreen Cables LED Resistive Touchscreen o The Figure below shows how to connect the optional capacitive to...

Page 102: ...below shows the tabs at the rear of the assembly and the slots in the base Insert the tabs into the base 5 Before closing make sure the LVDS cable is positioned as shown below and the backlight cable...

Page 103: ...ling the top cover examine the gasket to ensure it is seated in the groove Install the cover by attaching it to the hooks at the rear of the base then rotate the front of the cover downward to snap in...

Page 104: ...ng and Operating the Workstation 5A This chapter describes the environmental requirements for the workstation describes the IO Panel and covers the basic operational procedures In this Chapter Care an...

Page 105: ...ats is recommended An anti static mat incorporates a grounding clip with a cable that can be attached to earth ground Proximity to Foreign Materials Spilled liquids can cause damage to the circuits in...

Page 106: ...installed in accordance with the appropriate MICROS Site Preparation Guide Cleaning the Display Cabinet and Magnetic Stripe Reader Recommendations for cleaning the Cabinet Magnetic Stripe Reader and...

Page 107: ...kstation 5A Setup Guide Fourth Edition Installing and Operating the Workstation 5A The IO Panel The IO Panel Figure 4 1 displays the Workstation 5A IO Panel connectors Figure 4 1 The Workstation 5A I...

Page 108: ...ports on the Workstation 4 4 LX KWS4 and KW270 It contains both an RS422 or RS232 Interface This port is configured through application software as a full duplex RS422 interface to support IDN printin...

Page 109: ...Display into the USB6 connector Figure 4 2 USB6 Connector Cover VGA WIN32 operating systems include support for dual independent display allowing the desktop to be extended across two monitors For wo...

Page 110: ...n integrated isolation transformer as well as a link status and network activity indicators The interface is fully IEEE 802 3 compliant CF Express Card This slot houses the DMA Enabled CF Daughter Car...

Page 111: ...pplication on the CF card and Windows Embedded CE 6 0 places the persistent registry on this storage medium How to use the Compact Flash CF Card If you have not used a CF card take a moment to familia...

Page 112: ...on the card and remove it from the socket Figure 4 4 Removing the CF Card Disabling the CF Card BIOS Version Q2011d or later adds the ability to disable the CF Interface for security purposes This is...

Page 113: ...ittle force is required to insert the card Push the card into the socket until only a few millimeters are visible Figure 4 5 Installing the CF Card Customer Display This connector supports either a st...

Page 114: ...Close the compartment door Figure 4 6 Installing the Optional Printer Power Supply 2 Refer to Figure 4 7 and prepare to mount the workstation on the stand Connect the AC Power Cable supplied in the Wo...

Page 115: ...Workstation 5A Installation Figure 4 7 Preparing to attach the Workstation to the optional Stand 3 Mount the cabled workstation by placing the rubber feet into the receptacles on the adjustable stand...

Page 116: ...or additional security a pair of 17mm screws are provided in the Adjustable Stand loose parts kit to secure the knobs in the locked position Make sure the knobs are in the Secured position and use the...

Page 117: ...Magnetic Card Reader and the Operator Touchscreen LCD Figure 4 10 Workstation 5A Operator Features Operator LCD and Touchscreen The Operator LCD is a 15 Active Matrix LCD with a resolution of 1024x768...

Page 118: ...screen shown in the Figure below The MICROS BIOS Version is displayed in the upper left corner of the screen As the BIOS Splash Screen displays the unit is performing a Power On Self Test POST of the...

Page 119: ...sage NK BIN not found on CF appears on the first line This message is produced by FlashCE and is a simply a statement that the upgrade file is not present If the NK BIN file is present on the CF Card...

Page 120: ...ut Down Windows dialog box appears Select Shut Down from the pull down menu and tap OK to shut down the unit If the Shut Down Windows dialog box does not appear Tap Start Shut Down Shut Down then OK S...

Page 121: ...ct When the server name is complete press Enter to proceed 5 Select your Workstation 5A from the list Double click the entry Each workstation is pre programmed with a workstation name IP address and o...

Page 122: ...TAB to focus the edit box and press TAB again to focus the SEARCH button Pressing TAB a third time brings the list into focus use the UP DOWN keys to select then TAB to the SAVE button and press ENTER...

Page 123: ...backlights Instructions for modifying the default settings and using a custom logo can be found below Procedure 1 From the desktop Touch Start Control Panel Screen Saver The Screen Saver Properties w...

Page 124: ...ts button Backlight Control This section controls the LCD CCFL backlights to extend the life of the backlight tubes The default is to turn off the backlights twenty minutes after the screen saver enga...

Page 125: ...below to the six digit number that appears in the Key field and enter the results with the on screen keyboard as described below Digit 1 x Digit 2 Digit 4 Digit 6 Password In the example above the ke...

Page 126: ...illustration All USB ports are enabled when the workstation is shipped Figure 4 16 USB Port Control Tab To disable a USB port touch the box to remove the check mark from the corresponding field Or to...

Page 127: ...he reader head Figure 4 17 Using the Magnetic Card Reader Tips for using Magnetic Cards Magnetic cards should always be kept dry and away from magnets or sharp objects that could damage the encoded in...

Page 128: ...e position sitting or standing that the workstation is normally used Face the Touchscreen directly If the workstation is on a stand adjust it to the optimum viewing angle Windows Embedded CE 6 0 1 Fro...

Page 129: ...CF are available the Recovery Button or the ODM tab in the BIOS System Configuration Utility Recovery Button The Recovery Button is a recessed SPST switch accessed from the base of the workstation It...

Page 130: ...n The Workstation 5A Recovery Button is accessed from the bottom of the unit as shown below 1 Power off the workstation If using BIOS Version Q1010m Q2010g or Q2011d connect a USB Keyboard to enter th...

Page 131: ...e Wait Windows CE Factory Restore takes from three to five minutes to complete then formats the CF Card The Workstation 5A restarts and boots to Windows CE in the out of box state BIOS Q2010g and Q201...

Page 132: ...Drives Dongles Thumb Drives or Sticks connected to the IO Panel USB Ports 4 Use the power button to start the workstation 5 Observe the LCD and press the Recovery Button when the Blue BIOS splash w M...

Page 133: ...Starting Windows Pre boot Environment If an error box appears stating that Recovery detected 2 USB hard drives installed on the system Please remove any additional USB Flash Drives and restart recover...

Page 134: ...three to five minutes to complete then formats the CF Card The Workstation 5A restarts and boots to Windows CE in the out of box condition Win32 Factory Restore The primary storage device can be the...

Page 135: ...en save and restart 0 SATA drive 0 1 IDE 0 Pri Master CF Card 2 PXE Boot 3 None Pre Boot Menu BIOS Q1010m Only This BIOS Version moves WINCE and WIN32 Factory Restore to a Preboot Menu shown below Fig...

Page 136: ...he Del key to enter the System Configuration Utility 3 Navigate to the ODM Special Configuration Menu and set the Win32 Factory Restore field to Enabled 4 Select the Exit tab then Save Settings and Re...

Page 137: ...sk Drive 1 With a USB Keyboard attached and the POSReady 2009 Recovery CF installed in the CF Daughter Card power up the workstation with the power button 2 When the Blue Splash Screen appears press t...

Page 138: ...s displays the Blue Splash screen then requests a Password if enabled 4 Type Quant1c0 and press Enter The workstation restarts and displays the message Factory Restore in Progress Please Wait Windows...

Page 139: ...prompts appear including Loading RAM Disk Image followed by a Starting Windows Pre boot Environment After a brief time a Command Window appears followed by Loading Recovery Script Ghost32 starts If t...

Page 140: ...ight the Enable Password For Restore field and select Disabled Select the Exit tab then Save Settings and Restart Enter then Y to restart the workstation Note Using the WINCE USB WIN32 or SATA WIN32 d...

Page 141: ...ady Recovery CF generates this error message if 1 A USB Thumb or Flash Drive remains attached to the IO panel and a USB Hard Drive is attached to J8 2 The WS5A contains both an optional SATA disk driv...

Page 142: ...Diagnostics This chapter includes basic troubleshooting procedures for the unit and describes how to use the Diagnostics Utilities In this chapter Basic Troubleshooting 5 2 Workstation 5A Diagnostics...

Page 143: ...econd The Operator LCD remains blank after 30 seconds Possible missing or defective SO DIMM or Defective system board Re seat SO DIMM 0 Do not use 2GB SO DIMMs See Page 3 27 for approved SO DIMM confi...

Page 144: ...ia Press any key when ready or Non System disk or disk error Replace and press any key when ready Boot Defaults configured for WIN32 Enter the system configuration utility go to the Exit tab and selec...

Page 145: ...ts of the hardware and supported peripherals Running the Windows CE Diagnostics Utility For Windows Embedded CE 6 0 configurations the utility is located in the DOC Utilities folder 1 From the Desktop...

Page 146: ...is field DHCP Server Address This field displays the DHCP Server Address when the workstation operates in DHCP based network IP Address Dynamic This field displays the IP Address when the workstation...

Page 147: ...S splash screen at start up CAL Version Displays the current Client Application Loader CAL Version WinCE Version Reports Windows Embedded CE 6 0 Version Information CPLD Version The Workstation 5A sys...

Page 148: ...Operator LED blink rate when the operating system is running At start up the LED blinks then turns solid Blue as the operating system starts and loads this driver LPE2PROM DLL Version This driver prov...

Page 149: ...ng purposes Recovery Image Info Touch this button to determine the version of the factory restore files and the number of times the feature has been activated The information is contained in file call...

Page 150: ...following formula to the six digit number that appears in the Key field Digit 1 x Digit 2 Digit 4 Digit 6 Password For example if the Key is 374236 the Password would equal 29 3 x 7 2 6 29 To enter th...

Page 151: ...below to the six digit number that appears in the Key field Digit 1 x Digit 2 Digit 4 Digit 6 Password In the example above the key field displays 212188 2 x 1 1 8 11 3 To enter the password using the...

Page 152: ...shown in the IO Back Panel illustration All IO Panel USB ports are enabled when the workstation is shipped Figure 5 6 IO Panel USB Port Identification To disable a USB port tab the corresponding box t...

Page 153: ...Utility updated to Version 1 7 This version adds the processor type and speed to the System Info tab Figure 5 7 WIN32 Diagnostics Utility System Information Screen The WS5A Diagnostics Utility is deri...

Page 154: ...any registry changes made during testing Erase Compact Flash This selection removes all files from the CF card including the persistent registry folder the POS application and SAR totals if present F...

Page 155: ...5 14 Workstation 5A Setup Guide Fourth Edition WS5A Diagnostics Wipe Compact Flash WCF Utility WINCE Only...

Page 156: ...orkstation 5A Low Profile w Prot g Customer Display A 3 WS5A on Adjustable Stand with Rear LCD Customer Display A 4 Workstation 5A on Adjustable Stand w 6 LCD Pole Display A 5 Workstation 5A on Adjust...

Page 157: ...A 2 Workstation 5A Setup Guide Fourth Edition Equipment Dimensions Workstation 5A Low Profile Workstation 5A Low Profile...

Page 158: ...Workstation 5A Setup Guide Fourth Edition A 3 Equipment Dimensions Workstation 5A Low Profile w Prot g Customer Display Workstation 5A Low Profile w Prot g Customer Display...

Page 159: ...A 4 Workstation 5A Setup Guide Fourth Edition Equipment Dimensions WS5A on Adjustable Stand with Rear LCD Customer Display WS5A on Adjustable Stand with Rear LCD Customer Display...

Page 160: ...Workstation 5A Setup Guide Fourth Edition A 5 Equipment Dimensions Workstation 5A on Adjustable Stand w 6 LCD Pole Display Workstation 5A on Adjustable Stand w 6 LCD Pole Display...

Page 161: ...A 6 Workstation 5A Setup Guide Fourth Edition Equipment Dimensions Workstation 5A on Adjustable Stand w Prot g Customer Display Workstation 5A on Adjustable Stand w Prot g Customer Display...

Page 162: ...Workstation 5A Setup Guide Fourth Edition A 7 Equipment Dimensions Workstation 5A on Adjustable Stand and Prot g on 6 Pole Workstation 5A on Adjustable Stand and Prot g on 6 Pole...

Page 163: ...A 8 Workstation 5A Setup Guide Fourth Edition Equipment Dimensions LCD Pole Display LCD Pole Display...

Page 164: ...Workstation 5A Setup Guide Fourth Edition A 9 Equipment Dimensions Prot g Customer Display on 6 Pole Prot g Customer Display on 6 Pole...

Page 165: ...A 10 Workstation 5A Setup Guide Fourth Edition Equipment Dimensions Cash Drawers Cash Drawers...

Page 166: ...pages that follow you will find diagrams of the Workstation 5A I O Panel connectors system board connectors and commonly used hook up cables A description of how each cable or connector is used is pro...

Page 167: ...figured through the POS application IDN Port IDN Printers The most popular configuration of the IDN Port is the RS422 based IDN mode Figure B 1 shows the pin out for this configuration Figure B 1 IDN...

Page 168: ...N 300319 102 to convert this port to a DB9 connector Figure B 2 IDN Port Configured for RS232 COM 2 and COM 5 The Workstation 5A includes two modular COM ports COM2 and COM5 Each are full featured RS...

Page 169: ...r and Cable Diagrams IO Panel Connectors RS232 Connector A single DB9F RS232 connector assigned to COM1 is provided The pin out is shown below Figure B 4 DB9 RS232 Connector Diagram Cash Drawer 1 and...

Page 170: ...tion B 5 Connector and Cable Diagrams IO Panel Connectors Remote Customer Display Connector This port supports either the 2x20 VFD customer display or the graphics based LCD customer display Figure B...

Page 171: ...Board Connectors This section details connectors located on the Workstation 5A system board Magnetic Stripe Interface The internal magnetic card reader connector is CN13 located on the system board Th...

Page 172: ...sed with the Workstation 5A IDN Port RS232 Cables Figure B 8 displays a cable that includes the RS232 signals from the IDN Port to a DB9 male connector This cable is available from MICROS by ordering...

Page 173: ...LCD based Customer Display includes two cable assemblies The function of each cable is detailed in the following pages LCD Customer Display Housing Interface Cable The LCD Customer Display Housing con...

Page 174: ...N connector on the Workstation 5A I O panel through the pole to mate with the cable from the LCD Customer Display Housing Cable shown in Figure B 11 Figure B 12 Remote Pole LCD Customer Display Assemb...

Page 175: ...and Cable Diagrams Hook up Cables Ethernet Figure B 14 shows a diagram of a standard Cat 5 Ethernet hook up cable This cable would be connected from a workstation or server to the system hub Figure B...

Page 176: ...iagram of a typical Category 5 or later hook up cable with the transmit receive cross over pinning implemented This cable can be used when only two devices must be connected For example it can be used...

Page 177: ...B 12 Workstation 5A Setup Guide Fourth Edition Connector and Cable Diagrams Hook up Cables Cash Drawer Extension Cable...

Page 178: ...against such interference when operated in a commercial environment Operation of this equipment in a residential area is likely to cause interference in equipment in which case the user at his own ex...

Page 179: ...lement sur le Brouillage Radio lectrique Idict par le Minist re des Communications du Canada Caution Changes or modifications not expressly approved by the party responsible for compliance could void...

Page 180: ...t Fx where x 4 5 or 6 to open another terminal window 2 Log in as possupport user 3 Type startd to open the Universal Diagnostic Utility Available Diagnostics System Information LCD Display Customer D...

Page 181: ...ord of logged in user FIND LINUX IMAGE VERSION INFORMATION cat etc micros release FIND NETWORK ADDRESS OF DEVICE ifconfig ifconfig FIND NETWORK ADDRESS OF DEVICE ip ip addr CHECK NETWORK STATUS nmcli...

Page 182: ...k l CONNECT A USB DRIVE TO DEVICE mount sudo mount dev sdb1 mnt DISCONNECT A USB DRIVE FROM DEVICE umount sudo umount dev sdb1 mnt EDIT A TEXT FILE nano nano webconfig txt RESTART THE DEVICE reboot re...

Page 183: ...er clip to hold down the recovery button on the bottom of the workstation 5 While holding down the recovery button press and hold the power button for 1 second and then release both buttons to begin t...

Reviews: