2-27
D
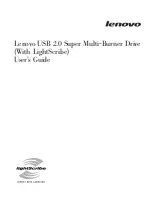
Solderless Terminal Size
The use of solderless terminals for the control circuit terminals is recommended for the reliability and
ease of connection.
Note
Make sure that the wire size is 0.5 mm
2
when using the following solderless terminal.
1.0 dia.
2.6 dia.
Model: Phoenix Contact’s A1 0.5-8 WH
(Size: mm)
D
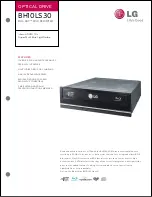
Wiring Method
1. Loosen the terminal screws with a thin-slotted screwdriver.
2. Insert the wires from underneath the terminal block.
3. Tighten each terminal screw firmly to a torque specified in the previous tables.
Note 1.
Always separate the control signal line from the main circuit cables and other power cables.
Note 2.
Do not solder the wires to the control circuit terminals. The wires may not contact well with the
control circuit terminals if the wires are soldered.
Note 3.
The end of each wire connected to the control circuit terminals must be stripped for approxi-
mately 5.5 mm.
Note 4.
Connect the shield wire to the ground terminal of the 3G3JG. Do not connect the shield wire to
the device side being controlled.
Note 5.
Be sure to insulate the shield wire with tape so that the shield wire will not come into contact
with other signal wires or equipment.
Terminal block
Thin-slotted screwdriver
Strip the end for approximately
5.5 mm if no solderless
terminal is used.
Wire
Solderless terminal or
wire without soldering.
Note
Applying excessive torque may damage
the terminal block. If the tightening torque
is insufficient, however, wires may dis-
connect.
Design
Chapter 2
Summary of Contents for SYSDRIVE 3G3JV-A4002
Page 1: ...USER S MANUAL SYSDRIVE 3G3JV Compact Simplified Inverters Cat No I528 E1 04...
Page 3: ...USER S MANUAL Compact Simplified Inverter SYSDRIVE 3G3JVSERIES...
Page 16: ......
Page 20: ...Chapter 1 Overview 1 1 Function 1 2 Nomenclature 1...
Page 26: ...Chapter 2 Design 2 1 Installation 2 2 Wiring 2...
Page 57: ...Chapter 3 Preparing for Operation and Monitoring 3 1 Nomenclature 3 2 Outline of Operation 3...
Page 65: ...Chapter 4 Test Run 4 1 Procedure for Test Run 4 2 Operation Example 4...
Page 216: ...Chapter 10 List of Parameters 10...
Page 229: ...Chapter 11 Using the Inverter for a Motor 11...