background image

d-Color MF552/452/362/282/222

3-5

3.2

Quick installation of the fax driver

3

Installation procedure

Install the fax driver on the PC by using the installer.

0

You need to have the administrator privileges to perform this task.

0

Use the DVD-ROM.

1

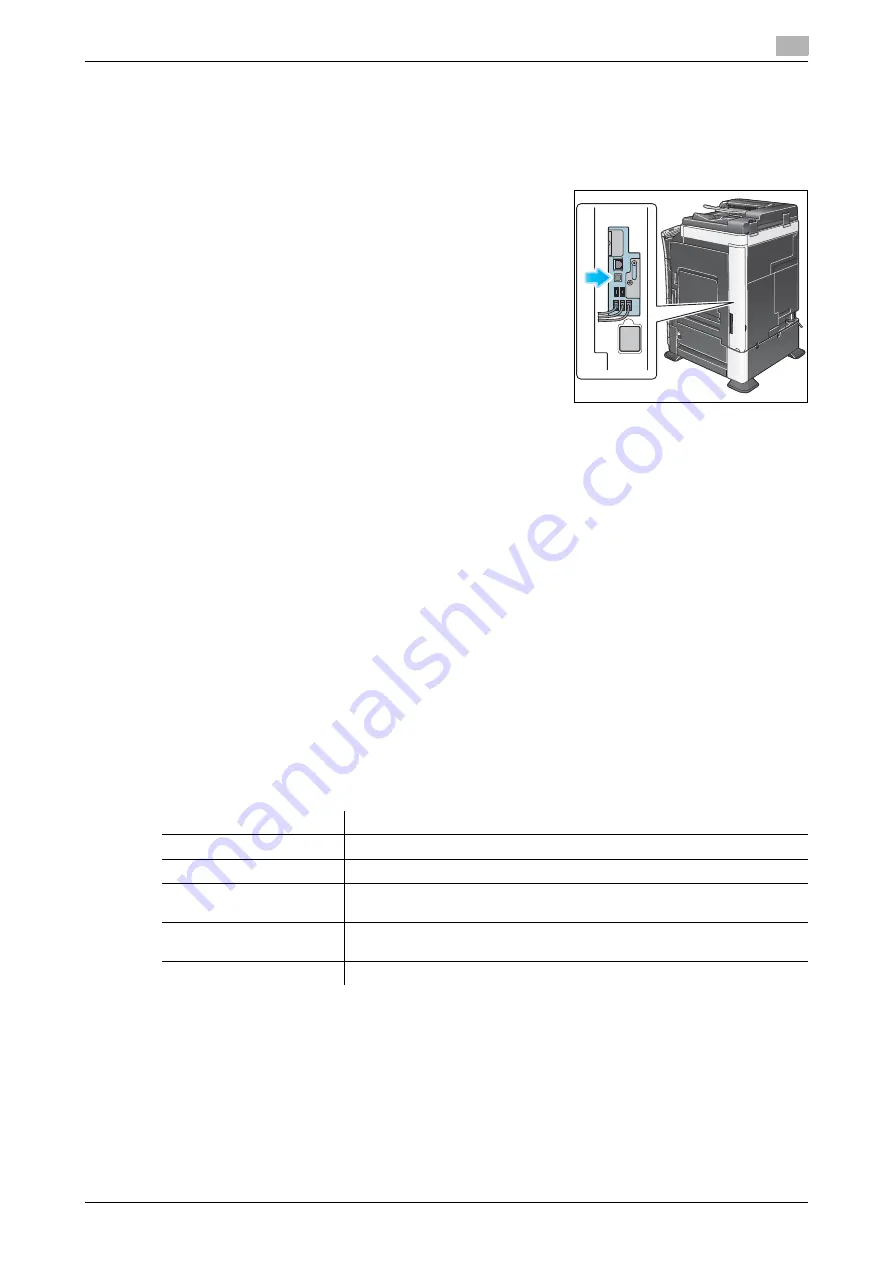
Connect a USB cable to the USB port of this machine.

%

If a wizard screen appears to add new hardware, click 
[Cancel].

2

Mount the DVD-ROM disk on the DVD-ROM drive of the PC.

%

Ensure that the installer starts, then go to Step 3.

%

If the installer does not start, open the printer driver folder on the DVD-ROM, double-click [Set-
up.exe], then go to Step 4.

%

If the [User Account Control] screen appears, click [Continue] or [Yes].

3

Click [Printer Install].

4

Read the license agreement, then click [AGREE].

5

Select [Install printers/MFPs], then click [Next].

Printers being connected via USB ports are detected.

6

Select this machine, then click [Next].

7

Select the fax driver box, then click [Next].

8

Check the components to be installed, then click [Install].

9

Change the printer name or print a test page if necessary, then click [Finish].

The fax driver has been installed on the PC.

d

Reference

Be sure to initialize the fax driver after you have installed it. For details, refer to page 3-6.

Settings

Description

[Review]

Displays the installed components for checking.

[Rename Printer]

Changes this machine name if necessary.

[Property]

Sets the optional operating environment of this machine. For details, refer 
to page 3-6.

[Print Setting]

Changes the default print settings of this machine if necessary. For details, 
refer to page 3-6.

[Print Test page]

Prints a test page to check the normal data transfer if necessary.

Summary of Contents for d-Color MF552

Page 1: ...Code 57 d COLOR MF452 d COLOR MF552 W l l l l l d COLOR MF2 2 d COLOR MF 2 d COLOR MF 2 Operazioni PC FAX PC FAX Operations Arbeiten mit PC Fax Op rations PC FAX Operaciones de PC FAX...

Page 2: ...which could compromise the conformity attested to above as well as the characteristics of the product incorrect electrical power supply incorrect installation incorrect or improper use or use not in...

Page 3: ...n of the fax driver 3 4 Installation flow 3 4 Check the operating system OS version that supports the fax driver 3 4 Changing the installation settings Windows 7 or Windows Server 2008 R2 3 4 Installa...

Page 4: ...the fax driver 6 3 How to display the Properties screen 6 3 Tabs provided by Windows 6 3 6 2 Available Operations with the Configure Tab 6 4 6 3 Available Operations with the Settings Tab 6 6 6 4 Regi...

Page 5: ...1 PC Fax TX...

Page 6: ......

Page 7: ...ta on a Windows PC as if it was printed on this machine This is well suited for an environment where you handle a large number of data files because it is not neces sary to prepare paper documents to...

Page 8: ...onal e64 Edition Windows Server 2003 Standard e64 Edition Windows Server 2003 Enterprise e64 Edition Windows Server 2003 R2 Standard e64 Edition Windows Server 2003 R2 Enterprise e64 Edition Windows V...

Page 9: ...rnet port 1000Base T 100Base TX 10Base T Use the LAN cable to connect this machine to the network This machine supports the 1000Base T 100Base TX and 10Base T protocols The TCP IP LPD LPR IPP and SMB...

Page 10: ...Printer cable connection to this machine 1 1 6 d Color MF552 452 362 282 222 1 3...

Page 11: ...2 Preparation for PC Fax TX via network connection...

Page 12: ......

Page 13: ...PC Fax TX via network connec tion 2 1 Overview Before using the PC Fax TX function you must install the fax driver software on your PC This section explains the preparatory procedure for enabling the...

Page 14: ...et Usually you can use the default settings Use Nor mal Printing Port 9100 unless otherwise specified by the administrator When using the Internet Print IPP Check the IPP operating environment Usually...

Page 15: ...as optional device attachment and authentication settings For details on how to setup refer to User s Guide Print Operations Related setting for the administrator You can use a password to restrict th...

Page 16: ...eration requirements of the fax driver are satisfied by the PC where you install the fax driver 2 Install the fax driver on the PC Install the fax driver on the PC using the installer Mount the DVD RO...

Page 17: ...mal Printing Internet Printing IPP or Secure Printing IPPS Among the connected printers only the target model is automatically detected and displayed If multiple target models are displayed check the...

Page 18: ...led and if you click Obtain Device Information the current information of this machine is obtained and reflected on the Device Option If communication with this machine fails set the Device Option man...

Page 19: ...3 Preparation for PC Fax TX via USB connection...

Page 20: ......

Page 21: ...w 3 3 Preparation for PC Fax TX via USB connection 3 1 Overview Before using the PC Fax TX function you must install the fax driver software on your PC This section explains how to prepare PC Fax TX u...

Page 22: ...nstructions Carry out a test print Carry out a test print and verify that it is acceptable 3 Preparation has finished Check the operating system OS version that supports the fax driver For details on...

Page 23: ...t then click AGREE 5 Select Install printers MFPs then click Next Printers being connected via USB ports are detected 6 Select this machine then click Next 7 Select the fax driver box then click Next...

Page 24: ...btain Device Information the current information of this machine is obtained and reflected on the Device Option If you are using Windows XP Server 2003 set the option manually using Device Option Sele...

Page 25: ...4 PC Fax TX...

Page 26: ......

Page 27: ...etails how to change the default print settings refer to page 2 8 The fax driver provides Favorite Setting to enable quick selection of frequently used print settings For details refer to page 4 13 5...

Page 28: ...Transmission flow 4 4 4 d Color MF552 452 362 282 222 4 1 8 Click OK The document data are faxed via the machine...

Page 29: ...elect fax recipients and change the fax transmission conditions You can open the FAX Transmission Popup screen as follows 1 Open document data using the application software From the File menu select...

Page 30: ...untry The Overseas TX Mode function reduces the transmission speed the infor mation transfer speed for sending a fax This is useful when sending a fax to an area where the communication status is poor...

Page 31: ...isplayed in the Personal Information list For details refer to page 4 17 3 Select a recipient name from the Personal Information list then click Add Recipients You can register up to 100 recipients To...

Page 32: ...1 From the FAX Transmission Popup screen select Add from Address Book 2 Select Address Book List from the list at the left of screen and display the desired recipient in the Ad dress Book list Click t...

Page 33: ...e registered in advance to enable recipient search from the server For details on how to register it refer to page 6 8 1 From the FAX Transmission Popup screen select Add From Phone Book 2 Select the...

Page 34: ...t which matches all of search conditions Select the Search Item and Condition Then enter characters to search then click Add Condition Specify multiple search conditions if necessary then click Search...

Page 35: ...so set this option using the FAX tab of Printing Preferences screen Timer Send Select this check box to set a time to send a fax The fax is automatically sent at the specified time Reflect Current Tim...

Page 36: ...add a cover sheet to the fax to be sent When you click Settings you can change the cover sheet For details on how to change it refer to page 5 3 Tips If the PC is running on Windows Vista x64 Windows...

Page 37: ...orite settings Set an icon a comment and call options for the favorite settings if necessary Settings Description Name Enter the names of favorite settings Use names that can easily be identified Icon...

Page 38: ...frequently used settings 4 4 14 d Color MF552 452 362 282 222 4 3 4 Click OK The favorite print settings are registered You can select the favorite settings from the Favorite Setting list when sending...

Page 39: ...ckly call the recipient when sending a fax Use the FAX tab of the fax driver to add recipients to a phone book When you use the Phone Book for the first time create a Phone Book file When you use the...

Page 40: ...e uses the ECM based communication by default However if the noise is high the communication may take a little longer than the com munication without using ECM checking If you need to shorten the comm...

Page 41: ...open the phone book next time To open another Phone Book file open the Phone Book Entry screen and select Open from the File menu Saving multiple phone book files can switch between these files to loc...

Page 42: ...ients which meet any of search conditions Enter characters to search then click Search Now The Advanced search displays the recipient which matches all of search conditions Select the Search Item and...

Page 43: ...g this time the recipient is also deleted from the registered group Tips If you directly enter a recipient name and fax number when sending a fax and if you register them by the Register To Phone Book...

Page 44: ...mbining a folder and a group Select Personal List then click Add Folder to create a folder You can also select Add Folder in the Edit menu to create a folder You can move a recipient name from the Per...

Page 45: ...5 Sending options...

Page 46: ......

Page 47: ...ettings screen which is opened when you click Settings Also you can set it in the FAX tab of the fax driver If the PC is running on Windows Vista x64 or Windows Server 2008 x64 you cannot set the FAX...

Page 48: ...scription Standard Use the standard characters to write the standard character string which does not specify the recipient on the cover sheet Details When you write the recipient information on the co...

Page 49: ...tab You can place images such as company s logo and map on the cover sheet BMP format can be specified Select the Zoom check box to zoom an image Set a position to add an image using X and Y options...

Page 50: ...unication cost You can send up to 20 faxes by timer transmission Tips When sending a fax using a timer make sure that the time set in the computer matches that set in this machine If the current time...

Page 51: ...communications are sent with enhanced security Tips The destination fax needs to have the F code function When sending a confidential fax you need to check the recipient s Confidential User Box numbe...

Page 52: ...ax to all destinations This is useful for broadcasting to distant locations Tips The destination machine the relay station must have the F code function When using the relay distribution you need to c...

Page 53: ...ine discards these jobs automatically Tips A send job that does not have any authentication information refers to a job whose user authentication or account track has not been set correctly in the Con...

Page 54: ...r and send a fax without entering the user name and password When using an external authentication server click Server Setting and select the authentication server If you always use the same user name...

Page 55: ...5 4 Click OK If the PC can communicate with this machine you can click Verify to check the entered authenti cation information Also you can check the authentication information for errors before prin...

Page 56: ...Send a fax with authentication information 5 5 12 d Color MF552 452 362 282 222 5 5...

Page 57: ...6 Fax Driver Settings...

Page 58: ......

Page 59: ...click the Start menu and select Control Panel Hardware and Sound Printer When Control Panel is displayed in Classic View double click Printers In Windows XP Server 2003 click the Start menu then sele...

Page 60: ...rom this machine If the check box is selected the device information is not obtained when this machine is in sleep mode Destination Settings Set the communication method to use to obtain information f...

Page 61: ...inting Preferences screen If you are using the machine from a Windows XP Server 2003 PC via USB connection Obtain Device Information cannot be used Related setting for the administrator You can use a...

Page 62: ...n Account Track settings Verify Authentication settings before printing Select this check box to enable the Verify button in the User Authentication Account Track di alog box Popup Authentication Dial...

Page 63: ...iver Width 3 9 16 to 12 5 8 inches 90 0 to 320 0 mm Length 5 1 2 to 18 inches 139 7 to 457 2 mm Banner sizes available in fax driver Width 8 1 4 to 11 11 16 inches 210 0 to 297 0 mm Length 18 to 47 1...

Page 64: ...he Properties screen of the fax driver For details on how to open the Properties screen refer to page 6 3 2 Open the Settings tab and select Setting Up LDAP 3 Click Add and enter the LDAP server infor...

Page 65: ...gs Change the connection port number of the LDAP server if necessary Usually you can use the default settings Select the Use SSL check box to use the SSL communication Search tab Set the search base a...

Page 66: ...ers In Windows Vista Server 2008 click the Start menu and select Control Panel Hardware and Sound Printer When Control Panel is displayed in Classic View double click Printers In Windows XP Server 200...

Page 67: ...ite Setting refer to page 4 13 View Displays the page layout sample with the current settings so that you can check the transmission fax image Printer Information Click this button to start Web Connec...

Page 68: ...is automatically sent at the specified time Reflect Current Time Reflects the current time of the PC onto the Send Time You can also set this option in the Fax Mode Setting Details of FAX Transmissio...

Page 69: ...e to its limited performance Settings Description Original Orientation Specify the orientation of the original created in application software If the setting in the fax driver differs from that specif...

Page 70: ...For example when you select 2 e 2 one page of the original is divided and printed onto four sheets When you join the printed sheets you will create a large poster As necessary click Combination Detai...

Page 71: ...In the Stamp Composition tab you can set the composition of the watermark on the original Settings Description Watermark Select this check box to print a watermark text stamp on the original Al so se...

Page 72: ...the Quality tab you can set a font process on the original when it is sent by fax Settings Description Font Settings Specify how to process texts Select the type bitmap or outline of the fonts to be...

Page 73: ...d Color MF552 452 362 282 222 6 17 6 11 Available Operations with the About tab 6 6 11 Available Operations with the About tab Open the About tab and you can check the fax driver version...

Page 74: ...Available Operations with the About tab 6 6 18 d Color MF552 452 362 282 222 6 11...

Page 75: ...7 Delete the fax driver...

Page 76: ......

Page 77: ...restart the computer appears click OK Now the fax driver has been deleted Delete the fax driver using the installer If you have installed the fax driver using the installer you can use the installer...

Page 78: ...7 7 4 d Color MF552 452 362 282 222...

Page 79: ...you need and the instructions for handling the waste correctly for example location and times of the waste collection centres etc b When you purchase a new device of ours give a used device similar t...

Page 80: ...of Information Technology Equipment Class B EN 61000 3 2 2006 A1 2009 A2 2009 Electromagnetic Compatibility EMC Part 3 Limits Section 2 Limits for harmonic current emissions equipment input current 1...

Page 81: ...ce characteristics of Information Technology Equipment Class B EN 61000 3 2 2006 A1 2009 A2 2009 Electromagnetic Compatibility EMC Part 3 Limits Section 2 Limits for harmonic current emissions equipme...

Page 82: ...haracteristics of Information Technology Equipment Class B EN 61000 3 2 2006 A1 2009 A2 2009 Electromagnetic Compatibility EMC Part 3 Limits Section 2 Limits for harmonic current emissions equipment i...

Page 83: ...radio interference characteristics of Information Technology Equipment Class B EN 61000 3 2 2006 A1 2009 A2 2009 Electromagnetic Compatibility EMC Part 3 Limits Section 2 Limits for harmonic current...

Reviews: