3.
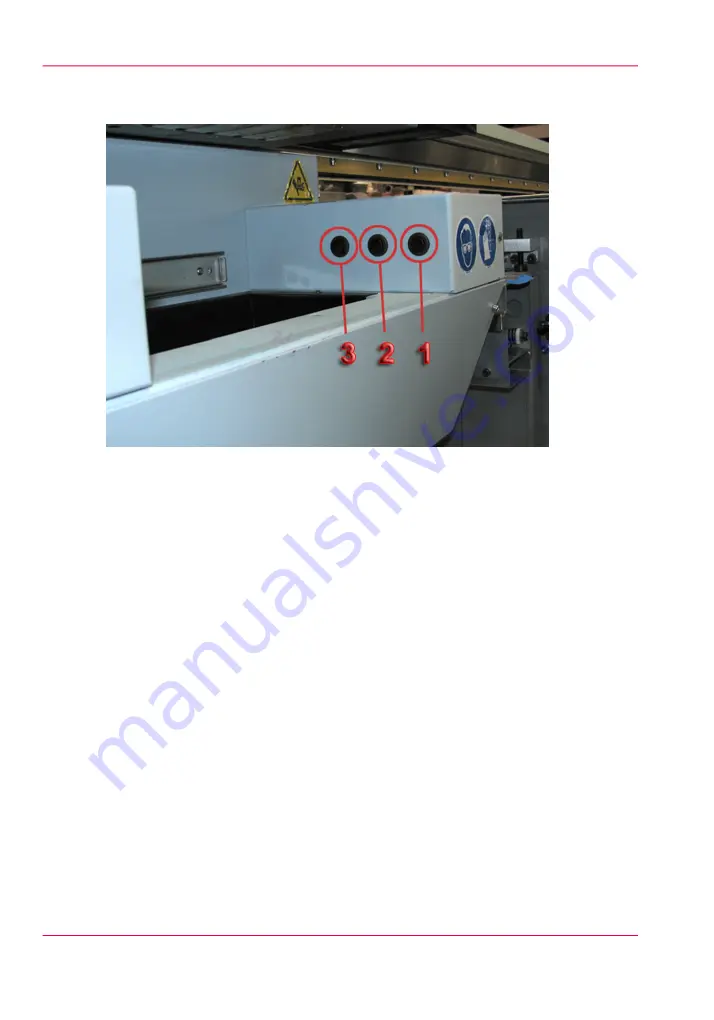
Press the Purge button (switch 1 on the right) to initiate an ink purge. Repeat this step
until the ink status window shows an Ink Low condition for the target color.
[187] Maintenance Station Buttons
4.
Press the Raise Carriage button (switch 2, middle) and then use the maintenance suction
nozzle to remove any excess ink from the printhead that you purged.
5.
Close the maintenance station door.
6.
In the ink bay reconnect the ink bag coupler of the target ink bag to re-initiate ink fill.
7.
Place a lint-free cloth below the bleed tube of the target ink filter to catch any ink.
8.
Turn the valve shutoff lever so that it is parallel to the bleed tube to open the valve.
9.
Keep the cloth close as you watch the open bleed tube. As soon as you see ink appear in
the open end of the bleed tube, flip the shutoff lever back to the perpendicular closed
position (this may take a few minutes, depending on the amount of air in the filter since
the ink pump is only active for a brief period every 5 seconds). Ignore the residual ink
that is already in the bleed tube.
Final Steps
1.
Check the new filter to make sure there are no ink leaks.
2.
Open any purge valves on the carriage that are still closed.
3.
Use a marker or create a label to record the install date.
4.
Replace the ink filter enclosure cover.
5.
Perform routine printhead maintenance before printing.
6.
Replace the ink filters every 12 months or after consumption of 11 bags (22 liters) of ink.
Chapter 12 - Printer Maintenance
246
How to Change Ink Filters
Summary of Contents for Arizona 180 GL
Page 1: ...Oc Arizona 318 GL 360 GT Oc Arizona 318 GL 360 GT XT Revision A Oc User Manual...
Page 6: ...6 Contents...
Page 7: ...Chapter 1 Introduction...
Page 14: ...Chapter 1 Introduction 14 Product Compliance...
Page 15: ...Chapter 2 Product Overview...
Page 18: ...Chapter 2 Product Overview 18 Printer Specifications...
Page 19: ...Chapter 3 Safety Information...
Page 41: ...Chapter 4 How to Navigate the User Interface...
Page 70: ...Chapter 4 How to Navigate the User Interface 70 Installation and Upgrade Module...
Page 71: ...Chapter 5 How to Operate Your Oc Arizona Printer...
Page 96: ...Chapter 5 How to Operate Your Oc Arizona Printer 96 How to Handle Media...
Page 97: ...Chapter 6 How to Operate the Oc Arizona 360 XT...
Page 104: ...Chapter 6 How to Operate the Oc Arizona 360 XT 104 How to Print With Dual Origins...
Page 105: ...Chapter 7 How to Operate the Roll Media Option...
Page 136: ...Chapter 7 How to Operate the Roll Media Option 136 How to Use Media Edge Protectors...
Page 137: ...Chapter 8 How to Use the Static Suppression Upgrade Kit...
Page 141: ...Chapter 9 How to Work With White Ink...
Page 181: ...149 Parameters Chapter 9 How to Work With White Ink 181 How to Use Media Models...
Page 198: ...Chapter 9 How to Work With White Ink 198 How to Create and Use Quick Sets...
Page 199: ...Chapter 10 Ink System Management...
Page 206: ...Chapter 10 Ink System Management 206 How to Change Ink Bags...
Page 207: ...Chapter 11 Error Handling and Trou bleshooting...
Page 211: ...Chapter 12 Printer Maintenance...
Page 262: ...Chapter 12 Printer Maintenance 262 How to Clean the Rubber Capstan...
Page 263: ...Appendix A Application Information...


