


Chapter 4 - Understanding the Chart Screen
Page 4-24
961 Operations and Reference Manual Rev. D
Adding points to an already displayed route
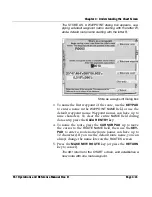
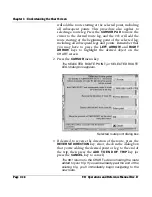
1. At the
CHART
screen, move the cursor to the desired next
point of the route displayed on the
CHART
screen, then
press the
CURSOR
menu key.
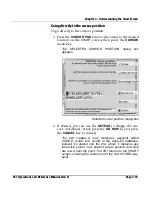
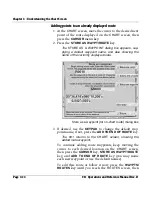
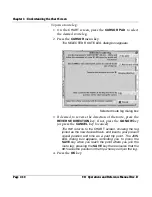
2. Press the
STORE AS WAYPT/ROUTE
key.
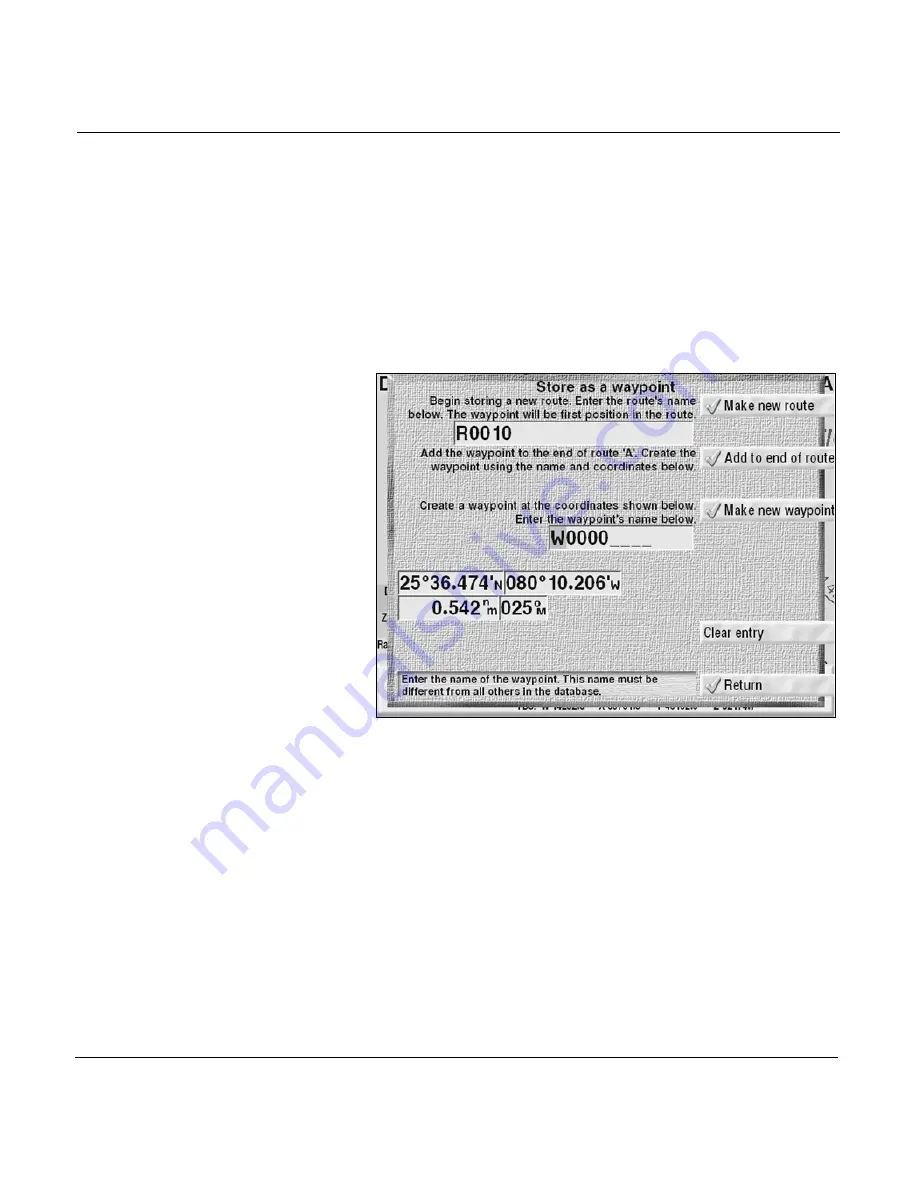
The
STORE AS A WAYPOINT
dialog box appears, sup-
plying a default waypoint name, and also showing the
name of the currently displayed route.
Store as a waypoint (for on-chart route) dialog box
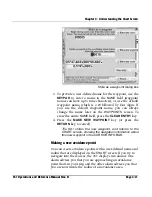
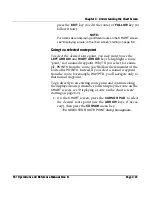
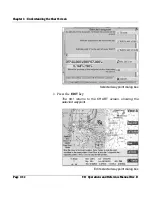
3. If desired, use the
KEYPAD
to change the default way-
point name; if not, press the
ADD TO END OF ROUTE
key.
The 961 returns to the
CHART
screen, showing the
added route waypoint.
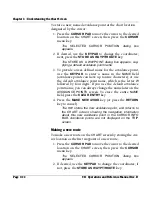
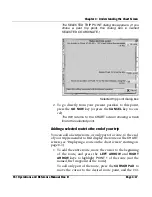
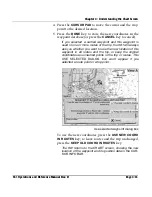
To continue adding route waypoints, keep moving the
cursor to each desired location on the
CHART
screen,
then press the
CURSOR
key,
STORE AS WAYPT/ROUTE
key, and
ADD TO END OF ROUTE
key (you may name
each new waypoint or use the default names).
To edit this route or follow it now, press the
WAYPTS/
ROUTES
key until you reach the
ROUTES
screen, then
Summary of Contents for 961X
Page 1: ...961 961 GPS Chart Navigator Operations and Reference Manual P N GM1700 Revision D X XD ...
Page 8: ...Page viii 961 Operations and Reference Manual Rev D ...
Page 10: ...Page x 961 Operations and Reference Manual Rev D ...
Page 58: ...Chapter 2 Introducing the 961 Page 2 16 961 Operations and Reference Manual Rev D ...
Page 172: ...Chapter 7 Creating Avoidance Points Page 7 16 961 Operations and Reference Manual Rev D ...
Page 198: ...Chapter 8 Creating Routes Page 8 26 961 Operations and Reference Manual Rev D ...
Page 262: ...Chapter 12 Alarms TideTrack and Currents Page 12 16 961 Operations and Reference Manual Rev D ...
Page 374: ...Index Page I 12 961 Operations and Reference Manual Rev D ...


