62
C
o
nnec
ting t
o
the f
tp S
er
v
er
Uploading Pictures to an ftp Server
Connecting to the ftp Server
Before connecting the UT-1, confirm that the host computer is
running and the user is logged in.
1
Turn the camera off and insert the
memory card containing the pictures to
be sent (if the camera is equipped with
multiple memory card slots, the card can
be inserted into any slot).
2
Open the UT-1 USB connector cover and
connect the USB cable from the UT-1 to
the camera USB connector (for more
information on connecting USB cables to
the camera, see the camera manual).
3
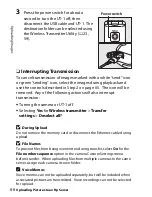
Connect the Ethernet cable or wireless transmitter.
Ethernet networks
: To access the network via Ethernet, confirm
that the camera is off and connect the Ethernet cable to the
computer and UT-1 as shown. Do not use force or insert the
connectors at an angle. Note that wireless transfer is disabled
while an Ethernet cable is connected; before accessing a
wireless network, turn the UT-1 off and disconnect the
Ethernet cable.
Wireless networks
: Connect the WT-5 wireless transmitter as
described on page 8.
16
GB
Summary of Contents for UT-1
Page 1: ...Communication Unit User s Manual En ...
Page 30: ...18 Installing the Wireless Transmitter Utility Introduction ...
Page 41: ...Copying Network Profiles to the Camera Using the UT 1 with a Computer 29 ...
Page 60: ...PC Mode Using the UT 1 with a Computer 48 ...
Page 69: ...57 Copying Network Profiles to the Camera Uploading Pictures to an ftp Server ...
Page 82: ...70 Uploading Images Uploading Pictures to an ftp Server ...
Page 103: ...Print Menu Guide 91 Print PrintModeOnly The UT 1 does not support this option ...
Page 106: ...Device Settings Menu Guide 94 ...
Page 138: ...126 ...
Page 139: ......


