


TriCaster Mini
Go Make Your Show Guide
57
When you record a macro, TriCaster Mini will record your actions as you perform them in the Live Desktop.
It will not record the state of the Live Desktop at the time you start recording the macro, as this could have
unintended consequences if you were to run the macro during your show. So, the first step to creating a
macro is to prepare the Live Desktop by putting it into a neutral state that won’t interfere with the macro
you have planned.
PREPARE THE LIVE DESKTOP
IMPORTANT: The time to create macros is not during your show. Practice and execution is what makes
amazing macros. So, take the time well ahead of your show to create, test and adjust your macros so
that they work exactly how you want them to.
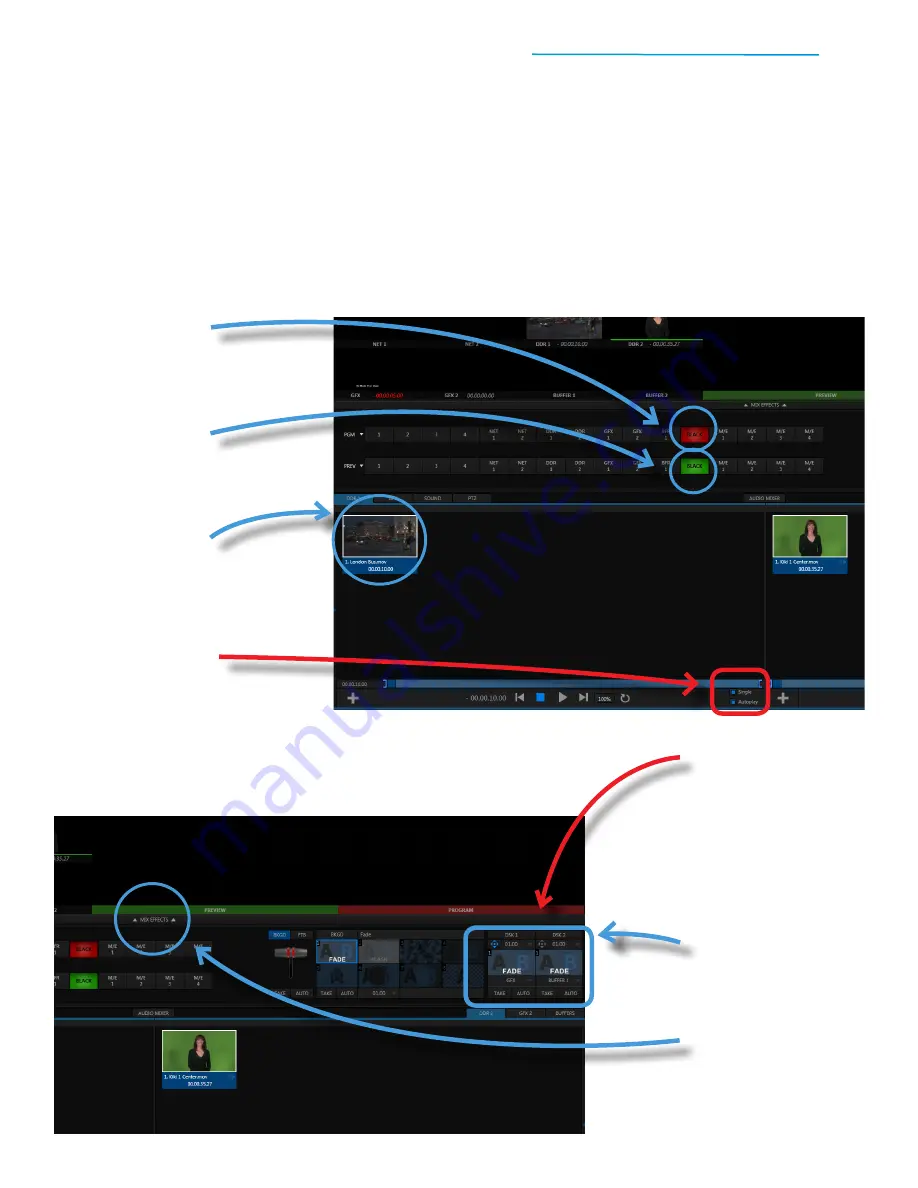
#1
Click on the
Program row
Black button
to start from
black on Program
#2
Click on the
Preview row
Black button
to start from
black on Preview
#5
Check DSK 1 and DSK 2
to determine if there are any
overlays applied—you will see
the overlay in the large Program
window and the TAKE button
under the DSK toolset will be
blue if an overlay is applied
#3
Click on the DDR 1 tab, then
click on the London Bus.mov
video clip
in the DDR 1 bin
to cue it up
#6
If you have an overlay applied,
click the DSK 1 or DSK 2 TAKE
button
as needed to remove
#4
Check that the Single and
Autoplay switches for DDR 1
are on
—the Single and Autoplay
switches are located in the
bottom-right corner of the DDR 1
bin (the switches are on if they are
blue – click them if they are not)
#7
Click on the MIX EFFECTS
divider bar
located beneath
the large Preview window to
close the M/E panel