


TriCaster Mini
Go Make Your Show Guide
22
When you click the AUTO button to switch DDR 1 to Program, the video clip will begin playing automatically.
When the clip finishes playing, TriCaster will automatically switch back to Camera 1.
If you would like to switch to a different source before the clip finishes, simply click on the source you would
like to show next in Preview, then click the TAKE or AUTO button.
USING AUTOPLAY
Each TriCaster DDR includes an Autoplay switch (see step 2 under LOADING VIDEO CLIPS INTO THE
DDR).
Autoplay is very convenient when you are working with large quantities of stored media or when you are
producing a fast-paced live show.
With Autoplay turned on, TriCaster begins rolling the selected clip when the TAKE or AUTO button is
pressed. And when the clip finishes playing, TriCaster switches back to the previous video source (or the
new source, if you have clicked on a different one in the Preview row).
If you have multiple videos loaded in the DDR, TriCaster will also cue up the next clip automatically after
the current clip finishes playing. When all clips have been played, TriCaster will automatically return to the
beginning of the playlist.
By default, the Autoplay switch is turned off. You can leave it turned off if you would prefer to manually cue
and playback clips.
PRACTICE SWITCHING MULTIPLE SOURCE TYPES
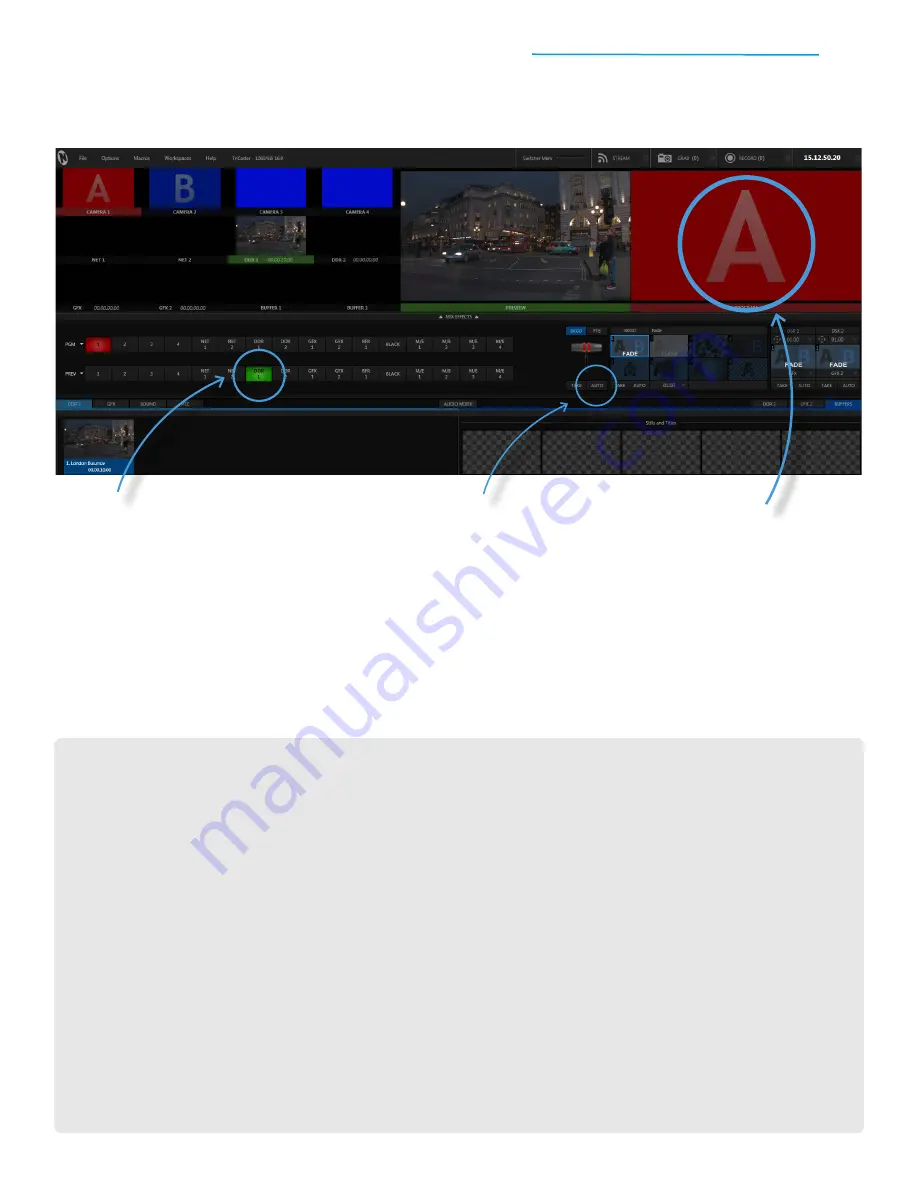
#1
Click the DDR 1 button
in the
Preview row to cue up DDR 1 (you
should see the same paused image
of the balloon from the DDR 1 video
window in the large Preview window)
#2
Click the AUTO
button to perform
a Fade transition between Camera 1
(currently selected on Program)
and DDR 1
#3
Watch the large Program window
to
see what happens