


TriCaster Mini
Go Make Your Show Guide
28
You have your first buffer loaded (if you want, you can go ahead and load additional buffers by clicking on
their individual thumbnails and repeating the steps above). Now, let’s layer the logo over the Program output
using DSK 2.
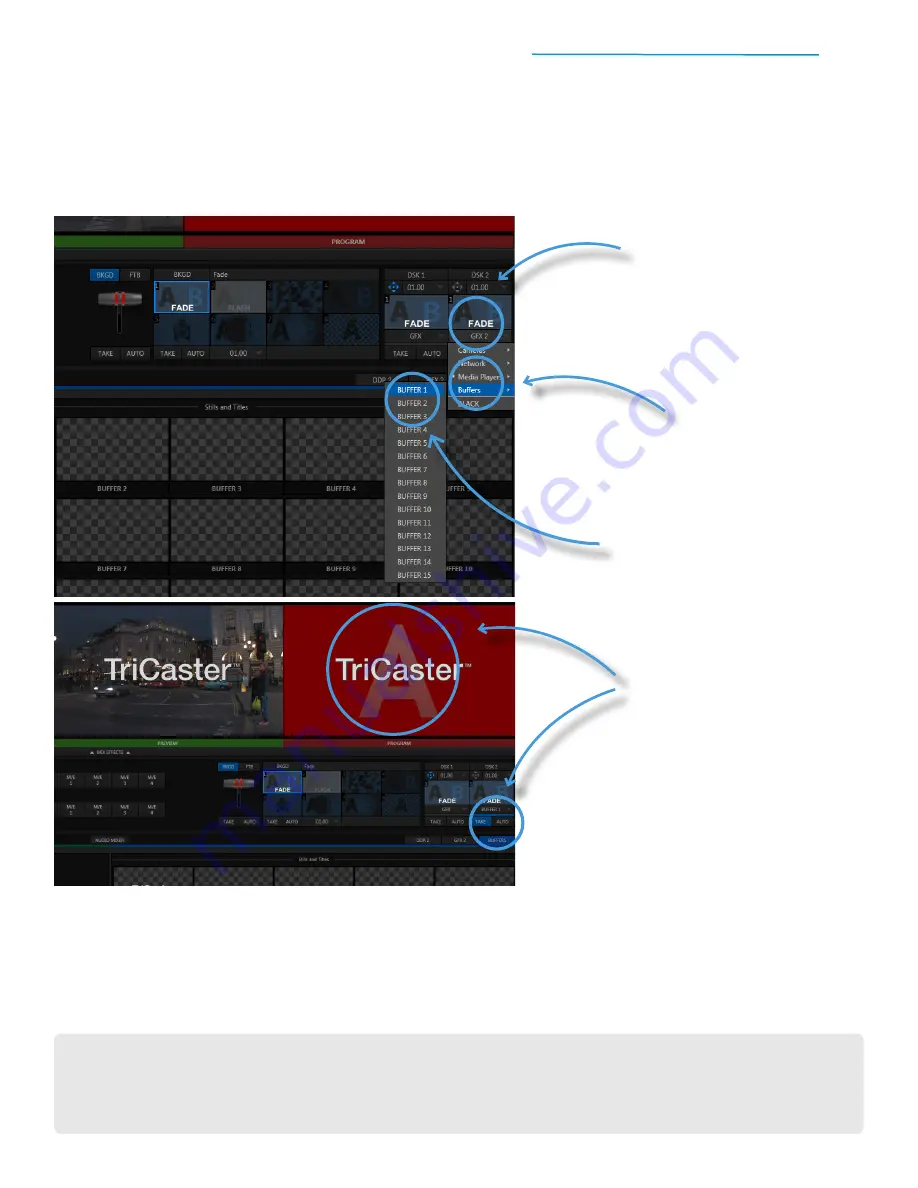
APPLYING A BUFFER OVERLAY
#1
To start,
click the DSK 2 source
button
, which is located beneath
the transition thumbnail and
currently set to GFX 2
#2
Mouse over Buffers
in the pop-up
menu to reveal the list of buffers
#3
Click on BUFFER 1
in the
list to change the DSK 2
source to BUFFER 1
#4
Now,
click the DSK 2 AUTO
button
to bring the logo onscreen
using a Fade transition
When you click the DSK 2 AUTO button, the logo fades up in the center of the large Program window, until it
is fully visible. You’ve just applied a buffer overlay that will stay onscreen until you remove it by using the DSK
2 TAKE or AUTO buttons.
Before continuing on to the next section, go ahead and click the DSK 2 AUTO button to remove the logo if it’s
still applied.
USING BUFFERS FOR TITLES
If you load a title template into a buffer, you can edit the text from within the buffer. Mouse over the buffer
thumbnail to reveal the gear icon, click the gear to open the Edit Title window, and edit the text.