


TriCaster Mini
Go Make Your Show Guide
20
Now that you’ve learned the basics to get you up and running with TriCaster, let’s learn to use some of the
creative tools that let you produce a show that looks just like the ones you see on TV.
TriCaster’s digital disk recorders (DDRs) allow you to include pre-produced clips, video packages or
supporting footage in productions. This is very helpful for people who need to work existing multimedia
content in with live video... or who are not using cameras in their live productions at all.
1) Video Clips
LOADING VIDEO CLIPS INTO THE DDR
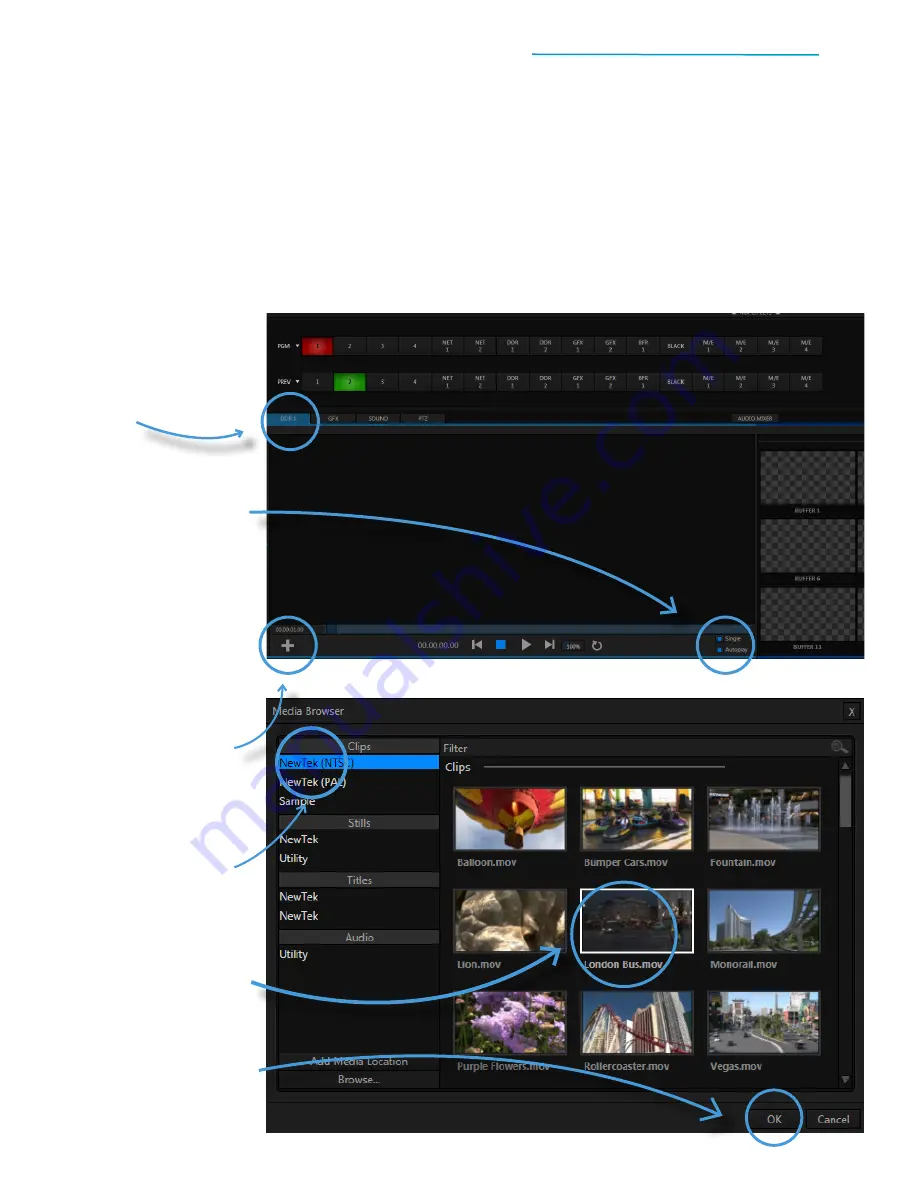
#1
Click the
DDR 1 tab
in the
lower left of the screen, just
beneath the Preview row of
the switcher
#2
Locate the Autoplay switch
in
the bottom-right corner of the
DDR 1 bin (to the right of the
playback control buttons)
#3
Click the box next to
Autoplay
, switching it to blue,
to turn on Autoplay for DDR 1
#4
Click the + button
in the
bottom-left corner of the
DDR 1 bin to open
the Media Browser
#5
On the left side of the Media
Browser window,
click on
NewTek
under the Clips
section to view the sample
clips stored on TriCaster Mini
#6
Click on the appropriate
thumbnail to
select the
London Bus.mov
video clip
#7
Click OK
in the bottom-right
corner of the Media Browser
window to add the clip to DDR 1