


TriCaster Mini
Go Make Your Show Guide
51
1) Recording
Not every show needs to be live—and not every live show goes perfectly.
TriCaster Mini’s built-in recording makes it easy to record your show to air at a later date, post for on-demand
viewing, or archive for your video library. You can also record individual camera feeds for post-production
editing or to repurpose footage from your show for other projects.
By default, TriCaster is set to record the Program output exactly as it appears live. This mean everything you
see in the large Program window – the switching that takes place on the Program row, transitions between
Preview and Program, and overlays applied using DSK 1 and DSK 2 – will be recorded as it happens.
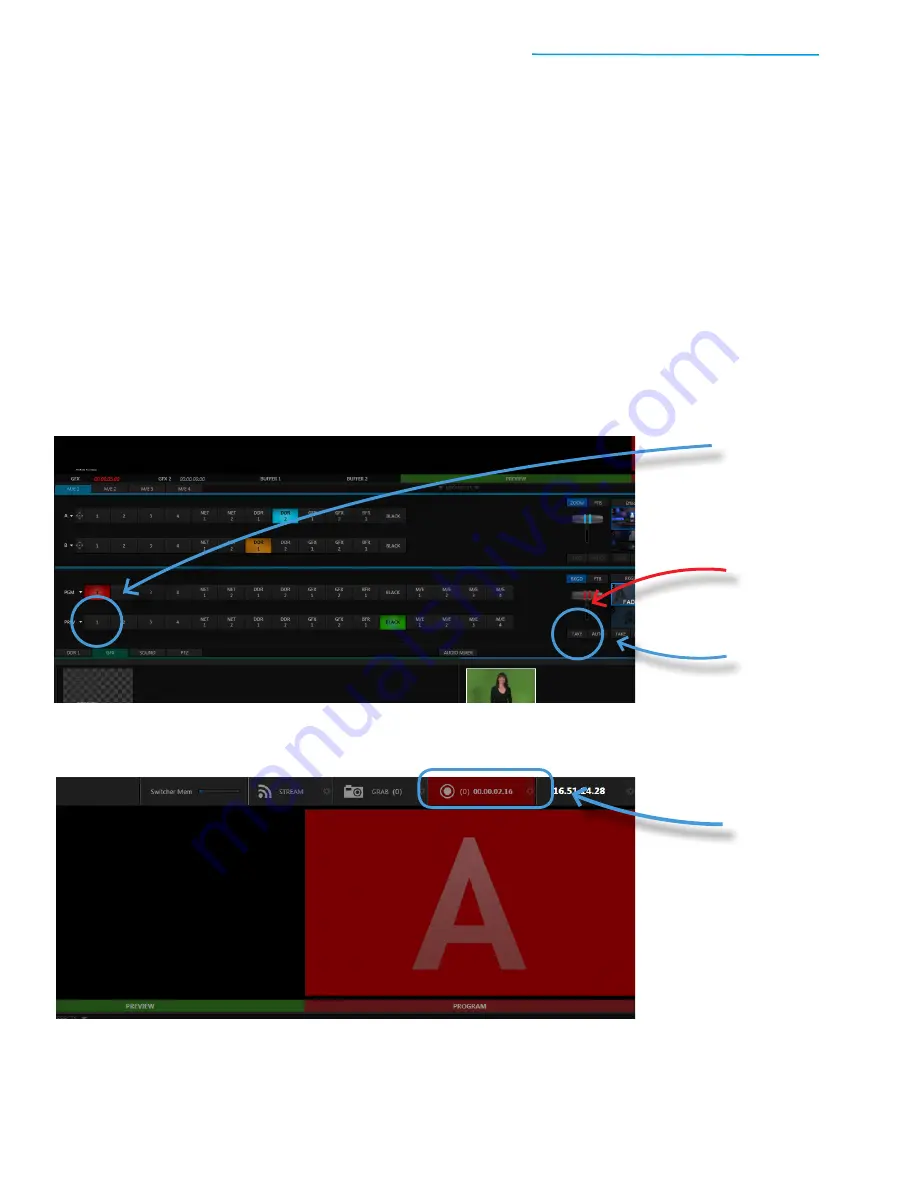
To start, switch to Camera 1 on Program (so you are recording something other than black)
Now, you’re ready to record. And all it takes is one click.
The Record button lights up red and the timecode clock will begin running to indicate that recording is in
progress. To stop recording, simply click the Record button again (the button will change back to gray).
It’s that easy!
PROGRAM RECORDING
#1
Click the
Preview row 1 button
to
cue up Camera 1 (you should now see
the video from Camera 1 in the large
Preview window)
#1
Click the Record button
in the
top-right corner of the screen
#2
To the right of the switcher,
locate the
TAKE button
beneath the T-Bar
#3
Now
click the TAKE button
to
instantly cut from Black to Camera 1