


TriCaster Mini
Go Make Your Show Guide
15
The first four numbered buttons on each row of the switcher are dedicated to up to four connected cameras.
For the next few steps, these are the only video sources you need. Don’t worry—we’ll get to the other sources
soon. Let’s get you switching cameras first.
4) Switching Between Sources
In these steps, you’ll learn to use both rows—with transitions, timing, and mouse movements (and with lots
more sources later on)—but more importantly, by learning this step, you’ll know how to switch a show.
TAKE
The TAKE button does two things—it makes the source on Preview become the new, live source on Program;
and it takes what was on Program and switches it down to Preview. These two changes occur instantly and
simultaneously.
That means the
Program row 1 button
should now be in
red
and the
Preview row Black button
in
green
.
Likewise, you should now see the video from Camera 1 in the large Program window and black video in the
large Preview window. It also means you’ve made your first camera switch.
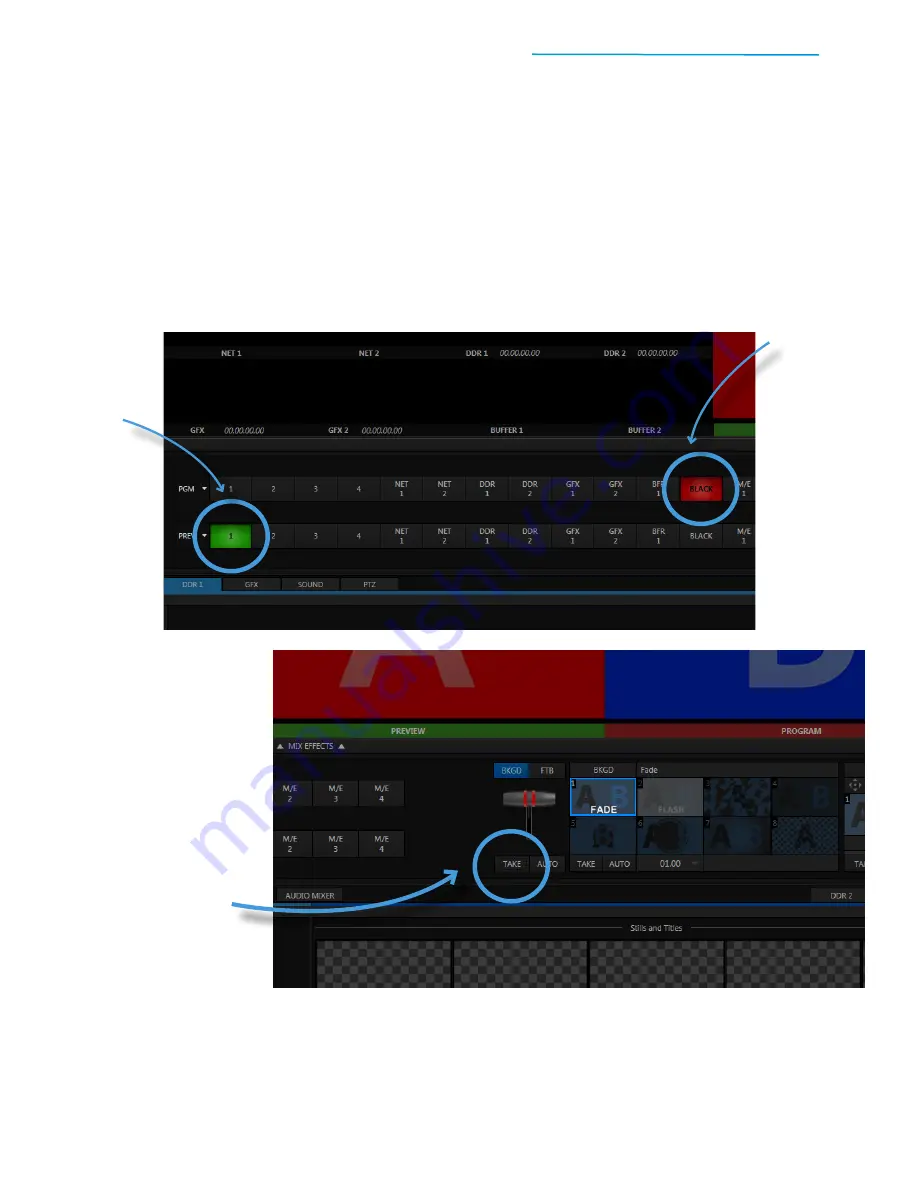
#1
Click the
Program row
Black button
so
that you’re starting
out from black (you
should only see
black appear in
the large Program
window)
#3
To the right of the
switcher,
locate
the TAKE button
beneath the T-Bar
#4
Now
click the
TAKE button
to
instantly cut from
Black to Camera 1
#2
Click the
Preview row 1
button
to cue up
Camera 1 (you
should now see
the video from
Camera 1 in the
large Preview
window)