3 - CONTROLS AND INSTRUMENTS
General
Area selection
To select an area, press and hold related buttons at FM1
band for about 3 seconds.
• USA Area: press and hold MODE
(3)
and 1DIS
(5)
but-
tons for
3 s
.
• Europe Area: press and hold MODE
(3)
and “2” buttons
for
3 s
.
• Asia Area: press and hold MODE
(3)
and “3RPT” but-
tons for
3 s
.
• Latin Area: press and hold MODE
(3)
and “4RDM” but-
tons for
3 s
.
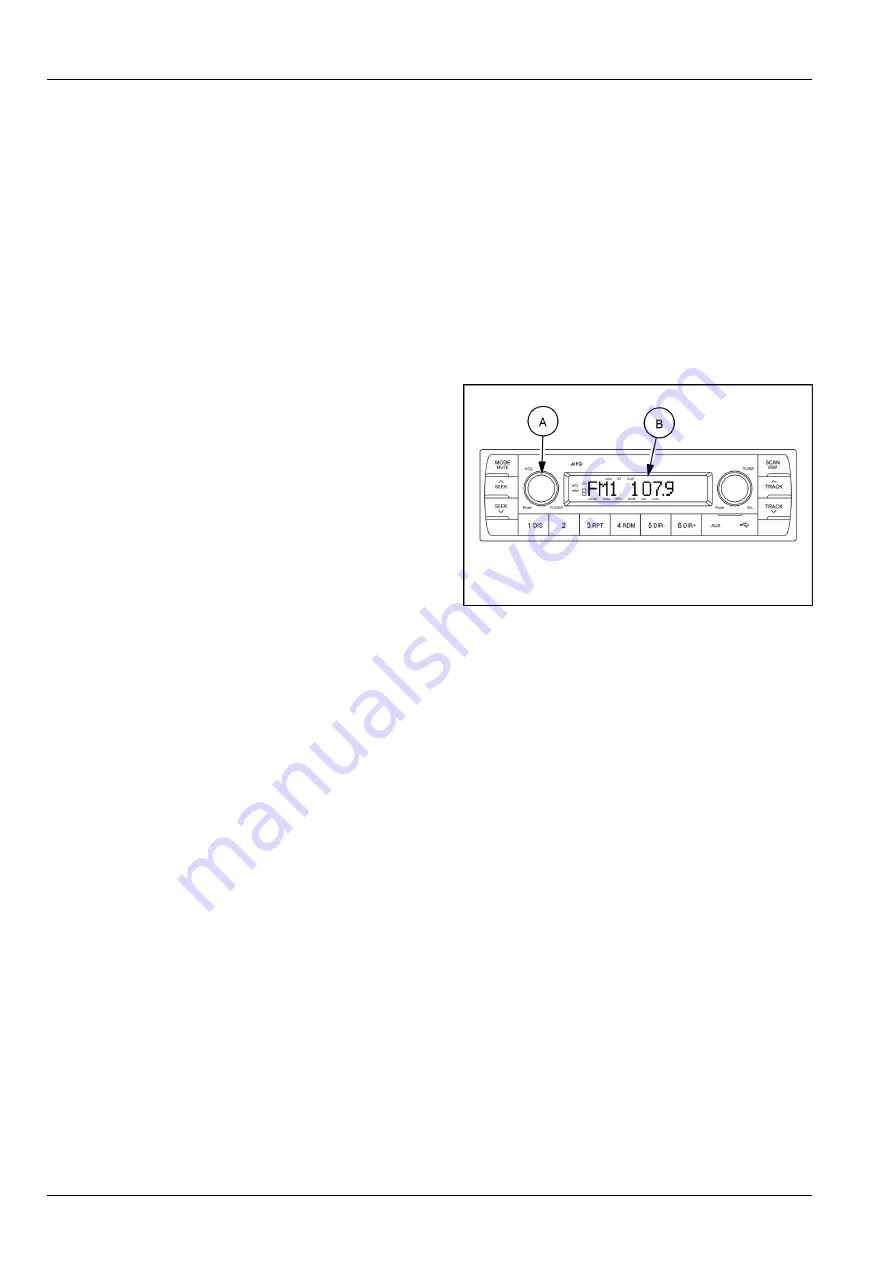
(1) Power and volume knob
Power ON/OFF button
Press the power button
(A)
to turn the unit ON or OFF
shortly. When the power is ON, the previous mode (last
memory) will appear.
SMIL17MEX2806AA
2
Volume up / down control
Turn the volume up/down button
(A)
right-hand to in-
crease the volume level. The level will be shown in
VOLUME xx on the LCD screen
(B)
.
Turn the volume up/down button
(A)
left-hand to de-
crease the volume level. After
5 s
of volume indication,
the LCD screen
(B)
will return to the previous mode.
Initial volume level set up
I-VOL is the volume level the unit will play at when next
turned on. To adjust the I-VOL level, press and hold
VOL button
(A)
for longer than
2 s
.
The current volume level displays on the display panel.
Turn button
(A)
right-hand or left-hand to set the volume
level as the I-VOL level.
Clock ON/OFF control
The CLOCK was default at off status.
To turn CLOCK ON, press and hold the button
(A)
for
longer than
2 s
to display I-VOL, then short press button
(A)
again, turn knob
(A)
while CLOCK OFF display, then
the CLOCK ON will be displayed.
Due to time tolerance, the clock display on the Audio
unit might have little difference.
3-32
Summary of Contents for E26C
Page 56: ...2 SAFETY INFORMATION 2 36 ...
Page 68: ...3 CONTROLS AND INSTRUMENTS Footrest SMIL19MEX0775BA 17 3 12 ...
Page 106: ...3 CONTROLS AND INSTRUMENTS 3 50 ...
Page 142: ...5 TRANSPORT OPERATIONS 5 8 ...
Page 218: ...6 MAINTENANCE 6 76 ...
Page 222: ...7 TROUBLESHOOTING 7 4 ...


