9-60 Upgrading Your Server
6.
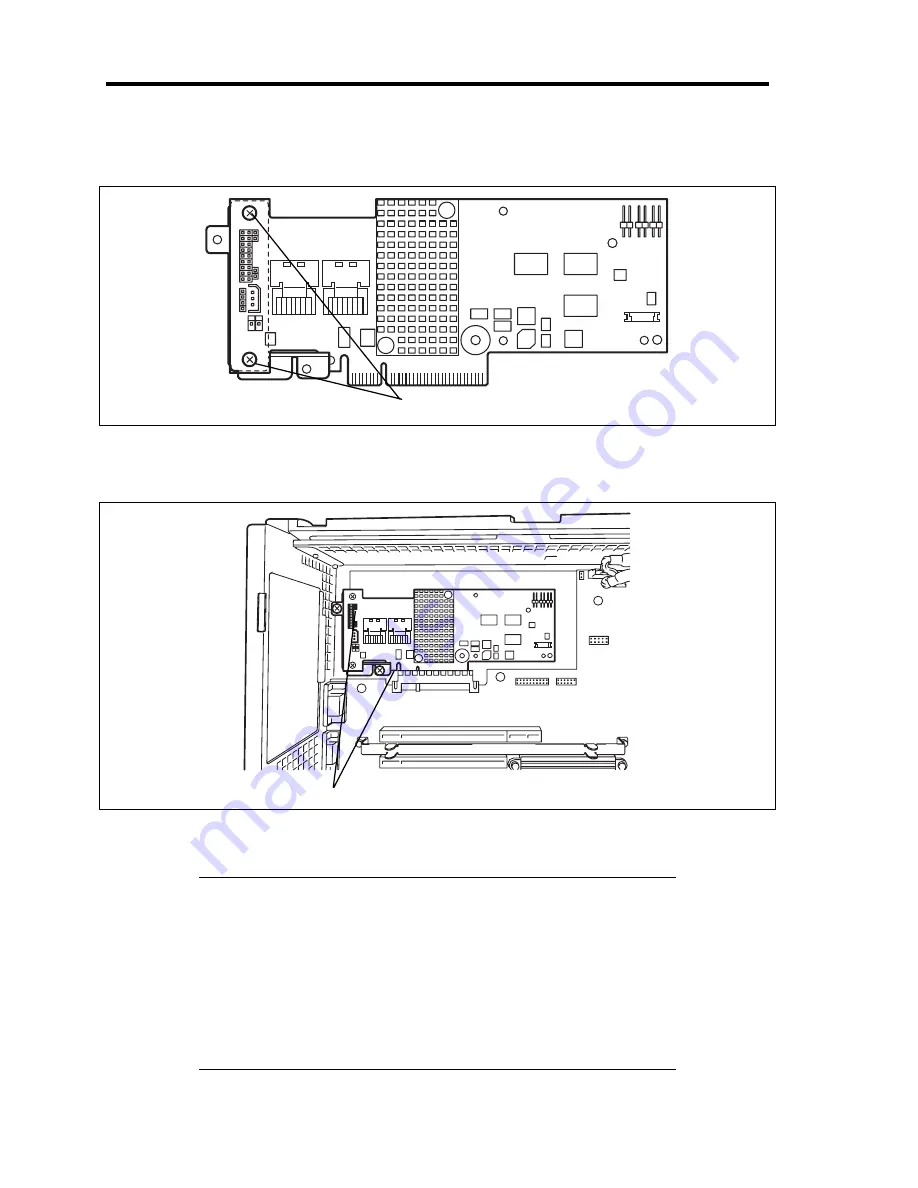
Attach the RAID controller to the bracket that was removed from the server chassis.
Use the screws removed in step 6.
7.
Install the RAID controller in the server chassis, and secure it with the screws that were
used to secure the bracket.
8.
Install the components you removed.
IMPORTANT:
This server does not have any connectors to which the connectors of
LEDs for indicating disk access, such as for the RAID controller,
can be connected.
If a RAID controller is connected, use the [Boot] menu of the BIOS
setup utility to set the controller's boot priority to the eighth item or
an item that has higher priority. If the RAID controller is specified
as the ninth item or an item that has lower priority, it will not be
possible to open the RAID controller configuration menu.
Screws
Screws
Summary of Contents for N8100-1644F
Page 21: ...Notes on Using Your Server 1 3 Internal View ...
Page 235: ...Installing and Using Utilities 6 13 Windows Server 2003 ...
Page 262: ...7 14 Maintenance This page is intentionally left blank ...
Page 316: ...8 54 Troubleshooting When you use a remote console 6 Each tool is selected and it starts ...
Page 417: ...C 2 IRQ This page is intentionally left blank ...
Page 441: ...D 24 Installing Windows Server 2008 R2 4 Activate Windows The Windows activation is complete ...
Page 471: ...E 28 Installing Windows Server 2008 4 Activate Windows The Windows activation is complete ...
Page 531: ......
Page 533: ...H 2 Using a Client Computer Which Has a CD Drive This page is intentionally left blank ...
Page 543: ...I 10 Accessing Power and Performance Data This page is intentionally left blank ...
Page 547: ...J 4 Product Configuration Record Table This page is intentionally left blank ...


