4-6 Configuring Your Server
Memory
To check the installed memory (DIMM board) status
Select [Advanced] - [Memory Configuration] - [DIMM #n Status], and check the status
indications (n: 1, 2, 3, or 4).
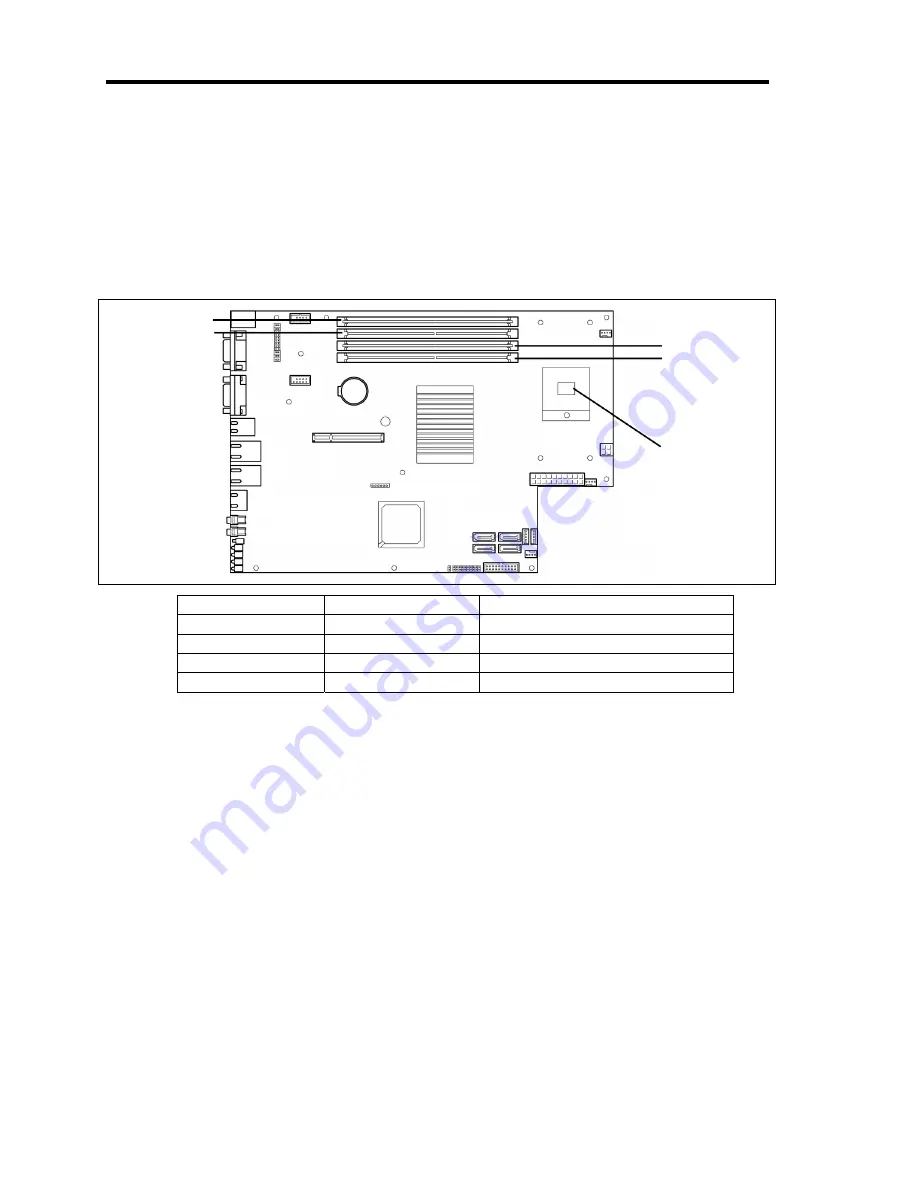
The on-screen DIMM group numbers and socket locations on the mother board are
associated as shown in the following figure.
DIMM number
Socket number
Installation order
DIMM #1
DIMM 1
First
DIMM #2
DIMM 2
Second
DIMM #3
DIMM 3
Third
DIMM #4
DIMM 4
Fourth
To clear the memory (DIMM board) error information
Select [Advanced] - [Memory Configuration] - [Memory Retest] - [Yes] and reboot.
The on-screen DIMM group numbers and socket locations on the mother board are
associated as shown in the following figure.
CPU
To check the installed CPU status
Select [Main] - [Processor Settings] and check the status indications.
To clear the CPU error information
Select [Main] - [Processor Settings] - [Processor Retest] – [Yes] and reboot.
The on-screen CPU numbers and socket locations on the mother board are associated as
shown in the above figure.
CPU
DIMM #1
DIMM #2
DIMM #3
DIMM #4
Summary of Contents for N8100-1573F
Page 16: ...x This page is intentionally left blank...
Page 19: ...Notes on Using Your Server 1 3 3 5 inch Disk Model FRONT REAR...
Page 126: ...4 50 Configuring Your Server This page is intentionally left blank...
Page 296: ...A 2 Specifications This page is intentionally left blank...
Page 304: ...C 2 IRQ This page is intentionally left blank...
Page 333: ...Installing Windows Server 2008 D 29 4 Activate Windows The Windows activation is complete...
Page 390: ...G 2 Using a Client Computer Which Has a CD Drive This page is intentionally left blank...
Page 394: ...H 4 Product Configuration Record Table This page is intentionally left blank...


