


5-13
Upgrades and Options
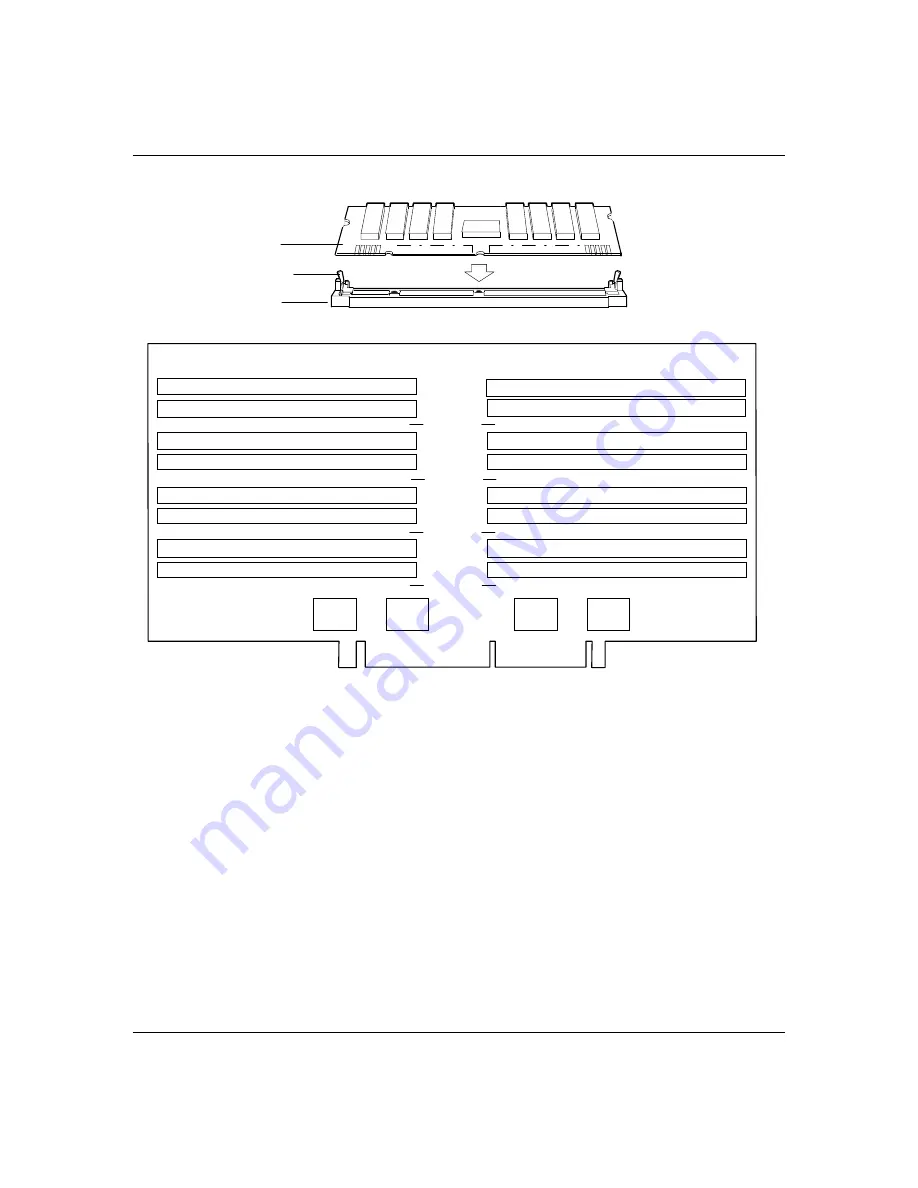
Figure 5-5. Inserting Memory DIMMs
A
B
C
P11
P12
P13
P14
P15
P16
P17
P18
P3
P4
P5
P6
P7
P8
P9
P10
Bank 0
Bank 1
Bank 2
Bank 3
3.
DIMMs are keyed so they can only be inserted one
way. Position the DIMM over the socket on the
board (Figure 5-5, A and B). The notches in the
bottom edge of the DIMM mates with the raised
bumps in the DIMM socket.
4.
Press down evenly on the DIMM until it seats
correctly. The white levers on the sockets are not
"tools" to aid in the insertion, only to keep the
DIMM's in place and to aid in extraction. The levers
should click in place once the DIMM is fully
inserted.
5.
Repeat the above steps to install any remaining
DIMMs.
6.
Install the memory board back into the system as
described later in this chapter.
Summary of Contents for MH4000
Page 1: ... Server MH4000 U s e r s G u i d e ...
Page 4: ...xx ...
Page 7: ...Bill Graham ...
Page 8: ...Chapter 1 Introduction Contents Organization 1 Notational Conventions 3 ...
Page 9: ...Bill Graham ...
Page 13: ...1 4 Introduction ...
Page 15: ...x ...
Page 44: ...x ...
Page 52: ...1231231 Billy Graham ...
Page 82: ...4 30 Configuring Your System ...
Page 138: ...5 54 Upgrades and Options Figure 5 26 Removing the Rear Fan modules ...
Page 140: ...dfgdfg ...
Page 168: ...6 28 Problem Solving ...
Page 170: ...Bill GrahamBill Graham ...
Page 179: ...Appendix B Memory Configurations Contents Memory DIMM Configurations 1 ...
Page 180: ...Bill Grahamaerrterterter ...
Page 184: ...B 4 Memory Configurations x ...
Page 185: ...Appendix C Option Boards Contents Introduction C 1 ...
Page 187: ...Appendix D Devices Contents Introduction 1 ...
Page 189: ...Appendix E Network Operating Systems Contents Introduction 1 ...
Page 192: ...rtyrtyrtyrtyry ...
Page 202: ...8 Glossary ...
Page 203: ......
Page 204: ... 101846 01 ...


