


9-44 Upgrading Your Server
Installation (First 2.5-inch HDD Cage)
Install the 2.5-inch HDD cage in the following procedure.
1.
See the section "Preparing for Installation and Removal" described earlier to prepare.
2.
Release the lock of the front door by using the security key to open the front door.
3.
Remove the side cover.
4.
Disconnect all the cables from the rear of 3.5-inch HDD cage.
NOTE:
To disconnect SGPIO cable or SAS/SATA cable, hold the
connector, unlock it, then pull it out. Pulling the cable while holding the
cord harness may cause damage to the connector.
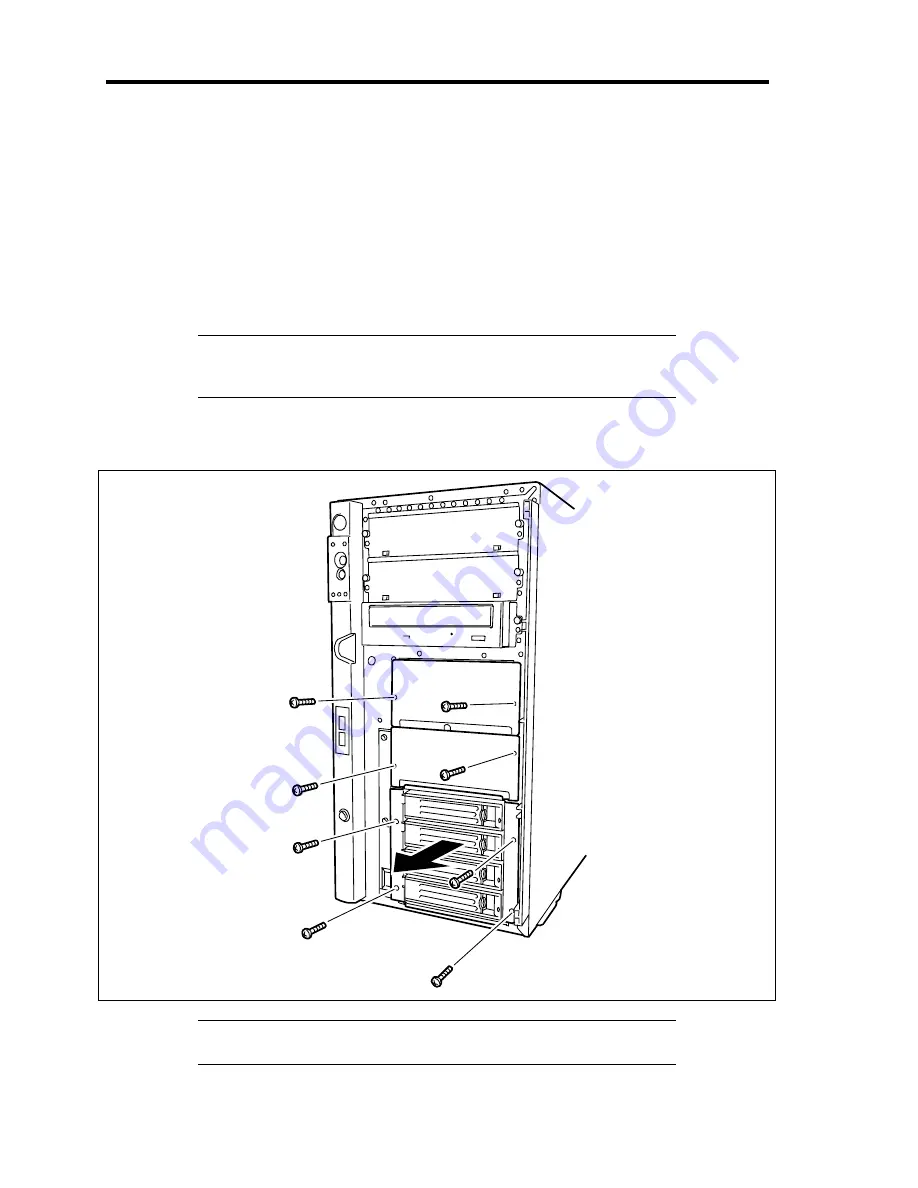
5.
Remove four screws from the 3.5-inch HDD cage, and the four screws from the two
dummy covers. Then, remove the 3.5-inch HDD cage and dummy covers.
NOTE:
Keep the removed dummy covers and screws for future use.
You will need these screws to install the 2.5-inch HDD cage.
Summary of Contents for Express5800/120Lj
Page 16: ...x This page is intentionally left blank ...
Page 36: ...2 8 General Description Rear View 1 2 3 4 5 6 7 8 9 10 11 12 13 1 14 12 14 12 14 13 3 13 2 15 ...
Page 143: ...Configuring Your Server 4 75 3 Setting menu for VD 0 is displayed ...
Page 220: ...7 12 Maintenance This page is intentionally left blank ...
Page 352: ...9 94 Upgrading Your Server This page is intentionally left blank ...
Page 353: ...Chapter 10 Internal Cabling Diagrams Internal cable connections of the server are shown below ...
Page 360: ...10 8 Internal Cabling Diagrams This page is intentionally left blank ...
Page 362: ...A 2 Specifications This page is intentionally left blank ...
Page 370: ...C 2 IRQ This page is intentionally left blank ...
Page 426: ...F 2 Using a Client Computer Which Has a CD Drive This page is intentionally left blank ...
Page 430: ...G 4 Product Configuration Record Table This page is intentionally left blank ...


