background image

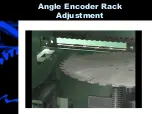
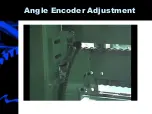
Angle Encoder Rack 

Adjustment

Loosen Allen head Bolts

Adjust the gear rack to make sure the gear is 

on the rack between 0 and 45 degrees 

Rotate the gear rack so that the gear is 

engaged at 0 degrees

Tighten up the Allen head bolts 

Be sure to follow all Lock out/ Tag out 
procedures before attempting any 
maintenance to the machine.

WARNING

!

Summary of Contents for DESAUW FWA500

Page 1: ...MONET D ES AUW INCORPORATED 877 642 4900 ...

Page 2: ......

Page 3: ......

Page 4: ......

Page 5: ...ting Air Brakes 12 Inspecting Air Brakes 13 Air Brake Adjustment 14 Brake Pad Replacement 15 Manual Safety Devices 16 Pre Start Checklist 17 Pinch Points and E Stops 18 Installation 19 Installation 20 Calibration 21 Calibration 22 Four Angle Webs 23 Square End Blocks 24 Two Piece Webs 25 Setting Web Lengths 26 Maintenance Schedule 27 Electrical Troubleshooting 28 Mechanical Troubleshooting 29 Shak...

Page 6: ...afest Easiest Way to Cut Floor Truss Webs MONET DeSauw INC 3100 DOGWOOD DRIVE FULTON MO 65251 7226 DeSauw Component Saws are manufactured by Monet DeSauw Inc Fulton MO 65251 FOR ADDITIONAL INFORMATION PLEASE CALL 877 642 4900 2001 MONET DESAUW INC 2 ...

Page 7: ...setting saw blade angulations magazine feed and external cut off blade have always made the FWA 500 the 1 CHOICE for cutting large volumes of floor webs The toughest high volume production Floor truss web saw in the industry Just got BETTER Now with the addition of our newest features Single Side Setup and Increased Feed Rate the FWA 500 provides fine tuned 01 accuracy and 60 pieces per minute yie...

Page 8: ...reas are protected with electronic and mechanical devices that should always be kept in proper working condition All DeSauw models use high speed carbide tipped saw blades This system does generate a noisy dusty and dangerous environment The saw should never be started unless all personnel are clear of the area Proper procedures should be established for routine maintenance and employee activity a...

Page 9: ... brake pads weekly for wear It is important that the pads not wear into the blade Air line filter must be inspected weekly for contaminants One filter is located where the inlet air is hooked up the other in the box connected to the regulator Change when necessary Maintain 30 psi throughout the entire air system Maximum pressure should not exceed 35 psi Check for leaks in the air system daily With...

Page 10: ...ne if the specified procedure is not followed IMPORTANT WARNINGS The machine is designed and produced exclusively for cutting truss components All other use will be considered to be contrary to the use specified by MONET DESAUW who cannot be held liable for damage to property or the machine or for personal injuries which may result Persons who risk improper use will therefore assume the responsibi...

Page 11: ...egible Clean the decals is they are covered by debris Do not wear loose clothing that may be trapped in moving parts Avoid using the saw in unsuitable physical conditions Before starting the blades always check that the area is free of persons or obstacles SAFETY DECALS The safety decals on the following pages are positioned on your saw in the locations shown in the pictures below These safety dec...

Page 12: ...8 Moveable End Electrical Cabinet Operator s Side Catcher s Side ...

Page 13: ...9 Blade 3 Guard ...

Page 14: ...tarter When the overload controls a 5 or 10 horsepower blade motor the starter can be reset by pushing the red button in the lower middle section of the overload Any other starter can be reset by pushing the round blue button on the bottom right side of the overload DO NOT turn the reset button when it is pushed and make sure the button returns to its full outward position 10 These drives have the...

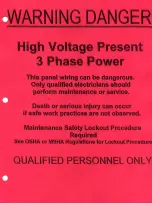
Page 15: ...ed with the minimum pressure requirement the emergency stop system will be activated and no motors will be allowed to operate The air brake system will also be activated if the system loses pressure due to a cut line or hose 11 WARNING ACCESS TO MAIN ELECTRICAL PANELS SHOULD BE LIMITED ONLY TO QUALIFIED PERSONNEL THE VOLTAGE WITHIN SHOULD BE CONSIDERED LETHAL AND CAN CAUSE SERIOUS DAMAGE ...

Page 16: ...12 ...

Page 17: ...13 ...

Page 18: ...14 ...

Page 19: ...15 ...

Page 20: ... The pull stop is activated by pulling the steel cable in any direction causing a full stop of all motion within the saw Pressing the blue button in the center of the pull mechanism on the fixed end of the saw can reset the E Stop The stop switch will not operate without the proper tension on the cable or if there is too much tension on the cable The tension can be adjusted via the turnbuckle loca...

Page 21: ...are to be followed as prescribed by standard lockout procedures or rules 2 Make sure all safety equipment is securely in place working mechanically and activated A Emergency Stop Buttons B Emergency Pull Cable rear side C Bump Bar right front D Cutoff Guards 3 Thoroughly check for loose or missing bolts set screws or parts A Check each quadrant 1 Motor hub and blade bolts 2 Motor mounting bolts 3 ...

Page 22: ...ures CAUTION ONLYAUTHORIZED PERSONELL SHOULD BE ALLOWED ACCESS TO THE ELECTRICAL PANELS THE CONTENTS CONTAIN HARMFUL AND POTENTIALLY LETHAL VOLTAGE POWER SHOULD BE SHUT OFF BEFORE ANY ELECTRICAL MAINTENANCE IS PERFORMED 18 Cutoff blade guard Bump E stop Mushroom E stop Pinch points ...

Page 23: ...Once air is applied the brake should be pressed against the blade 4 Level the saw ensuring all 4 legs of the saw frame are on the ground shim as necessary to ensure all legs are firmly on the ground There is no need to anchor saw to the ground 5 Slide shaker under saw to desired direction Anchor the shaker using 3 8 x 4 anchors in CONCRETE only No asphalt Draw the anchors tight only if frame is se...

Page 24: ...ne to the supplied motor starters in the panel Check direction of the incline if it is running backwards switch the red and white motor leads at the bottom of the starter 9 Check rotation of each blade the blade should spin in a direction so the teeth cut NOTE some blades rotate clockwise some counter clockwise Start blades and observe 10 Once the rotation is identified you are ready to check the ...

Page 25: ...chnician at Monet Desauw Inc if the saw is out of adjustment Saw Calibration Centerline Calibration First rotate the blades to 90 degrees one will be 0 degrees as indicated below in yellow Place the board in the magazine and mark top and an arrow showing the direction at which the board goes through the machine This will tell you which end of the board is fixed and moveable Start the blades and ma...

Page 26: ... a framing square measure from the bottom of the board to the TOP of the cut This should be If it is not raise or lower the blade until it is Recut the board until you achieve the measurement Next set each side at 45 degrees and make a cut The points where the blades intersect should be from the bottom of the board DO NOT measure from the top of the board as board thickness may affect an accurate ...

Page 27: ...Ended Blocks 3 Cantilever Webs 2 piece webs Four Angle Web Cutting o The FWA 500 s internal blades are mounted to motor slides which allow them to retract from the cutting plane of your 4x2 for versatility o The 2 front blades have hinged stops which are preset at the factory for Four Angle Web Cutting These stops provide for quick changeovers between 2 angles including square blocks and four angl...

Page 28: ...e are also mechanical pointers inside the front doors o Change settings as desired always using LOW angle numbers on each end of web to set digital read outs Both of the digital read outs are set to read the rear blades o Set both digital read outs to the same LOW numbered angle 45 45 Webs Simply Set both sides to read 45 degrees 45 degrees 45 degrees 45 degrees 45 degrees 65 25 Webs or Similar An...

Page 29: ...e teeth from touching the webs Cantilever Two Piece Webs o The FWA 500 cuts cantilever webs by using the front blade of one end and the rear blade of the other end o Set the digital read outs to the LOW numbered angle setting on both sides o The unused front blade on one side and the rear blade on the other side should be cranked beyond the reach of the board 65 degrees 25 degrees Piece 1 Piece 2 ...

Page 30: ...e respective pointer with the frame scale Carriage Travel 2 Angle Web and 4 Angle Web center line Square Ended Blocks Setting Web Lengths with Digital Readouts Single Side Setup Models Only o With its optional Single Sided Setup web length may be set to within 01 inch per the digital readout on the control panel shown below o Optional single side setup 26 Left Side Angle Readout Right Side Angle R...

Page 31: ...MAINTENANCE SCHEDULE SERVICE SCHEDULE 27 ...

Page 32: ...n wrench for 5 16 bolts on 10 hp and 7 16 wrench for bolts on 5 hp motors Visual inspection Allen head wrench and visual inspection MONTHLY Clean as above Tighten set screws in sprockets and bearings Examine sprockets for proper alignment with quadrant chain Examine tension in chain and sprocket alignment underneath carriage Allen head wrench size range from 1 8 to Visual inspection Visual inspect...

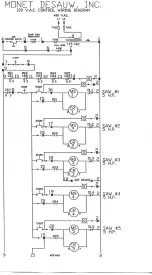
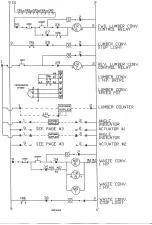
Page 33: ...oose wires at motor starter and or switch 4 Malfunction in contact blocks on pushbutton 5 Safety feature activated 1 Reset 2 Check and replace if needed 3 Check connections and tighten as needed 4 Perform continuity test on contact block 5 Check safety system components Motor runs erratically or jumps 1 Badly worn brushes 2 Insufficient torque by motor 1 Replace as needed 2 Call MDI tech for param...

Page 34: ...or resin coated 1 Clean and lubricate 2 Adjust gearbox sprocket away from chain to attain free movement without causing hesitation in movement 3 Clean and lubricate polish any rough or scored areas Counter reads incorrect angle 1 Broken counter shaft 2 Loose setscrew on counter causing sprocket slippage 1 Replace counter 2 Reset counter per calibrating instructions and tighten setscrew Traveling c...

Page 35: ... 1 Output end pulley misaligned 1 Adjust pulley bearings via threaded rods until belt runs true Belt Slips 1 Input end pulley misaligned too loose or binding 1 Adjust pulley bearing opposite motor until belt is true Adjust tension as above and adjust tracking Conveyor starter trips frequently 1 Belt drag excessive due to obstruction of belt or belt out of track 2 Gear lubricant thickened in cold w...

Page 36: ......

Page 37: ......

Page 38: ......

Page 39: ......

Page 40: ......

Page 41: ......

Page 42: ......

Page 43: ...Monet Desauw Inc FWA 500 Maintenance ...

Page 44: ...r rack to make sure the gear is on the rack between 0 and 45 degrees Rotate the gear rack so that the gear is engaged at 0 degrees Tighten up the Allen head bolts Be sure to follow all Lock out Tag out procedures before attempting any maintenance to the machine WARNING ...

Page 45: ...Angle Encoder Rack Adjustment ...

Page 46: ...t Adjust mount until gear meshes in rack After proper lash tighten the Allen head bolts and rotate arm using the push buttons insuring there is a constant mesh Be sure to follow all Lock out Tag out procedures before attempting any maintenance to the machine WARNING ...

Page 47: ...Angle Encoder Adjustment ...

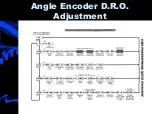
Page 48: ...Setting The Angle Digital Readout Scale Factor ...

Page 49: ...Angle Encoder D R O Adjustment ...

Page 50: ... able to pick up the conveyor chain two inches in the center of the conveyor Upper Hold down Chain Loosen two Allen head bolts Use a inch wrench to tighten or loosen the adjustment bolt Allow inch sag in the middle of the bar Be sure to follow all Lock out Tag out procedures before attempting any maintenance to the machine WARNING ...

Page 51: ...Lower Conveyor Chain Adjustment Video ...

Page 52: ...Upper Hold Down Chain Tension ...

Page 53: ...lights lined up Adjusting Chain Take a marker and make a line on the sleeve and the sprocket The mark lets you know if you are gaining or losing when it comes to timing Take a crescent wrench and put it on the square shaft to move bolts Be sure to follow all Lock out Tag out procedures before attempting any maintenance to the machine WARNING ...

Page 54: ...Lower Feed Conveyor Timing ...

Page 55: ...o jam nuts To tighten chain you need to draw the outer nut against the mount The chain needs to sag one inch for the proper tension Be sure to follow all Lock out Tag out procedures before attempting any maintenance to the machine WARNING ...

Page 56: ...Carriage Chain Adjustment ...

Page 57: ...lism Using a tape measure measure in between the conveyors on both ends of the machine The two need to be within 1 16 of an inch of each others distance If they are not parallel you must adjust the guide bearings Adjusting Bearings Use an Allen wrench and loosen the bearings Move the shims from outside to inside or vice versa By moving the shims you can adjust the dimensions between the conveyors ...

Page 58: ...Adjust Guide Bearings Video ...

Page 59: ...enters the saw With the string tight the blades should be touching the string on the leading edge of the blade and no more than a 1 16 on the rear edge of the blade To make an adjustment using the crank handle position the blade against the string Lock the location bolts and mark the slide plate ...

Page 60: ...Center Line Adjustment Video ...

Page 61: ...Electrical Cabinet Components Variable Speed Frequency Drive Control Relays Transformer for 110 Fuses and Fuse Blocks Motor Starters control 5hp motors and waste disposal The Disconnect ...

Page 62: ...Electrical Cabinet Components Variable Speed Frequency Drive ...

Page 63: ...Electrical Cabinet Components Control Relays ...

Page 64: ...Electrical Cabinet Components Transformer for 110 ...

Page 65: ...Electrical Cabinet Components Fuses and Fuse Blocks ...

Page 66: ...Electrical Cabinet Components Motor Starters ...

Page 67: ...Electrical Cabinet Components Lock Out Tag Out Disconnect ...

Page 68: ...et DeSauw Inc The Most Reliable Contact Us Monet DeSauw Inc 3100 Dogwood Drive Fulton MO 65251 United States Call 1 877 642 4900 Or Check us out on the web at www desauw com Email Us at contact desauw net ...

Page 69: ......

Page 70: ......

Page 71: ......

Page 72: ......

Page 73: ......

Page 74: ......

Page 75: ......

Page 76: ......

Page 77: ......

Page 78: ......

Page 79: ......

Page 80: ......

Page 81: ......

Page 82: ......

Page 83: ......

Page 84: ......

Page 85: ......

Reviews: