


SCSI Interface
126
Installation
Attention
It’s very important to protect the printer controller board and any
associated circuit boards from electrostatic damage. Before performing
this procedure, review the antistatic caution on page 105. In addition,
always handle circuit boards by the edges only.
1
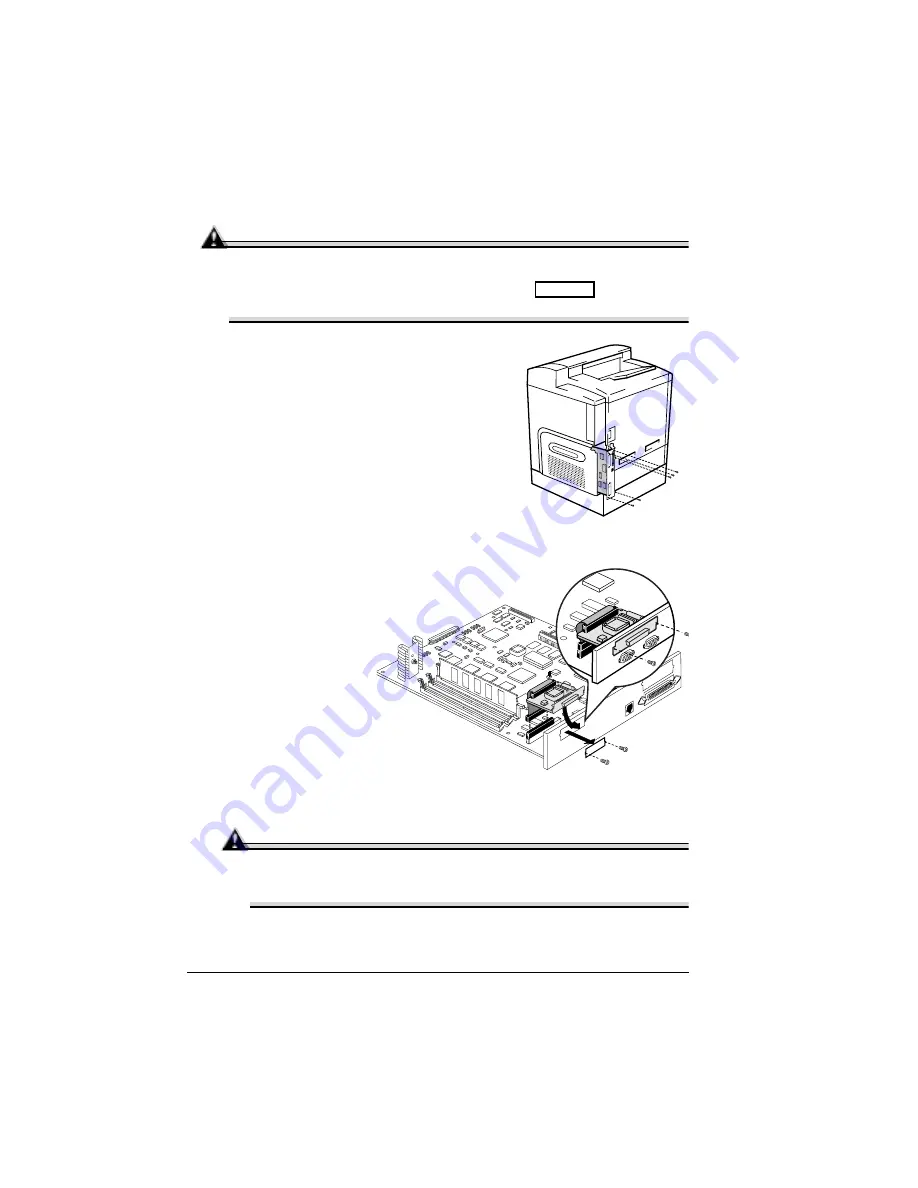
Turn off the printer, and then disconnect
the power cord and all interface cables
from the printer.
2
Loosen five screws and, using the tab on
the lower side of the panel, pull the
controller board from the printer.
3
Remove the two screws holding the metal
plate over the SCSI interface opening.
4
You can dispose of the metal plate and
screws according to local regulations.
5
Attach the SCSI
interface card to
the controller
board.
a
Position the
SCSI interface
card so that its
ribbon cable
connector
aligns with the
SCSI connec-
tor on the con-
troller board.
b
Gently press
the ribbon cable
connector down until it’s fully seated.
Attention
Make sure that the connectors on the ribbon cable and the controller
board are properly aligned. Damage to the controller board could
result if the pins are misaligned.
c
Insert the SCSI interface card connector into its opening in the
interface panel.
IIIIIIIIIIIIIIIIIIIIIIIIIIIIIIIIIIIIIIIIIIIIIII IIIIIIIIIIIIIIIIIIIIIIIIIIIIIIIIIII IIIIIIIII
................................................ ........................ ..........
................................................ ........................ ..........
................................................ ........................ ..........
................................................ ........................ ..........
..................
...................
..................
...................
Summary of Contents for MAGICOLOR 2210
Page 1: ...magicolor 2210 User s Guide 1800669 001B ...
Page 7: ...1 Replacing Consumables ...
Page 34: ......
Page 35: ...2 Using Media ...
Page 49: ...3 Maintaining the Printer ...
Page 53: ...4 Troubleshooting ...
Page 101: ...5 Installing Other Accessories ...
Page 140: ......
Page 141: ...6 Color Printing ...
Page 144: ......
Page 145: ...7 Repacking the Printer ...
Page 155: ...A Technical Specifications ...
Page 176: ......


