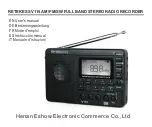
8
9
28 Volt Lithium Ion Battery Pack
Cat. No. 48-11-2830
18 Volt NiCd Battery Pack
Cat. No. 48-11-2230
14.4 Volt NiCd Battery Pack
Cat. No. 48-11-1024
12 Volt NiCd Battery Pack
Cat. No. 48-11-1960 & Cat. No. 48-11-1900
For a complete listing of accessories refer
to your
MILWAUKEE
Electric Tool catalog
or go on-line to www.milwaukeetool.com.
To obtain a catalog, contact your local dis-
tributor or a service center.
Only charge battery packs in their
recommended chargers. Charg-
ing a battery pack in a other type
of charger may cause the battery
pack to explode, causing per-
sonal injury and damage.
ACCESSORIES
WARNING!
To reduce the risk of injury, al-
ways unplug the tool before at-
taching or removing accesso-
ries. Use only specifically recom-
mended accessories. Others
may be hazardous.
WARNING!
FIVE YEAR TOOL
LIMITED WARRANTY
Every
MILWAUKEE
tool is tested before
leaving the factory and is warranted to be
free from defects in material and work-
manship.
MILWAUKEE
will repair or
replace (at
MILWAUKEE
’s discretion),
without charge, any tool (including battery
chargers) which examination proves to be
defective in material or workmanship from
five (5) years after the date of purchase.
Return the tool and a copy of the purchase
receipt or other proof of purchase to a
MILWAUKEE
Factory Service/Sales
Support Branch location or
MILWAUKEE
Authorized Service Station, freight prepaid
and insured. This warranty does not cover
damage from repairs made or attempted
by other than
MILWAUKEE
authorized
personnel, abuse, normal wear and tear,
lack of maintenance, or accidents.
Battery Packs, Flashlights, and Radios are
warranted for one (1) year from the date
of purchase.
THE REPAIR AND REPLACEMENT REMEDIES
DESCRIBED HEREIN ARE EXCLUSIVE. IN NO
EVENT SHALL
MILWAUKEE
BE LIABLE
FOR ANY INCIDENTAL, SPECIAL, OR
CONSEQUENTIAL DAMAGES, INCLUDING
LOSS OF PROFITS.
THIS WARRANTY IS EXCLUSIVE AND IN
LIEU OF ALL OTHER WARRANTIES, OR
CONDITIONS, WRITTEN OR ORAL,
EXPRESSED OR IMPLIED FOR
MERCHANTABLILITY OR FITNESS FOR
PARTICULAR USE OR PURPOSE.
This warranty gives you specific legal
rights. You may also have other rights that
vary from state to state and province to
province. In those states that do not allow
the exclusion of implied warranties or
limitation of incidental or consequential
damages, the above limitations or
exclusions may not apply to you. This
warranty applies to the United States,
Canada, and Mexico only.
Setting Preset Stations
1.
Select AM or FM band with the MODE
button.
2.
Tune to desired station.
3.
Press the MEM button.
NOTE:
"MEMORY" will appear in the
top right corner of the display win-
dow.
4.
Use the PRESET button to select a
number one (1) through 10.
5.
Push the MEM button to store preset
selection.
Using Punch EQ Feature
Push the Punch EQ button to set the de-
sired level of bass sound. The level of
sound is indicated by the color of the Punch
EQ button as follows:
• Off- No Light
• Low- Green Light
• Medium- Orange Light
• High- Red Light
Using Stereo AUX Jack
1.
Turn the volume down all the way us-
ing the on/off volume control knob. This
is to prevent speaker blowout.
2.
Plug the auxiliary device into the Ste-
reo AUX jack.
3.
Press MODE button until "AUX" ap-
pears in the bottom left corner of the
display window.
4.
Press the "PLAY" button on the auxil-
iary device.
5.
Adjust volume to desired level using
the on/off volume control knob.
NOTE:
When in this mode the clock
appears in the display window and
A.M. may also be displayed depend-
ing on time of day.
Fig. 2
Battery cover
Changing or Installing Clock Batteries
(Fig. 2)
WARNING!
Batteries may leak chemicals or
may explode if used incorrectly.
The following care should be taken
to prevent such an incident:
• Make sure the positive (+) and
negative (-) battery terminals
are positioned correctly.
• Do not mix new and old bat-
teries together, or mix
different types of batteries.
• Do not try to recharge non-re-
chargeable
batteries.
If chemicals from the batteries
come in contact with your skin,
wash them off immediately with
water. If chemicals leak onto the
unit, clean the unit completely.
1.
If the clock display begins to fade,
change the batteries.
2.
Remove the screw and battery cover.
3.
Insert two (2) AA batteries according
to matching positive (+) and negative
(-) marks.
NOTE:
If the radio is unplugged, replace
batteries within 15 seconds to avoid
loosing preset station memory.
4.
Replace the battery cover and screw.