background image

2 3

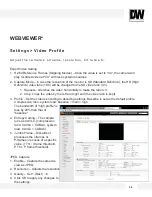
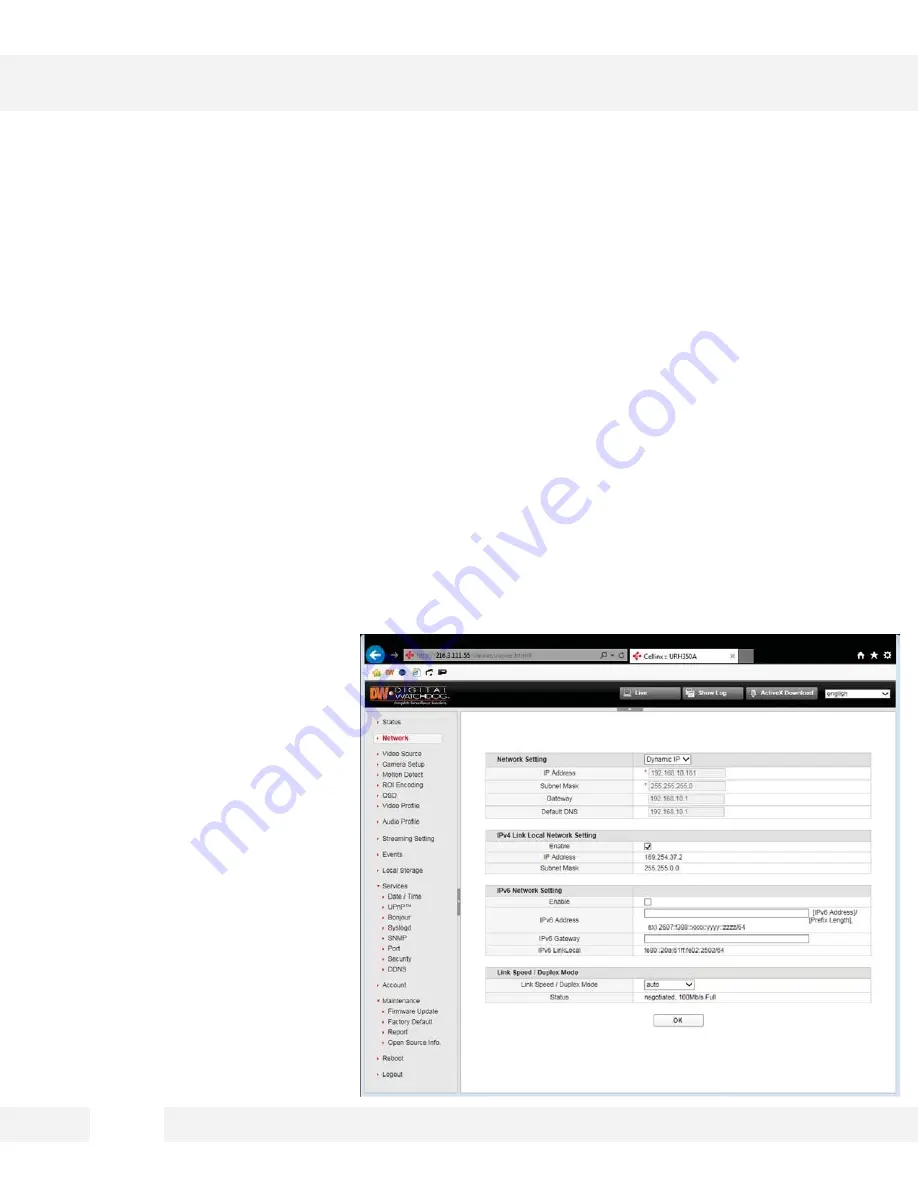
S e t t i n g s >   N e t w o r k

V i e w   t h e   M E G A p i x ®   P A N O ™   c a m e r a ’ s   n e t w o r k   i n f o r m a t i o n .  

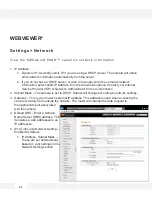
1. IP Address: 

1. Dynamic IP– Select Dynamic IP if you are using a DHCP Server. The camera will obtain 

all its network information automatically from the server. 

2. If you do not have a DHCP server, or wish to manually enter the camera’s network 

information, select static IP Address from the drop-down options. Contact your Internet 
Service Provider (ISP) or Network  Administrator for more information.

2. Subnet Mask – The camera is set to DHCP. Subnet will change according to network settings.

3. Gateway – This is your router’s external IP address. This address is used when accessing the 

camera remotely from outside the network. The router will channel the data request to 
the appropriate port associated 
with the camera. 

4. Default DNS – Enter a Domain 

Name Server (DNS) address. This 
translates a web addresses to an 
IP addresses.

5. IPv4 Link Local Network Setting –

Enabled by default. 

1. IP Address, Subnet Mask –

These are set automatically 
based on your settings in the 
Network Setting section. 

WEBVIEWER* 

Network

Summary of Contents for PANO DWC-PF5M1TIR

Page 1: ...nstalling or operating the camera please read and follow this manual carefully 04 16 operating the camera please read and follow this manual carefully DWC PF5M1TIR MEGApix PANO 5MP 180 and 360 Fisheye IP Camera ...

Page 2: ...the temperature may rise to high levels Cleaning To remove dirt from the case moisten a soft cloth with a soft detergent solution and wipe Mounting Surface The material of the mounting surface must be strong enough to support the camera Q This equipment has been tested and found to comply with the limits for a Class B digital device pursuant to Part 15 of the FCC rules These limits are designed to...

Page 3: ...ork 23 24 Video Source 25 Camera Setup 26 29 Motion Detection 30 ROI Encoding 31 OSD 32 Video Profile 33 34 Streaming Setting 35 36 Local Storage 37 39 Services Date Time 40 Services UPnP 41 Services Bonjour 42 Services SNMP 43 Services Port 44 Services Security 45 Services DDNS 46 Account 47 Maintenance Firmware Update 48 Maintenance Factory Default 49 Maintenance Report 50 Maintenance Open Sourc...

Page 4: ...mm Fisheye Lens Edge to Edge Image Clarity Smart IR with Intelligent Camera Sync 32ft Range True Wide Dynamic Range WDR ONVIF Conformant Profile S Smart DNR 3D Digital Noise Reduction True Day Night with Mechanical IR Cut Filter Web Server Built in Auto Gain Control AGC Auto White Balance AWB Motion Detection Micro SD SDHC Class 10 Card Slot card not included PoE and DC12V 5 Year Warranty FEATURES...

Page 5: ...PARTS DESCRIPTIONS 5 ...

Page 6: ...DIMENSIONS MM 6 43 8 1 72 ...

Page 7: ...INCLUDED IN THE BOX 7 ...

Page 8: ...itch PoE Injector The MEGApix PANO Camera is PoE Compliant allowing transmission of power and data via a single Ethernet cable PoE eliminates the need for the different cables used to power record or control the camera Follow the illustration below to connect the camera to a PoE enabled switch using an Ethernet cable Please note that the camera requires a Class 3 PoE Switch 2 Using 12VDC If a PoE ...

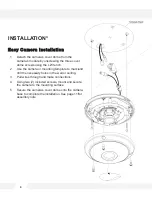
Page 9: ... to mark and drill the necessary holes in the wall or ceiling 3 Pull wires through and make connections 4 Using two 2 included screws mount and secure the camera to the mounting surface 5 Secure the camera s cover dome onto the camera base to complete the installation See page 11 for assembly note INSTALLATION 9 E Easy Camera Installation r and re era for ...

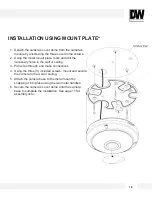
Page 10: ... wires through and make connections 4 Using the three 3 included screws mount and secure the camera to the wall or ceiling 5 Attach the camera base to the metal mount by snapping it into place using the two metal handles 6 Secure the camera s cover dome onto the camera base to complete the installation See page 11 for assembly note INSTALLATION USING MOUNT PLATE 1 0 era s rews secure es era or ...

Page 11: ...e the locking discs over the screws until the camera is held tightly from the mounting surface 5 Secure the camera s cover dome onto the camera base to complete the installation INSTALLATION USING MOUNT BOLT NUT 1 1 1 The camera includes a sensor at the camera s module For the sensor to function properly the camera s dome includes a special hole for the sensor 2 When assembling the camera together...

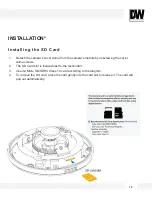
Page 12: ...dome screws 2 The SD Card slot is located next to the rest button 3 Insert a Micro SD SDHC Class 10 card according to the diagram 4 To remove the SD card press the card gently into the card slot to release it The card will pop out automatically INSTALLATION 1 2 Installing the SD Card ...

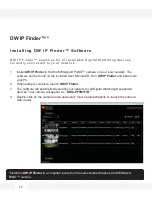
Page 13: ...software can be found on the included User Manual CD Run DW IP Finder and install onto your PC 2 When setup is complete launch DW IP Finder 3 The software will automatically search your network for all Digital Watchdog supported devices Your camera will appear as DWC PF5M1TIR 4 Double click on the camera name and select View Camera Website to launch the camera web viewer Install the DW IP Finder t...

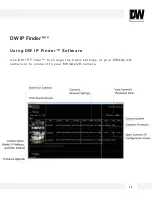
Page 14: ... IP Finder Softw are U s e D W I P F i n d e r t o c h a n g e t h e b a s i c s e t t i n g s o f y o u r M E G A p i x c a m e r a o r t o c o n n e c t t o y o u r M E G A p i x c a m e r a 1 4 DW IP Finder ...

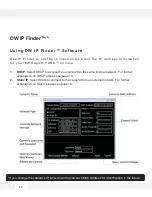
Page 15: ...c t i o n t y p e a n d t h e I P a d d r e s s i n f o r m a t i o n f o r y o u r M E G A p i x PA N O c a m e r a 1 DHCP Select DHCP to access the camera within the same internal network For further explanation on DHCP please see page 16 2 Static IP Select Static to connect to the camera from an external network For further explanation on Static please see page 16 DW IP Finder ...

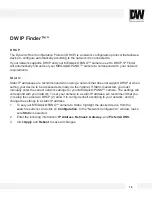
Page 16: ...xternally via the internet If Static is selected you must manually enter the correct network settings for your MEGApix PANO camera The settings will correspond with your network To set your camera to a static IP address we recommend that you 1 setup the camera to DHCP 2 allow it to configure itself according to your network and 3 change the settings to a static IP address 1 To set your MEGApix PAN...

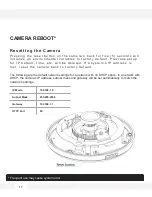
Page 17: ...e e t c w i l l b e d e l e t e d I f a s y s t e m s I P a d d r e s s i s l o s t r e s e t t h e c a m e r a b a c k t o f a c t o r y d e f a u l t The following are the default network settings for a network with no DHCP option In a network with DHCP the camera s IP address subnet mask and gateway will be set automatically to match the network s settings CAMERA REBOOT IP Mode 192 168 1 2 Subn...

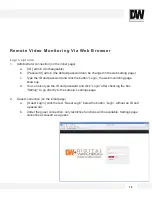
Page 18: ...d click the button Login the web monitoring page shows up d You can also type the ID and password and click Login after checking the box Setting to go directly to the camera s settings page 2 Guest connection on the initial page a Guest Login click the text Guest Login below the button Login without an ID and a password b Under the guest connection only restrictive functions will be available Sett...

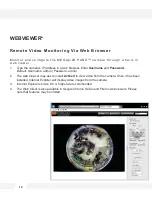
Page 19: ...r Username and Password Default Username admin Password admin 2 The web browser may ask to install ActiveX to view video from the camera Once it has been installed Internet Explorer will display video images from the camera 3 Internet Explorer version 8 0 or higher are recommended 4 The Web Client is also available in Google Chrome Safari and Firefox web viewers Please note that features may be li...

Page 20: ...2 0 GUI Description M o n i t o r a n d c o n f i g u r e t h e M E G A p i x c a m e r a t h r o u g h a b u i l t i n w e b v i e w e r WEBVIEWER Not supported on the DWC PF5M1TIR ...

Page 21: ...he camera in full screen you can hide all the settings and menu options and display the camera s view across your entire monitor Press Esc to exit the full screen mode 9 Local Recording Record short videos from the camera s streaming and save them locally 1 Click the Record button to start recording A red frame will appear around the display area 2 Click the Record button a second time to stop rec...

Page 22: ...ion status for Link Speed Duplex Mode Model Information Displays the camera s hardware information including Firmware and Boot Loader versions camera s Model Serial Number System Mode and local storage information NVT Time Display the camera s time information including the camera s current time settings and the running time how long the camera has been running since the last time it booted up CPU...

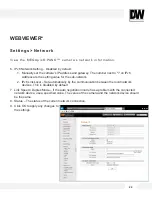
Page 23: ...r ISP or Network Administrator for more information 2 Subnet Mask The camera is set to DHCP Subnet will change according to network settings 3 Gateway This is your router s external IP address This address is used when accessing the camera remotely from outside the network The router will channel the data request to the appropriate port associated with the camera 4 Default DNS Enter a Domain Name ...

Page 24: ...value for the sub network 2 IPv6 LinkLocal Set automatically by the communication between the local network devices This is disabled by default 7 Link Speed Duplex Mode If the auto negotiation mode has a problem with the connected network device use a specified value The value of the camera and the network device should be the same 8 Status The status of the current network connection 9 Click OK t...

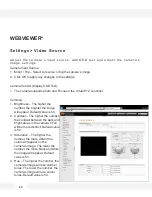
Page 25: ...mon 1 Brightness The higher the number the brighter the image will appear Default value is 50 2 Contrast The higher the number the contrast between the dark and bright areas in the camera s FoV will be more distinct Default value is 50 3 Saturation The higher the number the more vibrant the colors will appear on the camera s image The lower the number the more black and white the image will appear...

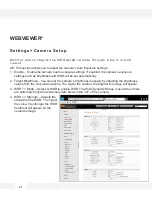
Page 26: ...rks the light level at which the camera will switch between color and B W Set the minimum and maximum values for the CDS threshold Default values are mentioned next to the drop down menu 5 IR You can manually activate the cameras IR LED board Select Built in to activate the IR LEDs in the camera when low light is detected If you are using an external light source or the camera s own IR LEDs interf...

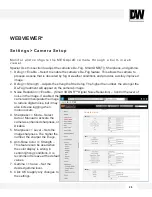
Page 27: ...ess and WDR will be set automatically 2 Target Brightness You can set the camera s brightness manually by adjusting the brightness values from the drop down options The higher the number the brighter the image will appear 3 WDR Mode Select D WDR to enable WDR The Wide Dynamic Range is used when there are extremely bright and extremely dark areas in the VoF of the camera 4 WDR Strength Adjusts the ...

Page 28: ...ment will appear on the camera s image 3 Noise Reduction Enable Smart 3D DNR Digital Noise Reduction Control the level of noise in the image If enabled the camera will manipulate the image to reduce digital noise but it may also increase lagging when motion occurs 4 Sharpness Mode Select Auto or Manual to activate the camera s enhanced sharpness or Disable 5 Sharpness Level Sets the image sharpnes...

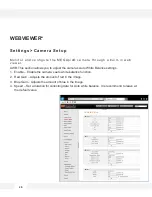
Page 29: ...ion allows you to adjust the camera s Auto White Balance settings 1 Enable Enable the camera s auto white balance function 2 Red Gain Adjusts the amount of red in the image 3 Blue Gain Adjusts the amount of blue in the image 4 Speed Set a duration for collecting data for Auto white balance It is recommend to leave at the default value WEBVIEWER Camera Setup ...

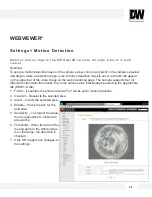
Page 30: ...ing page The camera supports four 4 different motion detection masks Each one can be setup individually be selecting the appropriate tab ROI 1 4 tab 1 Fill All If enabled the entire camera s FoV will be set to motion detection 2 Clear All Deselects the selected area 3 Invert Inverts the selected area 4 Enable Check the box for the activation 5 Sensitivity The higher the value the more sensitive to...

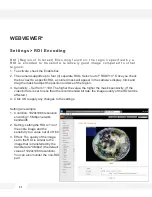
Page 31: ...just the position and size of the region 3 Sensitivity Set from 1 100 The higher the value the higher the mask s sensitivity If the video bit rate is set to less than the recommended bit rate the image quality of the ROI will be affected 4 Click OK to apply any changes to the settings Setting an example 1 Condition 1920x1080 resolution encoding 1 5 Mbps network bandwidth 2 Setting setting the ROI ...

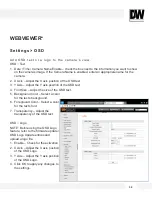
Page 32: ...ion of the OSD text 4 Font Size Adjust the size of the OSD text 5 Background Color Select a color for the text s background 6 Foreground Color Select a color for the text s font 7 Transparency Adjust the transparency of the OSD text OSD Logo NOTE Before using the OSD Logo feature refer to the firmware update OSD Logo Update entries and upload a logo file 1 Enable Check for the activation 2 X Axis ...

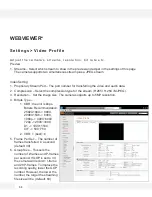
Page 33: ... H 265 H 264 MJPEG 3 Resolution Set the image size The camera supports up to 5MP resolution 4 Bitrate Type 1 CBR the unit is kbps Bitrate Recommendation 2592X1944 8000 2048X1536 6000 1080p 4000 6000 720p 2000 3000 D1 1000 1500 CIF 500 750 2 VBR 1 best 6 5 Frame Per Sec The number of frames transferred in a second default 30 6 Group Size This sets the number of I frames and P frames per second If G...

Page 34: ... crops the video by the left and right end the video ratio is kept 3 Profile Set the video s encoding to decoding settings Baseline is set as the default profile Compression ratio system load baseline main high The bandwidth of high profile is less by 20 than that of baseline 4 Entropy Coding The camera runs as CAVLC compression ratio CAVLC CABAC system load CAVLC CABAC 5 Jumbo Frame Discards or p...

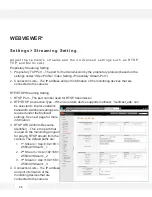
Page 35: ...SP Port The port number used for RTSP transmission 2 RTP RTSP Connection Type When a network device supports multicast multicast_udp can be selected to improve network bandwidth Additional settings are required under the Multicast settings See next page for more information 3 RTSP URI Uniform Resource Identifier This is the path that is used on the monitoring program for playing RTSP stream from t...

Page 36: ...ansmitting the video data 4 Audio Address The IP address for audio data transmission 5 Audio Port The port number for audio data transmission 6 Audio TTL Set the number of the routers that pass when transmitting the audio data Advanced Setting 1 Use RTSP Authentication Check the box if an authentication process is required 2 Use RTCP Check the box if RTCP function is required 3 Use RTCP Keep Alive...

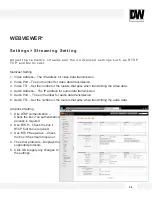
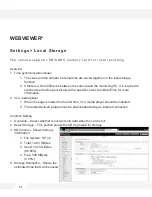
Page 37: ...ecific server See Date Time for more information 2 VLC media player 1 When the page is loaded for the first time VLC media player should be installed 2 The related ActiveX program can be downloaded during an internet connection Common Setting 1 Overwrite Select whether to overwrite old data when the card is full 2 Select Storage This section shows the SD Card used for storage 3 SD Volume Shows mem...

Page 38: ...d When the camera s network connection with the monitoring PC is lost 4 I Frame Only I Frame shows at every 60 frames 2 sec the camera will record only the main frames of the video The contents of the blank are the values that are set on the Video Profile settings 3 Select Stream Select which stream to record 4 Click OK to apply any changes to the settings Date Time Information 1 Model name Date T...

Page 39: ...l o c a l r e c o r d i n g File Lists 1 Time bar Displays the time for recorded data 2 Calendar Select a date and search the data 3 File format Stream Start End Encoding Size 4 Download button Download the selected files 5 Delete button Delete the selected files on the memory WEBVIEWER Local Storage ...

Page 40: ...ring PC Click the Set button to apply the changes 4 Specify OSD Date Time Format Set the date and time format Click the Set button to apply the changes Time Zone 1 Time Zone Select the time zone from the available options 2 Click OK to apply any changes to the settings Time Server If enabled the camera will synchronize its date and time with a time server 1 Enable Check the box to enable 2 Interva...

Page 41: ...c t i o n w i t h W i n d o w s e x p l o r e r 1 Enable Check to enable UPnP 2 Friendly name This is the name identifying the camera when using the UPnP search It is created by the camera s MAC address You can modify it as needed 3 Click OK to apply any changes to the settings WEBVIEWER UPnP ...

Page 42: ... e c t i o n w i t h W i n d o w s e x p l o r e r 1 Enable Check to enable UPnP 2 Friendly name This is the name identifying the camera when using the UPnP search It is created by the camera s MAC address You can modify it as needed 3 Click OK to apply any changes to the settings WEBVIEWER Bonjour ...

Page 43: ...e n u t o s e t t h e c a m e r a s S N M P s e t t i n g s 1 Enable Check to enable 2 Read community Shows the running mode as public fixed 3 UDP Port Enter the port number for use 4 Click OK to apply any changes to the settings WEBVIEWER SNMP ...

Page 44: ... b e r f o r t h e d a t a c o m m u n i c a t i o n Web HTTP The camera s web port is set by default to 80 You can modify it as needed Serial Port 1 RS485 Currently not supported Serial Port 2 RS232 Currently not supported Click OK to apply any changes to the settings WEBVIEWER Port ...

Page 45: ...1 Enable Check to enable 2 Basic Policy Select allow deny 3 IP Addresses List Create the IP address list for filtering Press the Add button to add new IP addresses to the list or delete to remove them from the list 4 My IP Address Displays the IP address of the PC currently connected to the camera 5 Click OK to apply any changes to the settings WEBVIEWER Security ...

Page 46: ... h i r d p a r t D D N S s e r v i c e s a n d s o m e m a y r e q u i r e s u b s c r i p t i o n o r p a y m e n t 1 Enable Check to enable 2 Select Service Select a service to use 3 Type the information that is used on the registration process of the DDNS server homepage 4 Click OK to apply any changes to the settings WEBVIEWER Dynamic DNS ...

Page 47: ...ate New user page will appear 1 Admin Password Enter the administrator s password 2 ID Enter or modify the ID for the user 3 New Password Confirm Password Enter or modify the password for the ID to be added 4 Apply Cancel button Click Apply to save the changes or Cancel to cancel 5 Guest Login Enable check box Check this box to enable guest login services Click Set to apply the changes 6 Max Numbe...

Page 48: ... be interrupted Updates can take up to 10 minutes 3 Network setting will remain the same however video settings may be reset during the update Logo Update 1 Logo Upload 1 Click Browse and select the file to upload 2 Click Upload to start updating OSD Logo Update 1 OSD Logo Upload 1 Click Browse and select the file to upload 2 Click Upload to start updating PTZ Protocol Update not supported NOTE If...

Page 49: ...ialize the reset of the selected values Please note to click the reset button only after selecting the values to be initialized 2 Show only changed values check box Check to display only the changed values default 3 Select All check box You can manually check the box next to each settings you want to reset or use the Select All button to selects all groups to be initialized WEBVIEWER Factory Defau...

Page 50: ...s p a g e d i s p l a y s t h e c a m e r a s c u r r e n t s e t t i n g a n d c a n b e p r i n t e d o r s a v e d a s a P D F f i l e f o r r e f e r e n c e 1 Use the Print button to export the report for your records WEBVIEWER Report ...

Page 51: ... s Settings Reboot Yo u c a n s e l e c t t o r e b o o t t h e c a m e r a a s n e e d e d A c o n f i r m a t i o n w i n d o w w i l l a p p e a r t o c o n f i r m t h e r e b o o t Settings Logout To p r o t e c t t h e c a m e r a a n d a d m i n i s t r a t o r s i n f o r m a t i o n y o u c a n u s e t h i s t o l o g o u t o f t h e c a m e r a w h e n y o u n o l o n g e r u s e i t WEB...

Page 52: ...ocols TCP UDP IP HTTP DHCP DNS ICMP ARP DDNS NTP SNMP UPnP Bonjure ZeroConf RTP RTSP Onvif Genetec Protocol Stream Capability H 265 Dual Stream or Simultaneous H 265 H 264 MJPEG Maximum User Access 10 Users Web Viewer Browser IE 8 0 or above OS Windows 7 Windows 8 Windows 10 Vista XP 2000 Video Management Software DW Spectrum IPVMS ENVIRONMENTAL Operating Temperature Humidity 10 C 50 C 14 F 122 F ...

Page 53: ...equirements DC12V 12VDC 6W LED On PoE Class 3 7W Please note that if you plug the camera into PoE but then plug that switch into a PoE it will not work properly If Yes if using PoE Switch is it connected to a proper internet outlet and operating properly Make sure the PoE Switch is connected to a router modem and the ports that have devices connected to them have a green LED on If Yes is the compu...

Page 54: ...ld be connected on the same router Contact your network administrator if you have more than one network available If Yes try pinging the MEGApix PANO camera s IP address as it appears on the DW IP finder From your desktop go to Start Programs Accessories Command Prompt Type ping followed by the camera s IP address then press Enter If you get the message Request timed out camera is not connected If...

Page 55: ...e below for more information If Yes did you install all required ActiveX files These are VLC media files that allows the camera to stream its video to the web client When you connect to your MEGApix PANO camera for the first time your browser will ask you to install ActiveX Make sure your Web Browser s security settings do not block pop up windows and allows ActiveX files to be installed and used ...

Page 56: ...sk will be 255 255 255 0 The MEGApix PANO camera can also connect to the web viewer using a static IP address This will allow you to set your own IP address manually Setup the Network Protocol on your PC 1 Go to Network icon on your PC 2 Right click and select Properties 3 Double click Local Area Connection 4 Click Properties 5 Double click Internet Protocol Version 4 TCP IPv4 6 Select Obtain an I...

Page 57: ... S e t t i n g s If your IP settings are obtained automatically you could use the MS DOS prompt or Command Prompt to determine your IP address To check your PC s TCP IP Settings Windows Vista or Windows 7 TROUBLESHOOTING 5 7 ...

Page 58: ...eipt or other proof of the date of the original purchase is required before warranty service is rendered This warranty only covers failures due to defects in materials and workmanship which arise during normal use This warranty does not cover damages which occurs in shipment or failures which are caused by products not supplied by the Warrantor or failures which result from accident misuse abuse n...

Page 59: ...xclusion or limitation of incidental or consequential damages or limitations on how long an implied warranty lasts so the above exclusions or limitations may not apply to you This warranty gives you specific legal rights and you may also have other rights from vary from state to state If the problem is not handled to your satisfaction then write to the following address Digital Watchdog Inc ATTN R...

Page 60: ...ritos California USA 90703 PH 866 446 3595 FAX 813 888 9262 www Digital Watchdog com technicalsupport dwcc tv Technical Support PH USA Canada 1 866 446 3595 International 1 813 888 9555 French Canadian 1 514 360 1309 Technical Support Hours Monday Friday 9 00am to 8 00pm Eastern Standard Time ...

Reviews: