4
4
NOTA: El material mostrado para instalacion no viene con la estufa.
NOTA: Su estufa puede estar equipada de fábrica con:
1.- Tubo de Alimentacion ó
2.- Válvula de Corte de Gas.
Tubo de Alimentación
integrado a la estufa
Llave de paso
de 9,5 mm (3/8")
Cople-Niple de 9,5 mm (3/8"NPT)
a 9,5 mm(3/8")cónica
Tubo de cobre con tuercas
cónicas de 9,5 mm (3/8")
Tubo de cobre con tuercas
cónicas de 9,5 mm (3/8") de
longitud necesaria para llegar
al gas
Cople-Niple de
9,5 mm (3/8"NPT)
Regulador
de gas
Conexión
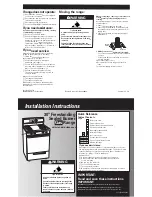
CONEXIÓN DE LA ESTUFA A LA LÍNEA DE GAS
Para conectar su estufa, utilice el material especificado en la figura
de abajo.
1
2
Cheque con agua jabonosa
que no existan fugas.
2
Check with soap solution for leaks.
IMPORTANTE
Con el fin de facilitar el movimiento del aparato,
el instalador debe hacer una espiral con el tubo
flexible de cobre e instalar una llave de paso
en la línea de suministro de gas, esta llave debe
estar fuera de la estufa y accesible a las
personas que la usan.
Si la instalación no es
nueva, limpie los tubos
de cobre, para evitar
que se tapen las
espreas y/o pilotos.
Esta estufa está preparada para
funcionar con gas L.P. de tanque
móvil o estacionario.
Para usarse con gas natural ( de
tubería) debe llamar a Whirlpool
Service , para cambiar las espreas
y hacer los ajustes necesarios, el
número telefónico aparece en la
página 12. El técnico calificado debe
cerciorarse que la conexión no tiene
fugas y que la presión de gas en la
estufa es la que aparece en las
tablas.
NOTA: Para operar esta estufa con gas natural,
se requiere el juego de conversión de acuerdo con
la siguiente tabla:
IM
PO
RT
AN
T
To make it easier to move the
appliance, the installer should
loop the 3/8" copper tubing as
shown in the illustration.
If the installation is not
new, you should clean
it in order to avoid the
obstruction of orifices
and/or pilots.
This
range is
adjusted at
the factory
for use with L.P. gas.
To use this range with natural gas,
you must replace the surface and
oven burner orifices, call your
Whirlpool
Service, the
phone number
is shown in the page 12.
The
technician must make sure that the
connections have no leaks and the
gas pressure in the range is the
same as shown in the charts.
NOTE: To
operate
this range
with natural
gas,
is required a kit according to the chart:
This kit
is available
at your
nearest Authorized
Service
Center.
NOTE: The material shown for inst
allation is not provided with the
range.
NOTE: The range could be equipped from the factory with
one of the following accesories:
1.- Gas Inlet Tube Fitting or
2.- Shut Off Gas V
alve.
3/8" shut off
valve
Gas Inlet Tube Fitting
integrated to the range
3/8" NPT to 3/8" brass pipe
fitting Hex. adapter
3/8" copper
pipe
with 5/8" flared
type nut
Gas
regulator
3/8" copper pipe with
5/8" flared type nut.
Necessary
length to reach the
gas
3/8" brass pipe
fitting
Hex. adapter
Gas Supply
Connection
GAS SUPPLY CONNECTION
To connect the range, use the material shown in the bottom figure.
1
Modelo
LP a Gas Natural
Natural a LP
WF5555 W10162150 W10162151
Este juego está disponible con su Centro de Servicio
Autorizado.
Model
LP to Gas Natural
Natural to LP
WF5555 W10162150 W10162151
GAS LP PRESIÓN DE OPERACIÓN
2,75 kPa (28 cm Col. agua)
QUEMADOR
SUPERIOR STD.
SUPERIOR SUPER
HORNO
ESPREA
74
78
57
mm
0,74
0,78
1,092
kJ/h
7 000
7 500
13 600
DIAM.
ESPREA
CAPACIDAD
TERMICA
ESPREA
105
115
52
mm
1,05
1,15
1,613
kJ/h
7 000
7 500
13 600
DIAM.
ESPREA
CAPACIDAD
TERMICA
GAS NATURAL PRESIÓN DE OPERACIÓN
1,76 kPa (18 cm Col. agua)
QUEMADOR
SUPERIOR STD.
SUPERIOR SUPER
HORNO
NATURAL
GAS OPERATING
PRESSURE 7 in WATER COLUMN
(4,04 oz/squared inch)
NUMBER
105
115
52
INCHES
0,041
0,045
0,063
BTU/h
6 700
7 100
13 000
ORIFICE
DIAMETER
THERMAL
CAPACITY
ORIFICE
BURNER
UPPER STD
UPPER SUPER
OVEN
NUMBER
74
78
57
LP GAS OPERA
TING PRESSURE
11 in W
ATER COLUMN
(6,36 oz/squared inch)
BURNER
UPPER STD
UPPER SUPER
OVEN
INCHES
0,029
0,030
0,042
BTU/h
6 700
7 100
13 000
ORIFICE
DIAMETER
THERMAL
CAPACITY
ORIFICE
Summary of Contents for MF5555B
Page 13: ...13 13...
Page 14: ...14 14...


