Part Number Preliminary 6/11
297
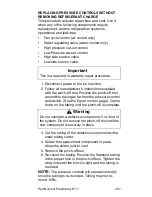
REPLACING PRESSURE CONTROLS WITHOUT
REMOVING REFRIGERANT CHARGE
This procedure reduces repair time and cost. Use it
when any of the following components require
replacement, and the refrigeration system is
operational and leak-free.
•
Fan cycle control (air cooled only)
•
Water regulating valve (water cooled only)
•
High pressure cut-out control
•
Low Pressure cut-out control
•
High side service valve
•
Low side service valve
1. Disconnect power to the ice machine.
2. Follow all manufacturer’s instructions supplied
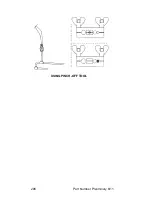
with the pinch-off tool. Position the pinch-off tool
around the tubing as far from the pressure control
as feasible. (See the figure on next page.) Clamp
down on the tubing until the pinch-off is complete.
3. Cut the tubing of the defective component with a
small tubing cutter.
4. Solder the replacement component in place.
Allow the solder joint to cool.
5. Remove the pinch-off tool.
6. Re-round the tubing. Position the flattened tubing
in the proper hole in the pinch-off tool. Tighten the
wing nuts until the block is tight and the tubing is
rounded.
NOTE:
The pressure controls will operate normally
once the tubing is re-rounded. Tubing may not re-
round 100%.
Important
This is a required in-warranty repair procedure.
!
Warning
Do not unsolder a defective component. Cut it out of
the system. Do not remove the pinch-off tool until the
new component is securely in place.
Summary of Contents for ICVD3095
Page 2: ......
Page 12: ...12 Part Number Preliminary 6 11 This Page Intentionally Left Blank ...
Page 25: ...Part Number Preliminary 6 11 25 This Page Intentionally Left Blank ...
Page 26: ...26 Part Number Preliminary 6 11 This Page Intentionally Left Blank ...
Page 36: ...36 Part Number Preliminary 6 11 This Page Intentionally Left Blank ...
Page 72: ...72 Part Number Preliminary 6 11 This Page Intentionally Left Blank ...
Page 101: ...Part Number Preliminary 6 11 101 This Page Intentionally Left Blank ...
Page 132: ...132 Part Number Preliminary 6 11 This Page Intentionally Left Blank ...
Page 137: ...Part Number Preliminary 6 11 137 This Page Intentionally Left Blank ...
Page 138: ...138 Part Number Preliminary 6 11 This Page Intentionally Left Blank ...
Page 187: ...Part Number Preliminary 6 11 187 This Page Intentionally Left Blank ...
Page 188: ...188 Part Number Preliminary 6 11 This Page Intentionally Left Blank ...
Page 225: ...Part Number Preliminary 6 11 225 This Page Intentionally Left Blank ...
Page 226: ...226 Part Number Preliminary 6 11 This Page Intentionally Left Blank ...
Page 262: ...262 Part Number Preliminary 6 11 This Page Intentionally Left Blank ...
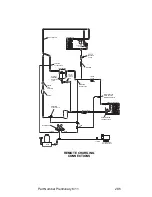
Page 283: ...Part Number Preliminary 6 11 283 ACCESS REMOTE RECOVERY EVACUATION CONNECTIONS ...
Page 291: ...Part Number Preliminary 6 11 291 This Page Intentionally Left Blank ...
Page 298: ...298 Part Number Preliminary 6 11 USING PINCH OFF TOOL ...
Page 303: ...Part Number Preliminary 6 11 303 This Page Intentionally Left Blank ...
Page 304: ...304 Part Number Preliminary 6 11 ...
Page 305: ...Part Number Preliminary 6 11 305 This Page Intentionally Left Blank ...
Page 306: ...306 Part Number Preliminary 6 11 This Page Intentionally Left Blank ...
Page 337: ...Part Number Preliminary 6 11 337 I0500 Remote Air cooled 1Ph ...
Page 339: ...Part Number Preliminary 6 11 339 I0600 I0850 I1000 Remote Condenser Air cooled 1 3 Ph ...
Page 341: ...Part Number Preliminary 6 11 341 IB0690C IB0890C IB1090C QuietQube Remote Air cooled 1 3 Ph ...
Page 342: ...342 Part Number Preliminary 6 11 I1400 I1800 Self Contained Air Water cooled 1 3 Ph ...
Page 343: ...Part Number Preliminary 6 11 343 I1400 I1800 Remote Air cooled 1 3 Ph ...
Page 349: ......


