1
2
3
4
V-belts
117
Checking condition
Fig. 1
D
Check V-belts for cracks, oiling, overheating
and wear.
D
Change damaged V-belts.
Checking tension
Figs. 2 and 3
Use belt tension indicator to check V-belt tension.
D
Lower the gauge arm
À
in the scale.
D
Position the tension indicator in the centre of
the belt between the two pulleys so that the
edge of the stop face
Á
locates against the side
of the belt.
D
Slowly depress the pressure pad
Â
vertically
downwards until the spring disengages with an
audible click; the gauge arm moves upwards.
A false reading will be obtained if you continue to
apply pressure after the spring has disengaged.
Fig. 4
Taking tension reading
D
The tension is shown where the top of the
gauge arm (1 in picture 2) intersects the kg
scale.
D
Ensure that the gauge arm does not move be-
fore you take the reading.
If the reading does not correspond with the speci-
fied value, the V-belt tension must be corrected.
2642
1
2905
2
3
2906
Tensioning forces as per kg scale on
the indicator
V-belt
for newly fitted
assembly
for mainte-
nance af-
width
after as-
sembly
after a
running
time of
10 min.
nance af
ter prolon-
ged pe-
riods of
operation
B 12,5
50-55
45-50
35
C 13
50-55
40-45
35
2/3VX
90-100
70-80
60
Summary of Contents for D 2866 LE 401
Page 1: ......
Page 17: ...Engine views D 2866 LE401 16...
Page 18: ...Engine views D 2866 LE401 17...
Page 19: ...Cross section of engine 18...
Page 20: ...Longitudinal section 19...
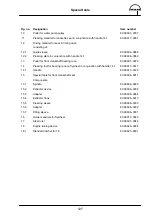
Page 124: ...123 Special tools...
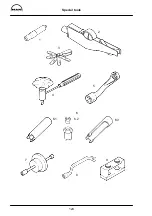
Page 125: ...Special tools 124 2 3 4 5 6 7 9 1 8 6 1 6 2 6 3...
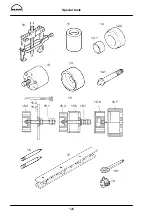
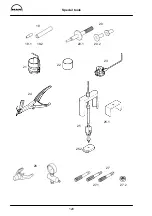
Page 129: ...Special tools 128 21 22 23 25 25 2 24 25 1 26 27 1 27 2 27 20 1 19 2 19 1 20 2 19 20...
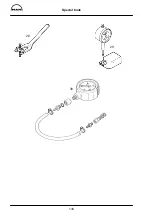
Page 131: ...Special tools 130 29 28 30...
Page 138: ......


