44
TIP: If you plan to print from an SD card instead of
directly from MakerWare, select “Export to a File” at
the top of the Make dialog instead of “Make it Now.”
If your MakerBot Replicator 2X is not connected to your
computer, “Export to File” will be selected automatically.
5
Save and Make Your File | Continued
USiNg mAKErBOT mAKErwArE
CONTINUED
D
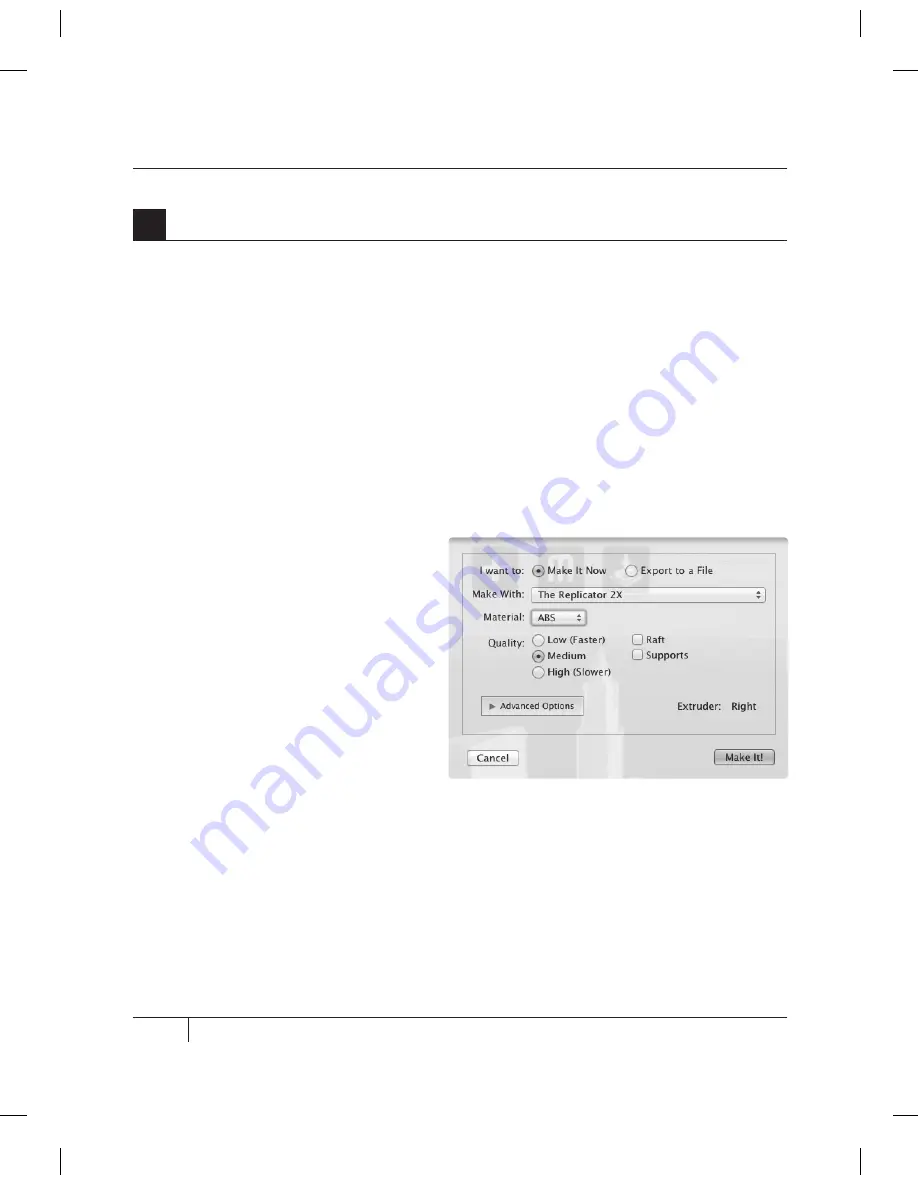
MAkING AN OBJECT WITH MAkERBOT MAkERWARE
[1] mAKE wiTh: Select The Replicator 2X if it is not already selected.
[2] mATEriAL: Choose the type of plastic filament you’re printing with.
[3] QUALiTy: Specify the quality of your build. Smaller layer heights result in more detailed
models and longer build times.
[4] rAFT: Select this to have your object built on a raft. Rafts provide a foundation for supports
and help your object stick to the build plate if the build plate is not level.
[5] SUPPOrTS: Select this to have
your object include easily removable
support structures for overhanging
parts of the object.
[6] ADVANCED OPTiONS: Click here
to open up a menu with more options.
For information on how to use these
options, go to makerbot.com/support/
makerware/documentation/advanced.
[7] EXTrUDEr: Choose which of
your two extruders will print the object.
Choose between Right and Left.
[8] CANCEL: Click here to cancel
this process.
[9] mAKE iT!: Send the file to the
MakerBot Replicator 2X for building.
5b. Select the Make It button. The Make dialog will appear, with the following options:
Summary of Contents for Replicator 2X
Page 1: ...USER MANUAL DUAL EXTRUSION...
Page 2: ......
Page 4: ...Welcome Let s get started A...
Page 8: ...Setting Up Your MakerBot Replicator 2X Experimental 3D Printer B...
Page 20: ...Startup Process Leveling Loading Testing C...
Page 35: ...35 NOTES C Startup PROCESS leveling loading testing...
Page 36: ...Making an Object with MakerBot MakerWare D...
Page 46: ...E Troubleshooting Diagnostics and Maintenance...
Page 64: ...MakerBot One MetroTech Center 21st Floor Brooklyn NY support makerbot com makerbot com...


