background image

LeadCare Ultra

® 

Blood Lead Testing System User’s Guide 

6-8 

6.7.3  Step C: Turn the System ON 

 Follow These Steps


1.  Turn ON the analyzer and login to the LeadCare Ultra System. 
2.  Check that the calibration code of the sensors in use matches the calibration code displayed on 

the main screen. Recalibrate if necessary. 

3.  Enter Patient Test Limit, if desired. For details, see Section 4.5. 


6.7.4  Step D: Analyze the Sample 

 Follow These Steps


1.  Remove a sensor from one of the sensor vials by grasping the sensor at the end with the 

alphanumeric designation. 

2.  Close the vial. 


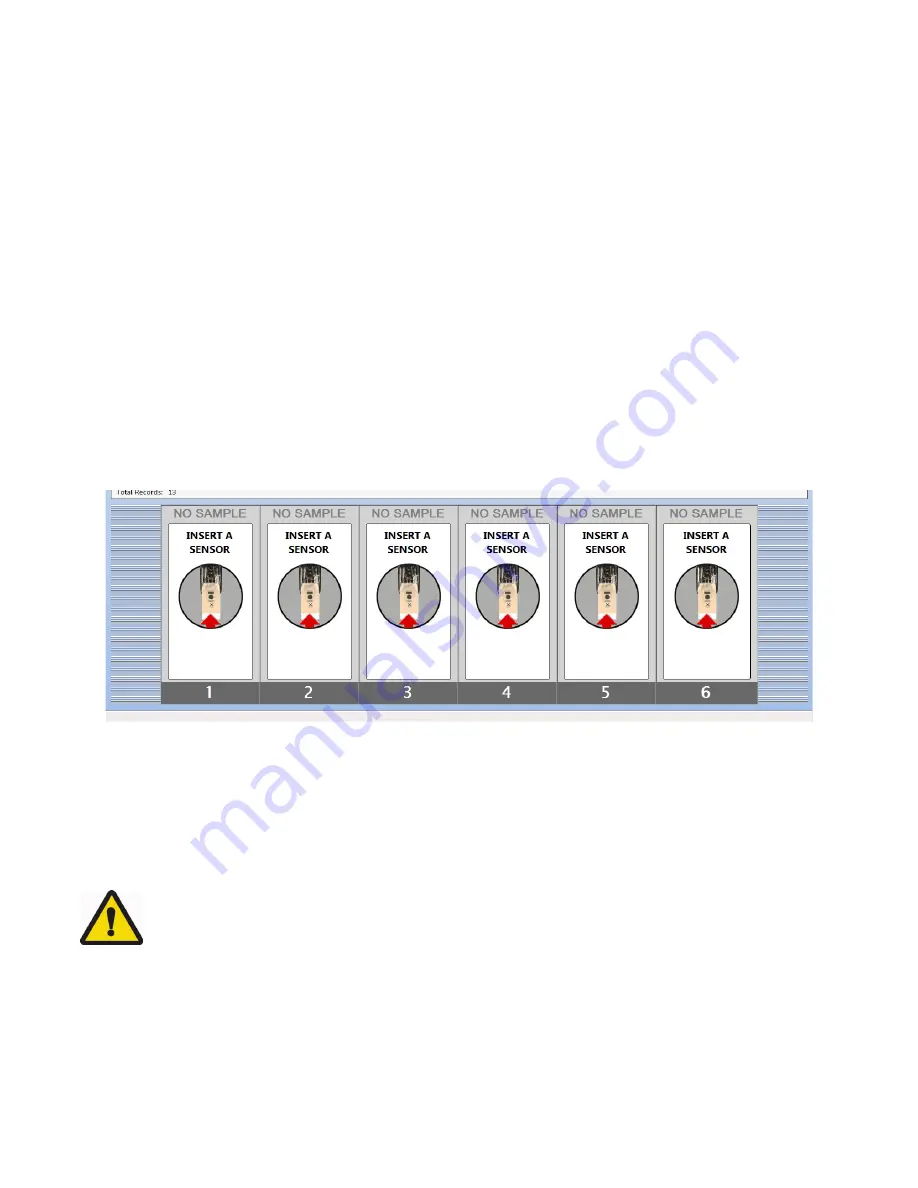
Figure 6-1: UA Ready to Accept Sensors 

3.  Insert a sensor (with the black bars facing up) completely into the analyzer. Make sure the 

sensor is inserted under the sensor guides and sits flush on the sensor deck. When the sensor 

is inserted properly, the analyzer beeps and displays the “Scan a Barcode” message shown in 

Figure 6-2. Insert as many sensors as needed, up to a maximum of six. 


CAUTION: 

Keep the sensors in their container until you are ready to use them. 

Minimize handling to prevent contamination which could cause a false test result. 

Ensure that the lot number on the sensor vial matches the lot number displayed on 

the monitor. 


Summary of Contents for LeadCare Ultra

Page 1: ...e WARNING Read User s Guide before setting up using or maintaining this system Failure to follow instructions and safety precautions could result in serious injury damage or false readings Keep User s Guide near system for future reference ...

Page 2: ...2TU UK Tel 44 0 1372 377 754 Fax 44 0 1372 388 282 Copyright 2019 Magellan Diagnostics Inc All Rights Reserved No part of this publication may be reproduced transmitted transcribed stored in a retrieval system or translated into any language or computer language in any form or by any means electronic mechanical magnetic optical chemical manual or otherwise without prior written permission of Magel...

Page 3: ...3 Additional Documentation 2 1 2 4 User Assistance 2 2 2 5 Acronyms 2 2 2 6 Compliance Statements 2 2 2 6 1 CE Mark 2 2 2 6 2 EMC Directive 2 2 2 6 3 Safety 2 3 2 6 4 FCC 2 3 2 6 5 Waste Electrical and Electronic Equipment 2 3 2 6 6 Part 11 Compliance 2 3 2 6 7 Symbols 2 5 3 System Overview 3 1 Introduction 3 1 3 2 About Blood Lead Testing 3 1 3 3 How the LeadCare Ultra System Works 3 1 3 4 System...

Page 4: ...Specimen Requirements 6 1 6 2 1 Acceptable Anticoagulants and Collection Devices 6 1 6 2 2 Collection and Storage Conditions 6 2 6 3 Limitations of the Test 6 2 6 4 Overview of the Testing Procedure 6 3 6 5 Safety Precautions 6 3 6 5 1 General Precautions 6 4 6 5 2 Precautions when Preparing Patient Samples 6 4 6 5 3 Precautions when Testing a Patient Sample 6 5 6 6 Required Materials 6 6 6 7 Test...

Page 5: ...sults 9 1 Backing Up Blood Lead Sample Test Results 9 1 9 2 Restoring Blood Lead Sample Test Results 9 2 10 Maintenance 10 1 Cleaning Procedures 10 1 10 1 1 Cleaning the Analyzer 10 1 10 1 2 Cleaning the Barcode Scanner 10 1 10 1 3 Cleaning the Keyboard 10 1 10 1 4 Cleaning Other System Components 10 2 11 Reordering Information 12 Technical Service Information 12 1 Technical Service Policy 12 1 12...

Page 6: ...in Screen 4 2 Figure 4 2 LeadCare Ultra UA Main Screen 4 3 Figure 4 3 Calibration Required Screen 4 3 Figure 4 4 Holding Calibration Button to Button Reader 4 4 Figure 4 5 Successful Calibration Message 4 4 Figure 4 6 Sensor Lot 4 4 Figure 4 7 New QC Lot Dialog Box 4 5 Figure 4 8 New QC Lot Dialog Box 4 6 Figure 4 9 Editing Original Control Lot Target Values 4 7 Figure 4 10 Entering New Target Val...

Page 7: ...2 Figure 8 4 Error History View Dialog Box 8 3 Figure 8 5 Custom Report Header Information Screen 8 4 Figure 8 6 Sample Error History Report 8 5 Figure 8 7 User Login History Dialog Box 8 6 Figure 8 8 Custom Report Header Information Screen 8 6 Figure 8 9 Sample User Login History Report 8 7 Figure 8 10 Main Login Screen 8 8 Figure 8 11 Account Manager Dialog Box 8 9 Figure 8 12 LIS Configuration ...

Page 8: ...pter 7 Table 7 1 Results Below the Target Range or Expected Value 7 1 Table 7 2 Results Above the Target Range or Expected Value 7 2 Table 7 3 UA Error Messages 7 4 Chapter 9 Table 9 1 Examples of Maintaining Updated Information During Merge Restore 9 3 Appendix A Table A 1 LeadCare Ultra System Specifications A 1 Appendix B Table B 1 Analyzer Kit Box Contents B 2 Table B 2 Computer System Kit Con...

Page 9: ...he signal word CAUTION and the warning symbol to the left NOTE A NOTE in this User s Guide provides additional information that helps you perform procedures correctly or may help you understand how the system works 1 1 Avoid Injuring Yourself Lab personnel using the LeadCare Ultra Blood Lead Testing System must take steps to avoid contact with blood or treatment reagent WARNING Read and follow the...

Page 10: ...ients health and well being depends on receiving accurate test results Always work carefully to avoid losing or damaging test data and records CAUTION Ensure that results are backed up to the appropriate media This practice will enable you to retrieve and restore data to the LeadCare Ultra System if necessary See instructions in Chapter 9 for details 1 5 Biohazard Warnings When handling biological...

Page 11: ...d for use with both the LeadCare Ultra and LeadCare Plus Blood Lead Testing Systems This test system is for prescription use only This system is not intended for point of care use 2 2 Clinical Laboratory Improvement Amendments CLIA Classification The LeadCare Ultra System has been evaluated and cleared by the United States Food and Drug Administration for use as a quantitative blood lead test with...

Page 12: ...alists are available to answer your questions 8 00 a m to 6 00 p m Eastern Standard Time EST Monday through Friday You can also contact Product Support by email at LeadCareSupport magellandx com 2 5 Acronyms The following acronyms are used in this User s Guide Acronym or Term Definition UA LeadCare Ultra User Application Software LIMS Laboratory Information Management System QC Quality Control BLL...

Page 13: ...in compliance with applicable sections of the FDA Electronic Records Electronic Signatures regulations 21 CFR Part 11 In complying with this regulation the LeadCare Ultra User Application is designed so that editing of patient results cannot occur Once a blood lead test has been completed and results obtained on the software editing functions are restricted to Adding a comment to a result NOTE Cur...

Page 14: ...ount Manager This notification will be provided securely upon entry of the old password In the case of an expired password the User will be provided with the opportunity to enter a new password in a secure manner The LeadCare Ultra system is intended to be used with LIMS or other third party software for blood lead test result data handling Magellan Diagnostics responsibility for compliance with 2...

Page 15: ...Analyzer and Blood Lead Test Kit Symbol Description Temperature Limitation Use By Manufacturer Batch Code Biological Risk Caution See Instructions for Use Consult Instructions for Use Catalog Number Serial Number In Vitro Diagnostic Medical Device Authorized Representative in the European Union О Off supply І On supply Prescription Use Only ...

Page 16: ...LeadCare Ultra Blood Lead Testing System User s Guide 2 6 This page intentionally left blank ...

Page 17: ...imultaneously Data management system that maintains test records for archiving and uploading to LIS NOTE Power down the LeadCare Ultra System before relocating or moving Failure to do so could damage the system 3 2 About Blood Lead Testing According to the US Centers for Disease Control CDC there is no known safe level of lead Consult your local public health department and or CDC recommendations ...

Page 18: ... the LeadCare Ultra Blood Testing System 3 4 1 Analyzer The six channel LeadCare Ultra Analyzer performs up to six blood lead tests simultaneously and uploads the completed test results to the computer Test results are stored in the computer in unique sample records along with Sample ID Comments Test Conditions Sensor Lot and User ID The analyzer is also equipped with a calibration button reader T...

Page 19: ...lyzer The computer stores the patient results allowing for retrieval at a later date and time The computer also allows connectivity via USB ports to a customer supplied printer and LIS NOTE Power down the LeadCare Ultra System before relocating or moving Failure to do so could damage the system 3 4 4 Barcode Scanner The barcode scanner is designed as the primary method for entering Sample ID infor...

Page 20: ...zer and used for the binding release and measurement of lead present in a test sample 3 Control Material Two control material vials Level I and Level II are supplied in each test kit The controls are buffered acqueous solutions containing bovine serum albumin dye and a known amount of lead The control material is used to demonstrate that the system is correctly measuring the lead concentration in ...

Page 21: ...oftware The User Application UA software is a Microsoft Windows based application dedicated to blood lead testing Figure 3 3 shows the Main UA screen and Table 3 2 identifies and describes the major software menus and options Figure 3 3 LeadCare Ultra UA Software Screen 3 1 2 6 5 7 4 8 ...

Page 22: ...f Range Patient Sample Type Channel Sensor Lot User and Comments In addition allows the user to sort by any of these options 5 All Tests List Displays all test results that have not been approved or archived 6 Result Options Menu Activated by right clicking on a sample record in the data table on the main UA screen Options allow you to Void a Test Change Patient Sample Type Edit Test Comments and ...

Page 23: ...lays a dialog box that lets you search for and display calibration records you can search by all calibration records or by specified values see Section 8 1 Admin and or Operator Accessible User Login History Displays a dialog box that lets you search for and display User login history you can search by all User login records or by specified values see Section 8 3 Admin and or Operator Accessible T...

Page 24: ...User s Guide 3 8 Menu Option Description Help About LeadCare Ultra Displays the version numbers of the software and firmware of the analyzer 3 4 8 Printer A printer can be connected to the LeadCare Ultra System See Appendix B for instructions ...

Page 25: ...the calibration data for the sensor lot is transferred to the analyzer When the transfer is complete an audible tone sounds and a Calibration Successful message appears The lot number from the calibration button is then displayed in the upper left hand corner of the UA 4 3 Calibration Procedure You must calibrate the analyzer The first time you use the analyzer Each time you change test kit lot nu...

Page 26: ...he computer monitor and analyzer The main Windows Login Screen will appear Figure 4 1 Figure 4 1 The Main Windows Login Screen 2 Select your user icon type in your password and press Enter The LeadCare Ultra main screen Figure 4 2 appears After 20 30 seconds the UA initializes the analyzer ...

Page 27: ...uired dialog box appears Figure 4 3 Calibration Required Screen Once the system has been calibrated the lot number of the calibration button is displayed in the upper left corner of the main screen Sensor Lot If the Sensor Lot displayed does not match the kit lot number you intend to use you must recalibrate the analyzer with the calibration button from the kit lot you intend to use ...

Page 28: ...libration Button to Button Reader 5 Calibration can take up to 5 seconds When calibration is complete the analyzer beeps and the screen briefly displays a message stating that the analyzer was calibrated successfully see Figure 4 5 Figure 4 5 Successful Calibration Message The Sensor Lot appears in the upper left corner of the main screen see Figure 4 6 Figure 4 6 Sensor Lot 6 Once the calibration...

Page 29: ...y Control Settings click Tools Set the QC Levels from the UA Follow These Steps 1 Using the arrows select the desired number of QC levels You have the ability to enter up to three levels of quality control Figure 4 7 New QC Lot Dialog Box 2 Enter the information for the new QC lot in the appropriate box a Control Name Defaults to LEVEL 1 LEVEL 2 etc for each level To rename delete the default name...

Page 30: ... The Target and Tolerance values for each successive level must be higher than those set for the lowest level and the ranges set for each level should not overlap NOTE The Target and or Tolerance values can be changed without creating a new QC lot code However this change affects the QC charts for the QC levels For example if the target and or tolerance values are changed the QC results before and...

Page 31: ... Figure 4 10 Entering New Target Values 4 Once all Quality Control Settings fields are updated click the OK button 5 The Confirm Quality Control Level Information dialog box appears Figure 4 11 Review the information and select Yes if the information is correct If the information is not correct select No This returns you to the Quality Control Settings dialog box to make the necessary corrections ...

Page 32: ...LeadCare Ultra Blood Lead Testing System User s Guide 4 8 Figure 4 11 Confirm Quality Control Level Information Dialog Box Figure 4 12 LeadCare Ultra UA Ready for Sensors ...

Page 33: ...stem Follow These Steps 1 Click Tools Set the Patient Test Limits The Patient Test Limits dialog box displays Figure 4 13 2 Specify the number of test limits to be set up to three 3 For each limit to be set enter the name of the limit the target lead concentration and instructions to be displayed in the comment field when the limit is exceeded If you are adding multiple target values each successi...

Page 34: ...est Limit Dialog Box 6 Review the information and select Yes if the information is correct If the information is not correct select No This returns you to the Patient Test Limits dialog box to make the necessary corrections NOTE If a blood lead result exceeds a limit entered the typed instructions appear in the Comment field of the sample record on the main screen ...

Page 35: ...trol samples Acceptable ranges for each lot and lead level are established by Magellan Diagnostics using the LeadCare Ultra Blood Lead Testing System Magellan Diagnostics Inc establishes these ranges using extensive replicate analyses and rigid QC CLIA guidelines recommend that a minimum of two levels of QC be performed with each analytical run Two levels of QC are included in the LeadCare Ultra T...

Page 36: ...f the sensors are exposed to humidity for an extended period of time this could lead to a false test result Do NOT touch the X on the sensors except when applying the control This could cause contamination and a false test result Make sure the sensor is inserted under the sensor guides and sits flush on the sensor deck Inserting the sensor above the guides could cause inaccurate test results Do NO...

Page 37: ...curate blood lead testing results The LeadCare Ultra Test Kit is supplied with two levels of QC each representative of different levels of lead Level 1 represents a lower lead concentration while Level 2 represents a higher lead concentration NOTE To enter QC target values see Section 4 4 NOTE If you are using control material not included with the LeadCare Ultra Test Kit prepare according to manu...

Page 38: ...rol Results Control target ranges are provided on the control label If the control results are within the range listed for the control your LeadCare Ultra System is working properly If the reported control results are not within the listed range refer to the Troubleshooting section in Chapter 7 of this guide or call Magellan Diagnostics Product Support at 800 275 0102 CAUTION Do NOT proceed to tes...

Page 39: ...y specified values 3 If you selected Filter records by specified values you can further refine your search by a QC Level b QC Lot c Test Date Range d Result Range e Controls Out of Range f Channel g Sensor Lot h User i Comments 4 Enter your search criteria and select the Apply Filter button 5 Select the View Report button in the lower right corner 6 The Custom Report Header Information screen open...

Page 40: ...d those results that meet your search criteria are displayed A sample QC Test Report is shown below in Figure 5 3 Figure 5 3 Sample Quality Control Test Report 9 The Binoculars icon in the menu bar allows you to search the report for specific text 10 The Zoom icon in the menu bar allows you to increase the font size of the report 11 To print the report click the Print icon in the menu bar and then...

Page 41: ... Use filters to choose which QC results to view as described in Section 5 8 steps 2 4 then click the View Charts button to generate graphs of the selected QC data 3 In the Quality Control Chart Viewer a separate chart is created for each control level and sensor lot see Figure 5 4 The description for each chart generated appears in a column on the left hand side of the display The chart displayed ...

Page 42: ... the charts by a Level b Lot Code should be QC Lot c Sensor Lot d Month Year 6 The Order feature sorts the charts in ascending or descending order 7 To print a quality control chart click the Printer icon above the displayed chart then enter the desired print parameters in the standard Windows Print dialog box that appears ...

Page 43: ...ead Test Results State Reporting of Blood Lead Test Results Follow up Testing WARNING Read all instructions carefully before you perform a blood lead test Failure to follow these instructions could result in injury from inaccurate results or injury to lab personnel WARNING Blood can transmit infectious diseases Use universal precautions while collecting and handling blood samples Follow the proced...

Page 44: ... Shipped and stored between 1 C 25 C 33 F 77 F refrigerated or room temperature conditions o Mixed with treatment reagent within 72 hours from time of blood collection The whole blood sample must be brought to room temperature and thoroughly mixed prior to addition to treatment reagent The mixture of blood and Treatment Reagent is stable for up to 48 hours at room temperature and up to 7 days if y...

Page 45: ...lary blood collection devices are used for sample collection the tube must be at least half full for the sample to be appropriate for use EDTA in high concentrations can lower the blood lead value Reject any sample less than half full 4 Add 50 µL of a blood sample to a labeled treatment reagent tube recap and mix thoroughly The sample preparation will turn brown 5 Match the sensor vial lot number ...

Page 46: ... or remove the sample reagent solution The tube and its contents could be contaminated causing false test results 6 5 2 Precautions when Preparing Patient Samples You must understand and follow these precautions when preparing blood samples to be tested using the LeadCare Ultra Blood Lead Testing System WARNING Blood can transmit infectious diseases Use universal precautions while collecting and h...

Page 47: ...s could cause contamination and a false test result Make sure the sensor is inserted under the sensor guides and sits flush on the sensor deck Inserting the sensor above the guides could cause inaccurate test results Do NOT allow the inside of the treatment reagent vial or the vial cap to touch anything This could cause false blood lead test results Mix the control with the treatment reagent thoro...

Page 48: ...Steps 1 Place the following items in front of you in a clean work space LeadCare Ultra Blood Lead Testing System LeadCare Ultra Blood Lead Test Kit which includes o Treatment reagent tubes o Sensor vials o Quality controls o Calibration button 50 µL pipette and disposable pipette tips 30 µL pipette and disposable pipette tips Capillary blood samples CAUTION Allow the analyzer test kit and samples ...

Page 49: ...nt Make sure the blood sample is free of blood clots which can cause inaccurate results Make sure to dispense exactly 50 µL of blood into the treatment reagent Please refer to the LeadCare Ultra Test Kit Package Insert for detailed instructions on preparing a sample Follow These Steps 1 Bring the blood samples to room temperature and mix thoroughly 2 Label a treatment reagent tube with the Sample ...

Page 50: ...sor at the end with the alphanumeric designation 2 Close the vial Figure 6 1 UA Ready to Accept Sensors 3 Insert a sensor with the black bars facing up completely into the analyzer Make sure the sensor is inserted under the sensor guides and sits flush on the sensor deck When the sensor is inserted properly the analyzer beeps and displays the Scan a Barcode message shown in Figure 6 2 Insert as ma...

Page 51: ...ile it is in progress Once the analysis is complete the Sample ID cannot be changed To edit a Sample ID right click on the Sample ID in the main data table THIS TABLE IS CALLED ALL TESTS of the user screen Select Change Patient Sample ID and type in the new Sample ID in the field New Sample ID Click OK The new Sample ID will appear in the Sample ID box of the main data table NOTE Barcode Scanner N...

Page 52: ...pillary radio button Figure 6 3 UA Waiting for Samples 6 Remix sample treatment reagent mixture then pipet 30 µL onto the X on the sensor Analysis begins automatically Figure 6 4 UA Analyzing Samples 7 The system shows a graphic of the analysis countdown as analysis proceeds from 180 seconds to 0 seconds Figure 6 5 UA Analysis Complete ...

Page 53: ...gher than the analytical range will be displayed as 65 13 Process the test results by approving or archiving the data See Section 6 8 Processing Blood Lead Test Results All test results remain as unapproved until the approval archiving process is performed by the user 14 See Sections 6 10 and 6 11 for state reporting and follow up lead testing requirements 6 8 Processing Blood Lead Test Results Al...

Page 54: ...st 2 Places the results in the Archived Test View an option available on the View menu Follow These Steps 1 You can archive all test results or select specific results for archival To archive all test results select a test in the main data table and then right click on the desired Sample ID Select Archive All Test Results from the dialog box displayed To archive selected test results select the te...

Page 55: ...in the main data table and then right click on the desired Sample ID Select Approve All Test Results from the dialog box displayed To approve selected test results select the test results to be approved by holding down the Ctrl key selecting the desired Sample ID s by right clicking on the desired Sample ID s Select Approve Selected Test Result s from the dialog box displayed 2 The Confirm Approve...

Page 56: ...the LIS 6 8 3 Voiding Unvoiding a Test Result Test results may be voided or unvoided at any time To void a test result right click on the Sample ID you wish to void in the test data table on the main UA screen then select Void Test from the pop up menu shown in Figure 6 9 Figure 6 9 Void Test Pop Up Menu To unvoid a voided test result Admins and or User Accessible right click on the voided Sample ...

Page 57: ...ield for any test result by right clicking on the desired Sample ID Next select Edit Comments from the pop up menu shown in Figure 6 11 Click in the Edit Test Comments box and type in your new comments as desired Click OK to accept Figure 6 11 Edit Test Comments Box NOTE Edit Test Comments is also available for QC results ...

Page 58: ...ow These Steps 1 To view blood lead test results click View Archived Tests An Archived Tests View viewer displays all blood lead test results stored on the computer see Figure 6 12 Figure 6 12 Archived Test View Dialog Box 2 Use the mouse to select one of the following search filter criteria a Show all tests b Filter tests by specified values 3 If you selected Filter records by specified values yo...

Page 59: ...t hand side of the Archived Test View window 5 To obtain a report of this data select the View Report button in the lower right hand corner of the screen The Custom Report Header Information screen displays Figure 6 13 Figure 6 13 Custom Report Header Information Screen 6 Enter the desired report header on line 1 and then click Done Lines 2 and 3 are provided for multi part headers The specified r...

Page 60: ...the menu bar allows you to search the report for specific text 8 The Zoom icon magnifying glass in the menu bar allows you to increase the font size of the report 9 To print the report click the Print icon in the menu bar and then enter the desired print parameters in the standard Windows Print dialog box that appears ...

Page 61: ...n Diagnostics Product Support at 800 275 0102 or LeadCareSupport magellandx com 6 11 Follow up Testing According to the US Centers for Disease Control CDC there is no known safe level of lead Consult your local public health department and or CDC recommendations for information on the management of blood lead levels Blood lead test results should be shared with the patient s physician for interpre...

Page 62: ...LeadCare Ultra Blood Lead Testing System User s Guide 6 20 This page intentionally left blank ...

Page 63: ...ected with EDTA or Heparin anticoagulant Do NOT use venous Do NOT use plasma or serum o Use only capillary blood collection devices for whole blood sample collection o Make sure the sample is free of clots o Make sure the sample is 72 hours old and has been stored at room temperature or in the refrigerator o Bring the sample to room temperature before use o Make sure EDTA capillary blood collectio...

Page 64: ... least half full Table 7 2 Results Above the Target Range or Expected Value Problem Area Check the Following Sample Type CONTROLS o Make sure the control lot being used is the same lot number of the sensors in the kit being used PATIENT BLOOD SAMPLE o Use only capillary whole human blood collected with EDTA or Heparin anticoagulant Do NOT use venous Do NOT use plasma or serum o Make sure the sampl...

Page 65: ...6 F and specified humidity range 12 80 Relative Humidity Make sure that the system and the test kit are maintained at a constant temperature If you move any part of the system from one place to another wait for the analyzer and components to reach a stable temperature User Technique Do NOT touch the black bars or the black cross on the sensor This could damage or contaminate the sensor Do NOT touc...

Page 66: ...isplay messages Table 7 3 UA Error Messages Error Type Message Reason s Fix System Errors Analyzer Connection to Computer Workstation The analyzer is turned OFF when UA is open The analyzer is disconnected from power source when UA is open The analyzer is not connected to the computer workstation by the USB cable Confirm the power switch on the back of the analyzer is set to the ON position Confir...

Page 67: ...he green LED on the barcode scanner is lit Make sure the computer is ON Restart the UA Scan the barcode below The scanner makes three rapid beeps Calibrating Analyzer Analyzer cannot be used until it is calibrated with a valid calibration button Calibrate the analyzer with a valid calibration button Channel Locked Internal check of the channel failed Remove sensor turn analyzer OFF then turn analy...

Page 68: ...rt Temperature Below Limit or Temperature Above Limit The temperature of the analyzer is outside of its operational temperature range Place the system in an environment of ambient temperature 16 C to 30 C Allow the analyzer to adjust to ambient temperature Analyzer Calibration Failed The analyzer failed to calibrate o Button did not make sufficient contact in button reader port o Defective calibra...

Page 69: ...ver entered Confirm the QC Lot expiration date was input correctly If the QC Lot has expired discard the material No Sample ID Sample ID must be entered into the UA before testing a sample A Sample ID was not entered before putting the sample on the sensor Remove and discard the sensor insert a fresh sensor and enter the Sample ID before adding sample to the sensor Temperature is Unstable During B...

Page 70: ...Sensor Out of Vial Too Long Sensor was left in the analyzer for more than five 5 minutes without use Sensor performance may be compromised Remove and discard sensor Insert a fresh sensor enter Sample ID and add sample to sensor without delay Sensor Inserted Before Ready One or more sensors were detected in the analyzer as the analyzer was turned ON Remove and re insert sensor If the error continue...

Page 71: ...sed Sensor A used sensor was inserted into the analyzer Remove and discard the used sensor Sensor s Not Removed from Analyzer Sensors are left in the analyzer for too long after analysis Remove and discard the sensors Do NOT leave sensors in the analyzer Test Failed Insufficient Sample Volume Not enough sample was put on the sensor to start the test Remove and discard sensor Confirm pipette delive...

Page 72: ...ics Product Support After troubleshooting if you are unable to resolve your issue contact Magellan Diagnostics Product Support at 800 275 0102 or LeadCareSupport magallendx com Please write down this information and have it ready before you call Serial Number of Analyzer on bottom of Analyzer and under Help About Installation Date Application Version Number under Help About Firmware Version Number...

Page 73: ...1 Viewing Calibration History The Calibration History option displays a dialog box in which you enter search criteria to search for and display calibration records Follow These Steps 1 To display calibration records click View Calibration History The Calibration History dialog box Figure 8 1 displays showing calibration records identified by Calibration Date Time Calibration Expires Sensor Lot and...

Page 74: ...line 1 Lines 2 and 3 are provided for if you have more lines of header information 5 Once all of the desired information has been entered click Done Based on your search criteria the calibration records are filtered and those results that meet your search criteria display in the viewer A sample Calibration History Report is shown in Figure 8 3 Figure 8 3 Sample Calibration History Report 6 Click t...

Page 75: ...Steps 1 To display error records click View Error History The View Error History dialog box can display error records such as Error Error Type Code Channel Date of Error Channel Locked Sensor Lot User Figure 8 4 Error History View Dialog Box 2 Use the mouse to select one of the following search filter criteria a Show all records b Filter records by specified values ...

Page 76: ...hand corner of the screen The Custom Report Header Information screen displays Figure 8 5 6 Enter your search criteria and click the View Report button The Custom Report Header Information screen displays Figure 8 5 Figure 8 5 Custom Report Header Information Screen 7 Enter the desired report header on line 1 and then click Done Lines 2 and 3 are provided for multi part headers If you have more li...

Page 77: ...Print icon in the menu bar and then enter the desired print parameters in the standard Windows Print dialog box that appears 8 3 Viewing User Login History The User Login History option displays a dialog box in which you enter search criteria to search for and display user login records Follow These Steps 1 To display user login records click View User Login History The User Login History dialog b...

Page 78: ...w all user login records b Filter user login records by specified values 3 If you select the second search option you can further refine your search criteria by Date From To range User Name and User Type Enter your search criteria and click the View Report button The Custom Report Header Information screen displays Figure 8 8 Figure 8 8 Custom Report Header Information Screen ...

Page 79: ...ecific user login record click the Binoculars icon in the menu bar to search the results for a specific user login 7 To print the report click the Print icon in the menu bar and then enter the desired print parameters in the standard Windows Print dialog box that appears 8 4 Creating User Accounts The Laboratory Manager or another laboratory designee with Account Manager privileges may assign or d...

Page 80: ...lect the Account Manager User icon type in the password and press Enter The LeadCare Ultra User Account Manager dialogue box appears containing a chart with User Name User Type and Description fields see Figure 8 11 NOTE A password list will be provided by a Magellan Diagnostics Representative ...

Page 81: ...r When the field is selected it will be highlighted and the Assign User field will become active 4 Enter the information for User Name Password Confirm Password and Description User Type is pre defined Then click OK 5 Click on Apply to save changes NOTE Once a password is set it can be changed by logging into the Account Manager selecting the appropriate User Name and selecting the Change Password...

Page 82: ... LIS document for LeadCare Ultra which describes how data is transmitted between the Ultra application and an external system such as LIS If you need this document please contact Product Support To configure the parameters in the Ultra User App go to Tools LIS Settings In the LIS Configuration Box that opens Figure 8 12 check the Enable LIS Interface option Enter the TCP port to be used for transf...

Page 83: ...on in the Ultra User App select Tools LIS Status The LIS Interface Status box will open and display Figure 8 13 Current status of the connection between the Ultra and the LIS IP Address assigned to the LeadCare Ultra computer TCP Port Status of the pending Queue Figure 8 13 LIS Interface Status ...

Page 84: ...nection or power outages Results are removed from the queue once the LIS acknowledges receipt of the result If for any reason a result cannot be transmitted or is rejected by the LIS the result will remain in the queue The queue contents can be cleared by clicking the Clear Queue button Admin only The LIS Interface Status box can be closed by clicking OK button ...

Page 85: ...up Backing up of data to a blank CD DVD media An Over Write Backup Backing up of data to a re writeable CD DVD media used previously to back up data o The Over Write backup operation will simply save the data files over the old ones the CD is updated NOTE Please be advised when performing an Over Write Backup A second set of data is not saved Merging of the two sets of data is not performed NOTE T...

Page 86: ...vailable which enable the User to reload historical information onto the system A Simple Restore Restoring data onto a blank empty LeadCare Ultra system A Merge Restore Restoring data onto a LeadCare Ultra system already containing data The Restore process places previously backed up information onto the LeadCare Ultra System The software has been designed to perform checks on the current informat...

Page 87: ...ent Changing the sample type The comment and or sample type present within the UA record will be maintained and applied 3 A voided record has been backed up and then subsequently un voided within the UA The un voided record present within the UA records will be maintained and applied 4 An un voided record has been backed up and then subsequently voided within the UA The voided record present withi...

Page 88: ...ood Lead Testing System User s Guide 9 4 Upon completion of the Restore process the following notification will appear on the screen and the CD DVD will be automatically ejected Figure 9 4 Restore Successful Dialog Box ...

Page 89: ...case of accidental spill dry the area immediately Do NOT leave any residual liquid on the analyzer Do NOT wash the inside of the calibration button reader 10 1 2 Cleaning the Barcode Scanner The window of the barcode scanner should be cleaned periodically to assure scanning accuracy Do NOT allow any abrasive material to touch the window Remove any dirt particles with a damp cloth Wipe the window u...

Page 90: ...should remove all blood traces and ensure that blood borne diseases are eliminated cleaning with a 10 solution of bleach is required Freshly prepare a 10 solution of household bleach using 1 part bleach and 9 parts water or add cup bleach to 1 quart water It is best to use a cotton swab to massage the bleach solution between the keys of the keyboard 10 1 4 Cleaning Other System Components Follow t...

Page 91: ...adCare Ultra Blood Lead Testing System is simple If you know the item number please contact our Customer Service Department at 800 959 5095 to complete your order If you are unsure of the item number or for a complete list of parts please visit https www magellandx com leadcare products leadcare ultra support parts service ...

Page 92: ...LeadCare Ultra Blood Lead Testing System User s Guide 11 2 This page intentionally left blank ...

Page 93: ... installation 12 2 Preparing for a Technical Service Call Before you make a technical service call be sure to obtain the following information as appropriate to submit with your request or question System version number In the UA select Help About LeadCare Ultra to display this information Serial number of the analyzer Test kit lot number The name and contact telephone number of the person who ask...

Page 94: ...that we can a determine which product versions are affected b identify the problem and find its cause and c verify that the problem is actually corrected when the correction work is done The date of the installation How long has the system been installed Has the software been updated You should include any other information that you think is important If you are submitting the request by fax pleas...

Page 95: ...ys at Buyer s expense for repair work 3 Parts returned damaged due to poor or insufficient packaging by the Buyer will not be accepted for service unless otherwise agreed 4 Any time parts are returned where no problems are found a service handling charge which will reflect the labor to test and verify the parts as well as other incurred expenses will be borne by the Buyer 5 In no event shall Magel...

Page 96: ...LeadCare Ultra Blood Lead Testing System User s Guide 13 2 This page intentionally left blank ...

Page 97: ...yer s place of operations failure to use maintain or calibrate the System or component thereof in a manner consistent with the User s Guide exposure of the System to environmental conditions beyond those specified by the documentation or repairs alterations or installation made by any person or firm not duly authorized by Seller in writing this warranty shall be void EXCEPT AS EXPRESSLY STATED IN ...

Page 98: ...e price of the System or any component thereof or any other payment required from Buyer to Seller whether under the contract or otherwise all warranties and remedies granted in this section and all of Seller s warranties and obligations to service repair replace correct or otherwise remedy defects errors or failures under any other contract between Buyer and Seller may at Seller s option be termin...

Page 99: ... 93 Codabar NW7 Interleaved 2 of 5 MSI Plessey GS1 DataBar Certifications CE ETL FDA cleared General Specifications Dimensions approximate system Height 58 cm 23 in 23 in Width 46 cm 18 in Depth 56 cm 22 in Weight approximate system 15 4 kg 34 lbs Electrical Specifications Power adapters are included with system External Power Source Analyzer Switching power supply AC input 100 240V 1A max 50 60Hz...

Page 100: ...nsing Altitude LeadCare Ultra System can be operated in altitudes up to 8 000 feet 2 440 meters above sea level Storage Ranges Analyzer 15 C 30 C 59 F 86 F Up to 80 Relative Humidity Test Kit 15 C 27 C 60 F 80 F 12 80 Relative Humidity Shipping Environmental Ranges Analyzer 30 C 40 C 22 F 104 F 10 to 80 Relative Humidity non condensing Test Kit 15 C 27 C 59 F 80 F ...

Page 101: ...µg mL Cyclophosphamide 500 µg mL d Amphetamine Sulfate 100 µg mL Diphenylhydramine Hydrochloride 100 µg mL Doxorubicin 100 µg mL Doxycycline 100 µg mL Erythromycin 100 µg mL Ferric Chloride 100 µg mL Ferrous Sulfate 100 µg mL Fexofenadine HCl Allegra 50 µg mL Fluconazole Diflucan 100 µg mL Gabapentin 100 µg mL Ganciclovir AZT 100 µg mL Glyburide 100 µg mL Guanfacine 100 µg mL Hydroxyurea 250 µg mL...

Page 102: ...LeadCare Ultra Blood Lead Testing System User s Guide A 4 This page intentionally left blank ...

Page 103: ...LeadCare Ultra Blood Lead Testing System User s Guide B 1 ...

Page 104: ...LeadCare Ultra Blood Lead Testing System User s Guide B 2 ...

Page 105: ...n condensing B 2 Setting Up the Analyzer and Computer Components B 2 1 Unpacking the System LeadCare Ultra materials are contained in two separate main packages the Analyzer Kit box and the Computer System Kit box each containing multiple components as described in Tables 1 and 2 1 Carefully remove the packages from the shipping boxes and inspect them for damage If you notice any damage report it ...

Page 106: ... Cable 2 Monitor Box Monitor VGA Monitor Cable USB Upstream Cable Power Supply 3 Keyboard Box Keyboard with USB cable attached 4 AIO Stand Box AIO Stand 5 Computer Box Computer Mouse and extra power cord Barcode Scanner and hands free stand Serial USB cable Grey NOTE The following items included in the LeadCare Ultra boxes are NOT necessary for setup Cable cover for monitor silver monitor stand an...

Page 107: ...ions provided in the monitor box Place the AIO stand on a stable level surface 1 Attach the monitor to the stand 2 Connect the power cable from the stand to the monitor 3 Connect the VGA cable to the monitor 4 Route the VGA cable through the front slot of the stand Leaving sufficient slack tuck the monitor cable into the cable channel 5 Connect the USB upstream cable to the USB upstream port on th...

Page 108: ...C adapter into a wall outlet B 3 Registering Your System Please take a moment to complete the registration form online at https www magellandx com leadcare products leadcare ultra support getting started Registering your analyzer with Magellan Diagnostics will allow you to receive important updates to your LeadCare Ultra Blood Lead Testing System B 4 Preparing for Operation At this point you have ...

Page 109: ...t establish a User Account The Laboratory Manager or another laboratory designee with Account Manager privileges may assign or delete accounts as well as change User passwords for the LeadCare Ultra software The computer must be updated to reflect the proper time zone Log in as the LIMS Administrator to change the Date Time settings This will be particularly important if your system is linked to L...

Page 110: ...gellan Diagnostic Representative or if you want to add or change User accounts please follow the steps below These steps can also be found in the chapter entitled Performing Other Tasks in the User s Guide NOTE The LeadCare Ultra User Account Manager has five pre defined Administrator fields and fifteen pre defined Operator fields ...

Page 111: ...The computer must be ON when scanning the barcode NOTE Barcode Scanner Not Connected The Barcode Scanner does not need to be connected to the system in order to use the LeadCare Ultra User Application The User Application defaults to manual entry mode when the barcode scanner is not connected Specifically if the scanner is not connected when the User Application starts the Barcode Reader Not Found...

Page 112: ... Ultra System has been installed and User accounts have been established the system is ready for initial calibration Log in to proceed What is Calibration Each LeadCare Ultra Test Kit comes with a specific calibration button coded for the sensors provided for that sensor lot The calibration button is coded with the data required for the analyzer to translate the raw signal measured on the sensor i...

Page 113: ...tton reader until you hear the beep Figure B 6 The button must touch both the center contact and metal side of the button reader Figure B 6 Holding Calibration Button to Button Reader 3 Calibration takes a few seconds When calibration is complete the analyzer beeps and the screen briefly shows a message stating that the analyzer was calibrated successfully Figure B 7 Figure B 7 Successful Calibrat...

Page 114: ...the power cord and adapter Do NOT connect the USB cord 5 Turn on the printer 6 Load paper Follow These Steps 1 Log into the System is as the LIMS ADMIN 2 Insert the Disk into the LeadCare Ultra Computer D Drive NOTE The LeadCare Ultra User Application UA has disabled the auto start function therefore you will have to double click the drive in order to open it If you don t see it reboot the system ...

Page 115: ...er Properties 4 Select Sharing Tab 5 Click Share Printer The installation and set up of your LeadCare Ultra Blood Lead Testing System is now complete Please read the information detailed in the User s Guide prior to performing testing If you have any questions contact Magellan Diagnostics Product Support at 800 275 0102 Monday through Friday between 8 AM and 6 PM EST or by email at LeadCareSupport...

Page 116: ...LeadCare Ultra Blood Lead Testing System User s Guide B 12 This page intentionally left blank ...

Page 117: ...a Blood Lead Testing System User s Guide C 1 Appendix C Safety Data Sheets SDS This chapter contains the following LeadCare Ultra Safety Data Sheets LeadCare Ultra Plus Controls LeadCare Ultra Plus Treatment Reagent ...

Page 118: ...LeadCare Ultra Blood Lead Testing System User s Guide C 2 This page intentionally left blank ...

Reviews: