


Dreamweaver Tutorial
39
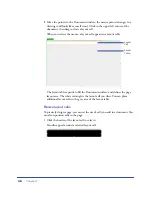
2
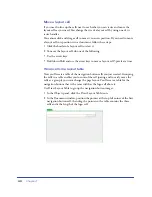
To resize this layout cell, do one of the following:
•
In the Property inspector for the layout cell, type
510
in the Fixed field to set the
cell’s width to 510 pixels, then click in the document to see the cell width change.
Note:
If you enter a pixel width that is larger than the width of the layout table, or that
causes the cell to overlap another cell in a layout table, Dreamweaver alerts you and
adjusts the cell width to a valid width.
•
On the right side of the layout cell, drag the middle resize handle to the right
until the cell is the desired width. When you release the mouse, the cell’s width
is displayed in the column header area along the top of the layout table.
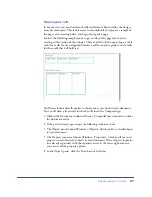
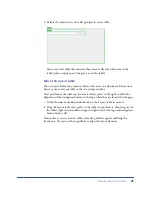
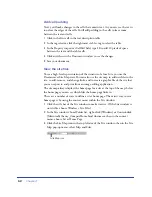
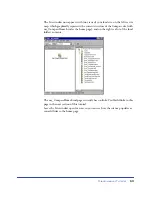
Add multiple layout cells
Next you’ll add three layout cells below the logo cell you just created. Later you’ll
insert the page’s navigation buttons in these cells.
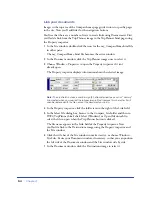
1
In the Objects panel, click the Draw Layout Cell icon; then hold down the
Control key (Windows) or Command key (Macintosh).
2
In the Document window, position the pointer below the cell you drew for the
logo; then drag to draw a layout cell.
Continue to hold the Control key (Windows) or Command key (Macintosh)
and draw two more layout cells. Your screen should look similar to this.
Summary of Contents for 38028779 - Macromedia Dreamweaver - Mac
Page 1: ...macromedia Using Dreamweaver...
Page 148: ...Chapter 4 148...
Page 296: ...Chapter 12 296...
Page 472: ...Chapter 18 472...
Page 512: ...Chapter 21 512...
Page 562: ...Appendix 562...