


Using Tables to Present Content
185
•
In the Rows field, specify the number of table rows.
•
In the Columns field, specify the number of table columns.
•
In the Cell Padding field, specify the number of pixels between the cell content and
the cell boundary (or wall). The default padding is 1 pixel. Enter 0 for no padding.
•
In the Cell Spacing field, specify the number of pixels between each table cell.
The default spacing is 2 pixels. Enter 0 for no spacing.
•
In the Width field, specify the width of the table as a number of pixels or as a
percentage of the browser window.
•
In the Border field, specify the pixel width of the table border. Enter 0 if you
don’t want a border.
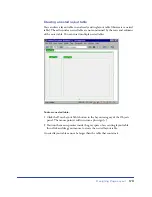
3
Click OK to create the table.
If you want to insert a table without having to first specify these options, turn off
the Show Dialog When Inserting Objects option in the General preferences. See
“Setting preferences” on page 88.
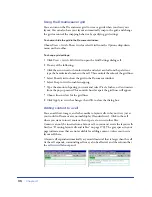
Adding content to a table cell
You can add text and images to table cells.
To add text to a table:
1
Click in a cell in which you want to add text, and do one of the following:
•
Type text into the table. Table cells automatically expand as you type.
•
Paste text copied from another document. See “Inserting text and objects”
on page 234
.
2
Press Tab to move to the next cell or press Shift+Tab to move to the
previous cell. Pressing Tab in the last cell of a table automatically adds
another row to the table.
You can also use the arrow keys to move between cells.
Summary of Contents for 38028779 - Macromedia Dreamweaver - Mac
Page 1: ...macromedia Using Dreamweaver...
Page 148: ...Chapter 4 148...
Page 296: ...Chapter 12 296...
Page 472: ...Chapter 18 472...
Page 512: ...Chapter 21 512...
Page 562: ...Appendix 562...