R
GRAFIK Eye
®
QS System Installation and Operation Guide 29
Set Up Occupant Sensor
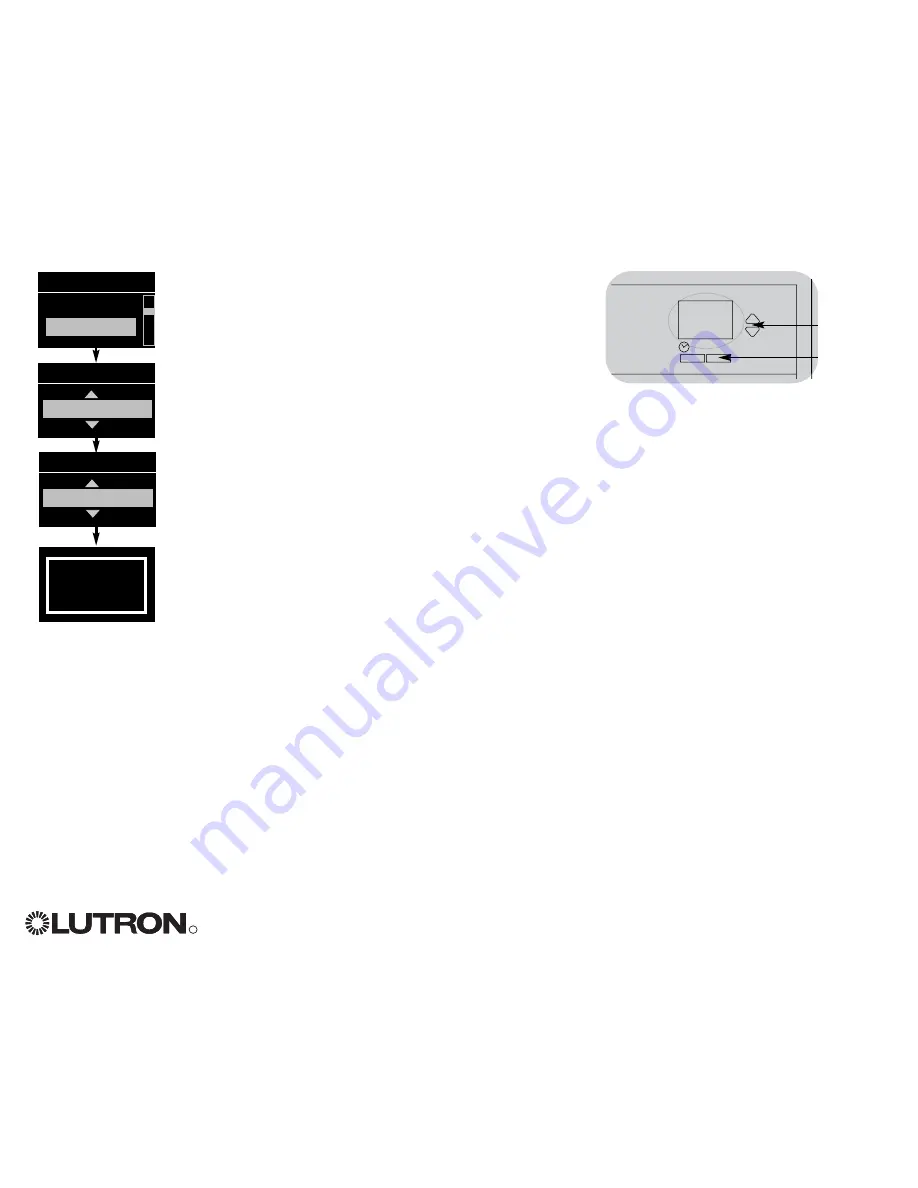
1. Enter programming mode (see page 12).
2. Use the master buttons to highlight “Occ sensor” and press the
OK button to accept.
3. Use the master buttons to select the scene you wish to activate
when the room is occupied.
For an occupant sensor setting involving only shades, scroll
through the scenes to find the group of shades and the action
(1, 2, or 3; open, preset, or close) you want to set.
Or, press the button on the shade column that produces the
action you want to add to this timeclock event.
If your local lighting code requires it, you may also select
“Manual on,” which means the occupant sensor will not
automatically turn the lights on when someone enters a room.
Instead, a button must be pressed manually.
4. Press OK to accept your choice.
5. Use the master buttons to select the scene you wish to activate
when the room is unoccupied.
For an occupant sensor setting involving only shades, scroll
through the scenes to find the group of shades and the action
(1, 2, or 3; open, preset, or close) you want to set.
Or, press the button on the shade column that produces the
action you want to add to this timeclock event.
You may also select “Manual off,” which means the occupant
sensor will not trigger an action when the room is unoccupied.
6. Press OK to accept your choice. The info screen will display a
confirmation screen that your occupant sensor settings have
been saved.
7. Exit programming mode (see page 12).
Main menu
Save mode
Occ sensor
Occupied
Scene 1
Occupied and Unoccupied Modes
Occupied, contact closing . . . . . . The occupied scene occurs when an occupant sensor or contact closure connected to the
occupant sensor input closes.
Unoccupied, contact opening . . . The unoccupied scene occurs when an occupant sensor or contact closure connected to the
occupant sensor input opens.
OK
Master
buttons
OK
button
Unoccupied
Manual off
Saved
Saved


