LUMIFORGE USER MANUAL 23
5.4 Phase 3: PRINTING
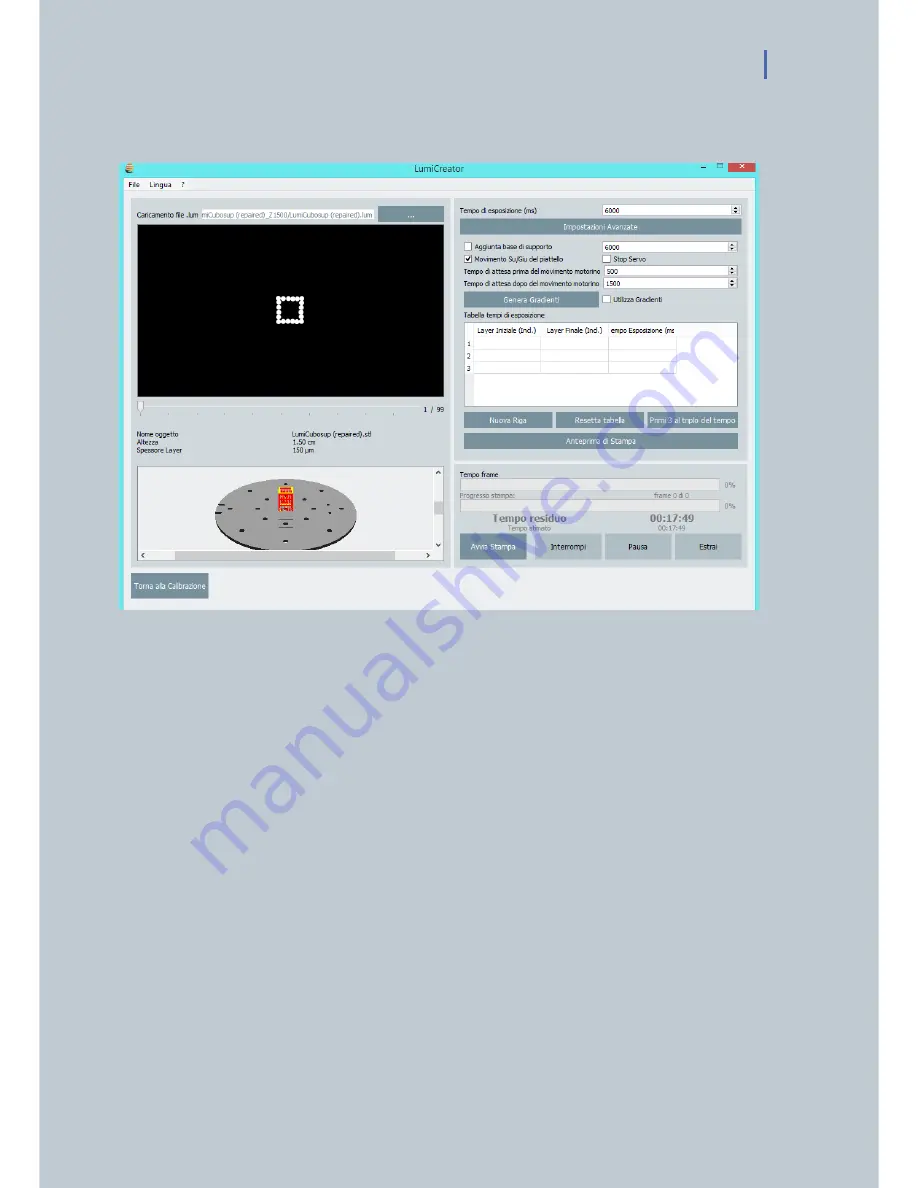
Img.20 LumiCreator Software – third screen - printing
-
Click the “Go to Printing” button on the bottom right.
-
The top screen on the left part will show all the slices that have been created from the loaded
part.
-
Move the arrow left and right to visualize the different layers and check that no abnormal layers
have been created
-
On the lower screen the model ready for 3D printing is visualized
-
On the top right menu, a suggested curing time has already been set according to the resin
chosen in the first LumiCreator screen, when model has been loaded, and to the pre-set printing
area in the LumiCreator second screen (calibration)
-
In case you need to adjust the curing time, the layer curing time can be set manually just typing
the new time (in milliseconds).
ADVANCED SETTINGS (change them only if you really know how they will affect the print process)
-
Check “Add Base” if an additional base is needed to your model
(in case of big models, we suggest not to use it since it is going to cover all the carriage holes
needed for the resin flow during printing)
-
Never deflag UP/Down movement option. The carriage will immerge a bit further into the resin
before re-joining to the correct position. This movement is fundamental, as it allows the resin to
flow better.
It is possible to adjust the timing before and after submersion.
- Stop servo: allows stopping the servo-shutter movement.
Summary of Contents for LumiForge
Page 1: ...CRAFTER MANUAL...


