LUMIFORGE USER MANUAL 21
-
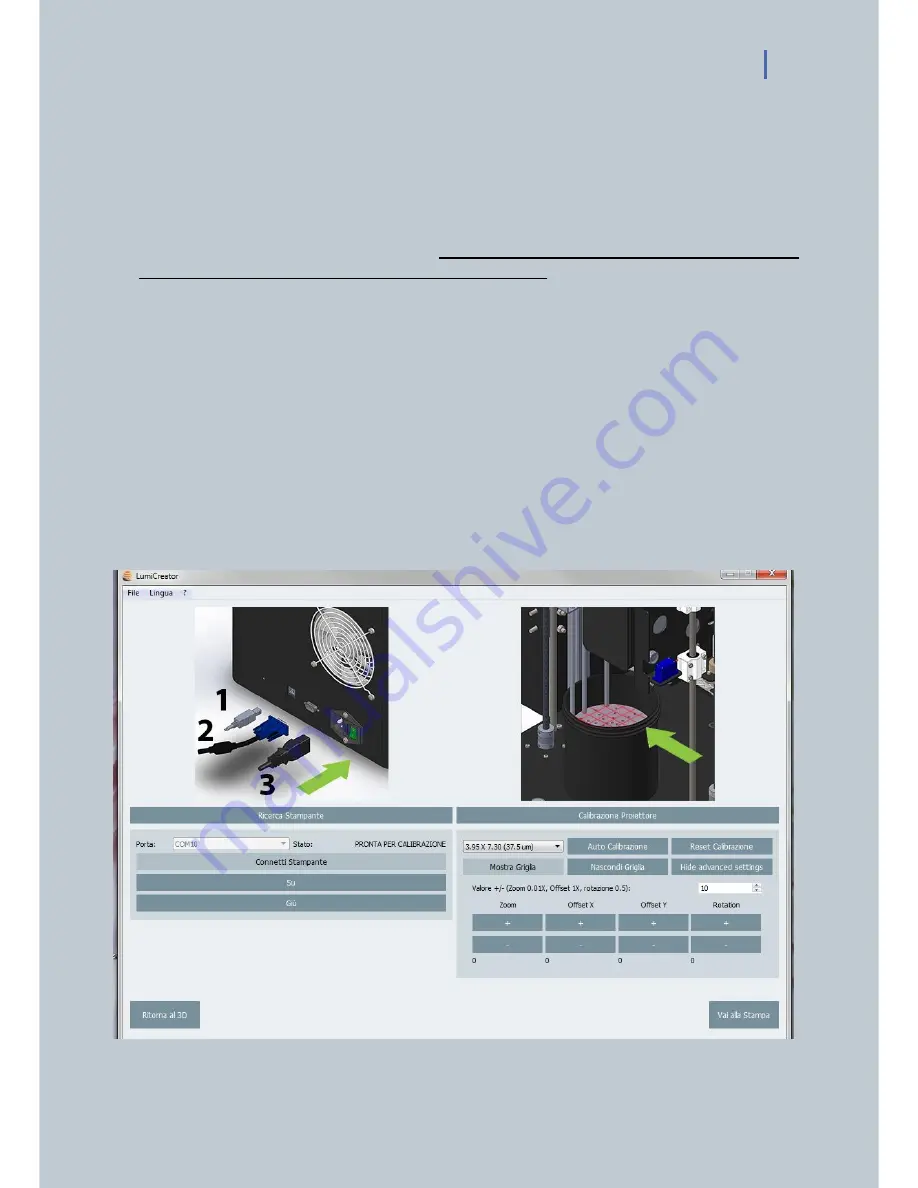
Press the “Go to Calibration” Button on the bottom left.
-
The software has already calculated the needed printing area according to the volume of the part
we are going to print.
-
Just press “Calibration “followed by “Auto Calibration” key and the projector will adjust
automatically the calibration.
-
It is also possible to choose manually one of the five available printing areas on the drop down
menu and then press “Auto Calibration”, but only after you have first reset the Calibration
pressing on the corresponding button “Reset Calibration”.
ATTENTION: When “Calibration” key is presses, if the following error message appears “Seems
projector resolution isn’t 1920x1080. Please fix it”, go to the advanced setting on your computer
control panel and choose the right resolution for your projector.
-
The projected red grid will help the projection focus.
-
Focus the projector so that the red grid in perfectly on focus, turning the focus ring above the
projector lamp as per producer’s Focus instruction.
ATTENTION: make sure you have enough space on the disk C before printing. If the disk is full the
slicing might not start
.
ADVANCED SETTING:
Img.18 Calibration advanced settings.
Summary of Contents for LumiForge
Page 1: ...CRAFTER MANUAL...


