Milling and drilling
ProtoMat M60
37
7.10 Milling of solder mask foils
Settings
Tool:
Unimill 100 micro cutter
Tool diameter:
0,15 mm
Totational speed:
40.000 (20.000) min-1
Speed:
10 (5) mm/s
Values in brackets apply to circuit board plotters with DC-motors!
› Adjust the milling depth on the unused edge of the solder mask foil.
› To adjust the milling depth, cut a square of 2 x 2 mm with the engine
switched on using the processing keys of
BoardMaster
.
› Switch on the exhaust unit.
› Start the milling with the data prepared by
CircuitCAM
.
› After the milling process, check if all pads have been cut out. If not,
start the milling process again.
7.11 Drilling with the micrometer screw
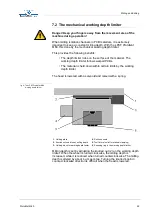
The micrometer screw is used for the exact depth adjustment regardless
of the material surface. It enables the processing of packed boards as
well as mechanical parts. The lower oin of the micrometer screw serves
as a stop and prevents the further lowering of the machine head.
7.12 Cleaning the PCB
Before components are mounted, the finished PCB must be thoroughly
cleaned. This can be carried out manually or in PCB brushing machines.
If cleaning by hand, the PCB is placed on a flat support. The board is
brushed in the direction of the conductor paths with wet board cleaner
(e.g. LPKF board cleaner PAD). The purpose of the brushing is on the
one hand to remove the layer of oxidation and on the other to remove
swarf in the isolation channels. After brushing, the PCB must be free of
any metal particles. From now on, the board should only be held by its
edges and with gloves. The board should now be rinsed under running
water and then dried with an air drier.
Caution! Never use compressed air as the oil particles it contains
can cause problems later on.
After drying, both sides of the board are coated with solderable lacquer.


