Setup
ProtoMat M60
23
› Position the previously drilled base material and drilling base over
the alignment pins. The holes in the base material and the copper
clad should have been drilled using the system and at the same
distance apart as the alignment pins so the plastic strips do not have
to be moved.
› Now fix the base material thus positioned with adhesive tape on all
four sides.
5.11 Producing a PCB with BoardMaster
The job to be carried out must already be loaded or prepared in
BoardMaster
. For example, the data from the
CircuitCAM
tutorial can be
used.
A further requirement is that the HOME position was programmed
precisely as described.
Caution! Bevore beginning you must read the chapters „The
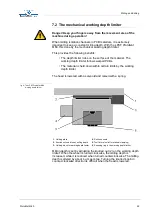
mechanical working depth limiter“ on page 29 and „Changing a
Danger! Take care when handling the tools! Danger of cutting! Do
not forget to switch on the vacuum system during machining!
› Move to the PAUSE position using
BoardMaster
(
GO TO...,
PAUSE
).
› Fix the base material using alignment pins as described in the
section „Securing the PCB on the machine bed“ on page 28.
› Using
BoardMaster
, move to the left corner (-x, -y) of the base
material so that the working depth limiter does not quite touch the
adhesive tape.
The project must be visible in BoardMaster as light gray on the dark
gray machine surface.
› If applicable, move the project by means of
PLACEMENT
so that the
graphics data is completely on the material. In the menu the position
can be selected manually. It can also be clicked on the icon
on a corner of the projekt, so that the machine exactly approaches
this point.
› Select the first machining phase i.e.
DRILLINGPLATED
.
› Drill data is selected with
ALL+
.
Selected data is shown brighter.
› Switch on
AUTO-MOTOR-ON
(
) (motor key on right in
BoardMaster
).
› Press
START
.
BoardMaster requests the tool needed for the machining phase by
traveling to the tool change position and then switching the motor off
automatically.


