


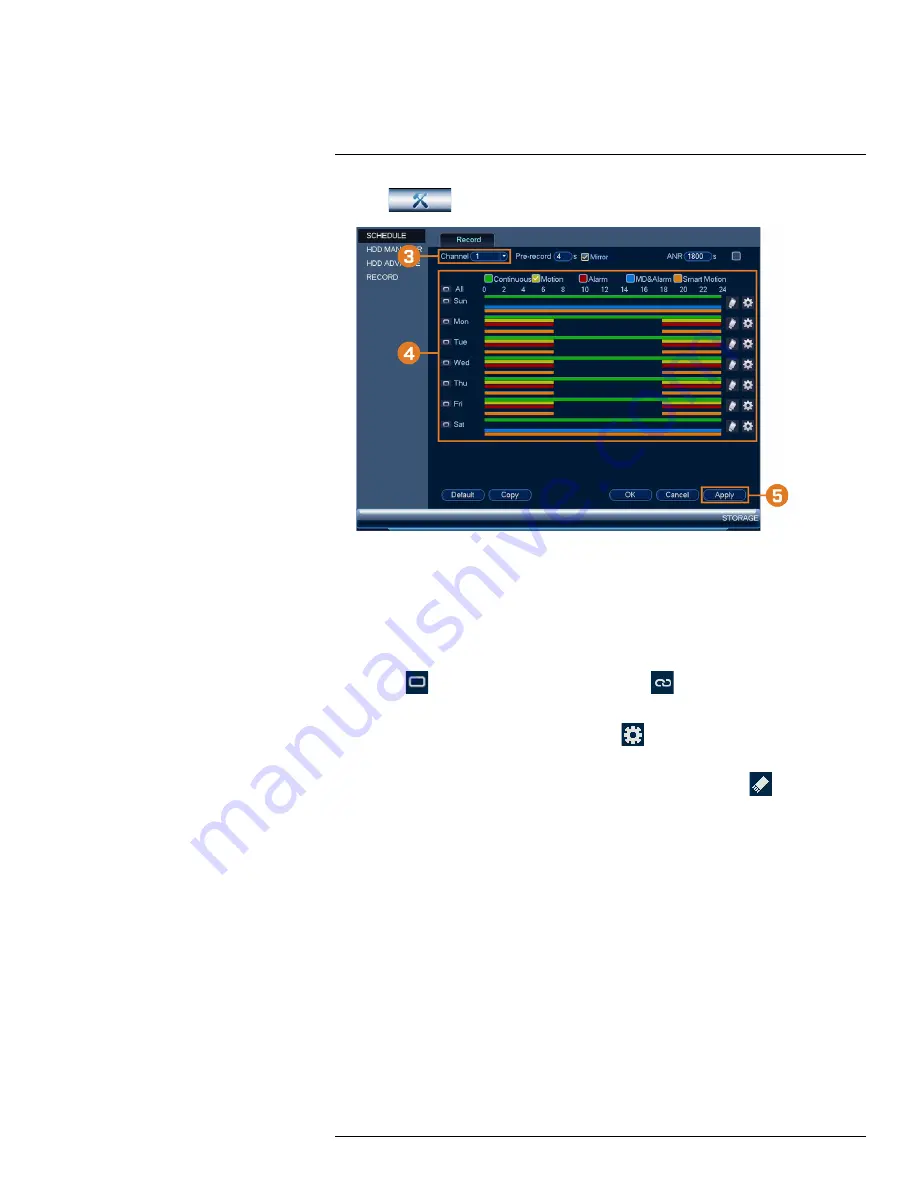
2. Click
, then click
STORAGE
. Click the
SCHEDULE
tab on the side panel.
3. Under
Channel
, select the channel you would like to configure or select
All
.
4. Configure the schedule as needed:
•
Check
Continuous
,
Motion
,
Alarm
,
MD&Alarm
, or
Smart Motion
to select the record-
ing type you would like to configure.
•
Click-and-drag on each day to customize the recording schedule. The schedule is set up as
a grid, which each block representing one hour.
•
Click
beside 2 or more days to link schedules (
). This allows you to quickly
change multiple schedules at once.
•
To make fine adjustments to a schedule, click
. This will allow you to set exact start
and end times for a schedule.
•
To disable all recording of the selected type on the selected day, click
.
5. Click
Apply
.
9.4
Setting up Scheduled or Manual Recording
You can set the system to record based on a schedule or you can manually turn recording on and
off. By default, the system is set to always record on a schedule.
To configure the recording schedule, see 9.3
Setting the Recording Schedule
#LX400113; r. 3.0/56326/56332; en-US
25